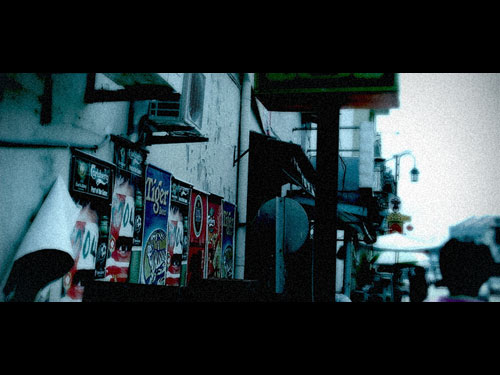
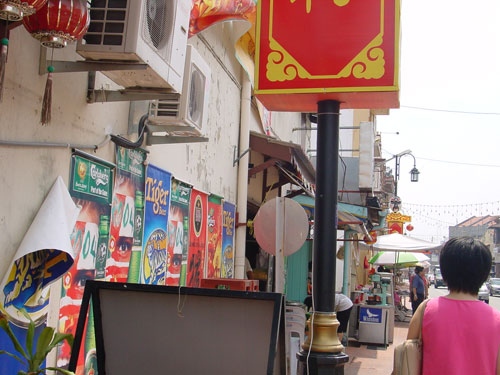
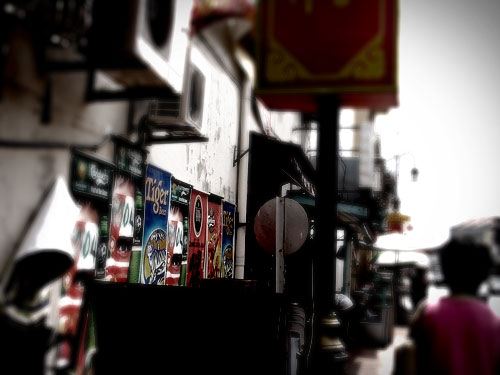
Today we will learn how to make a Turn Your Photo Into Movie-Like Effect in Photoshop. To make this tutorial we use color effect and color adjustment. So let's have a look...

What you need to have: Adobe Photoshop
What you will learn: colour mood adjustments + depth of field effect + film effect
PS: ⌘ key for Mac users / CTRL key for Windows users
What you will learn: colour mood adjustments + depth of field effect + film effect
PS: ⌘ key for Mac users / CTRL key for Windows users
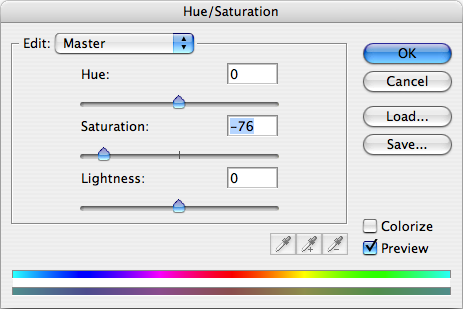
Colour mood adjustments
1. Adjust the Hue/Saturation: ⌘U/CTRL-U

2. Adjust the brightness and contrast: Menu > Image > Adjustments > Exposure…


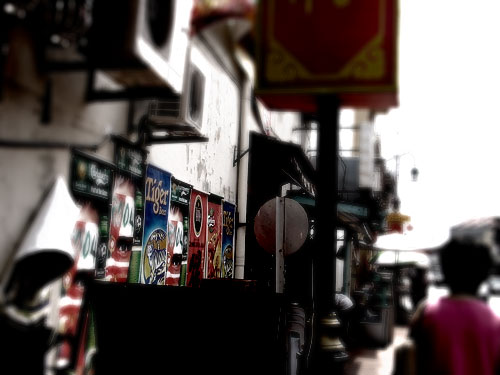
Depth of field effect
3. Duplicate current active layer by dragging it to the ‘create a new layer’ button located at the bottom of Layerwindow.


4. Apply lens blur on the new layer on top: Menu > Filter > Blur > Lens Blur…
Adjust according to your own preference.
Adjust according to your own preference.


5. Click on the ‘add layer mask’ button at the bottom of Layer window. Then click and select the ‘Layer mask thumbnail’ (the white rectangle).

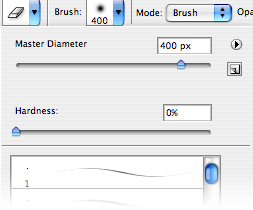
6. Select brush tool(b), set the master diameter to 400px. Then choose the focus point in the photo and click on it.

Film effect
7. Create a new layer by clicking the ‘create a new layer’ button located at the bottom of Layer window.
8. Fill the new layer with black colour: reset colour to default black & white (d), switch black colour to background (x), fill the layer (⌘-del/CTRL-backspace)
9. Set the opacity of the black layer to 70% by pressing ’7′

10. Use erase tool(e), set the master diameter to 400px. Then start erase the center of the photo.
11. Flatten the image: Menu > Layer > Flatten Image and add noise: Menu > Filter > Noise > Add Noise…


Cinemascope (optional)
12. Add black bars on top and bottom of photo and it’s done!
Use Rectangular Marquee Tool(m) to select (drag) upper part of photo, hold the shift key and select the bottom part, fill with black colour (⌘-del/CTRL-backspace)
Use Rectangular Marquee Tool(m) to select (drag) upper part of photo, hold the shift key and select the bottom part, fill with black colour (⌘-del/CTRL-backspace)
Hope you can learn something new from this tutorial.I feel really glad if you give me feedback through comment below. Soon i am going to show more interesting & innovative tutorials so please keep visit our blog. That’s for now.
Have fun!
Feel free to contact with Clipping Design for clipping path service, image editing service, image masking service or any kind of design support.
Thank you…
Credit: wordpress.com
No comments:
Post a Comment