
In today's tutorial we will present how to make a Pencil photography in Photoshop. We use amazing handwriting text or a complex drawing and banner style element. So let's have start...
Step 1
So how aboutu’ll need to decide what sort of hand drawn element you want to add to your design. Whether it’s a simple bit of handwritten text or a complex drawing, knowing what you want is the first step. I’ve decided to draw an old banner style element, but like you I’ve spent too much time with a mouse and too little time with a pencil lately, so here’s what we’re going to do:
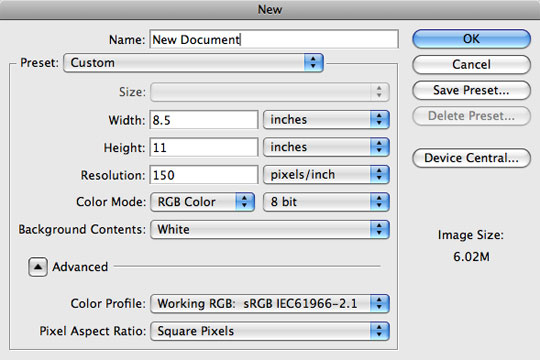
Open up a new Photoshop document by pressing Command-N (PC: Ctrl-N). When the New Document dialog appears choose US Paper from the Preset drop-down menu, change the ppi setting to 150 and click OK.
Step 2
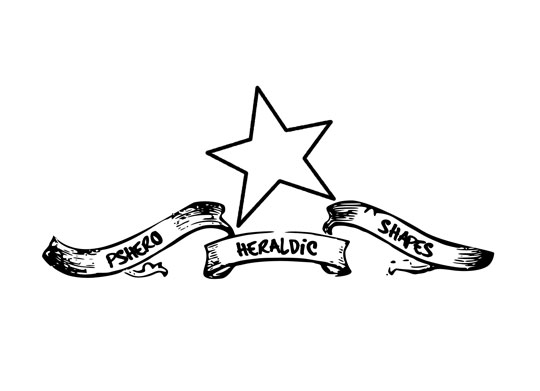
With this new document we’re going to create a graphical version of what we want to be drawn into our design. We’re doing this because we’re going to take a step back to high school art class and do some tracing in the next step.
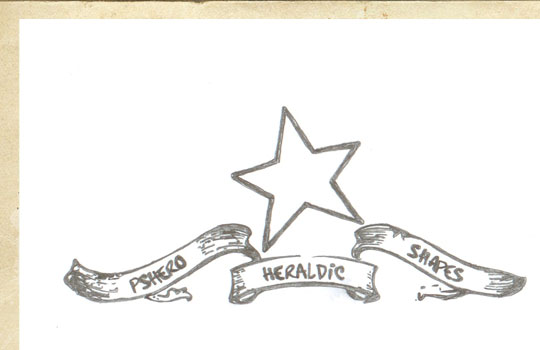
I’m going to use one of the custom shapes from my popular Heraldic Shapes custom shape set, but you can use anything you’d like. Feel free to add text, shapes, even photos if you’re feeling ambitious. My only pointer here would be that this is easiest if your design is in black and white. Make your design nice and big so it’ll be easy to trace (you can always shrink it to fit your design).
I also rotated my canvas so that I could work horizontally by choosing Image>Rotate Canvas>90° CW from the main menu. If you do this, don’t forget to rotate it back before moving on to the next step.
Step 3
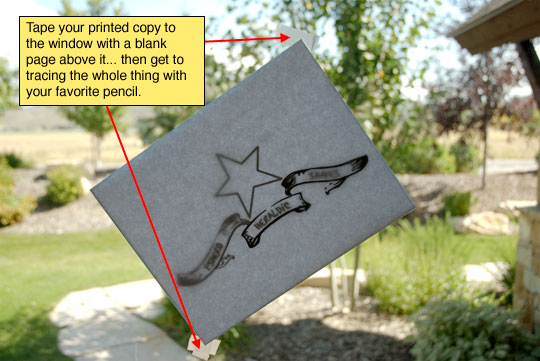
When you’ve got your design all done, choose File>Print from the main menu to print out a hard copy.
With the printed out design in your hot little hands, grab a blank piece of paper and some tape and go find yourself a window that has light coming through it (unless of course you’re one of the cool kids that has a light table at home). Tape the paper with your printed design onto the window at a level that will be easy for you to draw then tape the blank paper over the top and SHAZAM! you’ve got a light table of your very own!
Sharpen up that #2 pencil and get to tracing! When you’re done, pull your mess down from the window, remove the tape from the edges and move on to Step 4.
Step 4
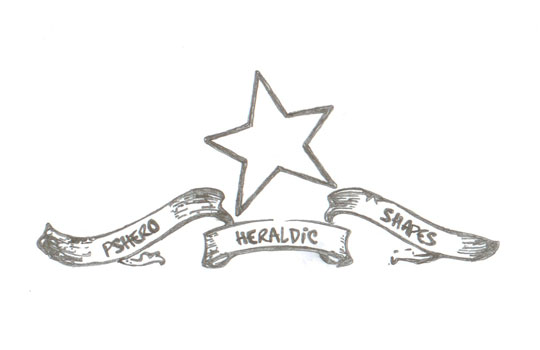
Ok, now take that beautifully traced page over to the scanner (I told you you’d need one, remember?). Scan the page using the scanner’s "Photo" setting, this will ensure that you capture all the levels of gray that your pencil put down and will give the depth to the final result to be convincing. Save the scan as a .jpg or .tiff at at least 150ppi.
Step 5
Now back to Photoshop where you’ll need to open the design you want to place your pencil drawing into as well as the pencil drawing we just scanned. Since I want to be able to show you a full scale version, I’ve created a small file with an aged paper background. If you’re interested in how to create one of your own, check out my Creating Old Paper With Custom Brushes tutorial.
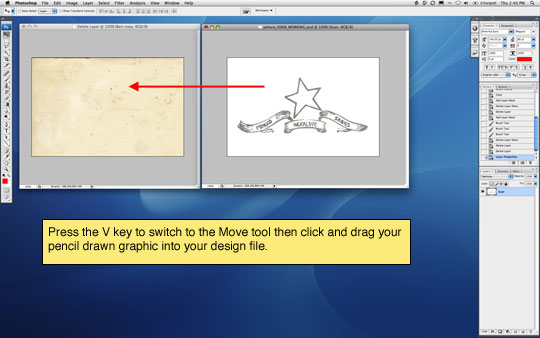
Arrange your two photoshop windows so that you can see them both, press the V key to switch to the Move tool, then click and drag your scanned pencil drawing into your design document.
Step 6
It’s quite possible that your drawing is way too big when you get it into your design document so press Command-T (PC: Ctrl-T) to activate the Free Transform tool. Holding down the Shift key to constrain the dimensions of your pencil drawing, click and drag from the corners until you’ve got it sized correctly then commit the transformation by hitting the Return (PC: Enter) key on your keyboard.
Step 7
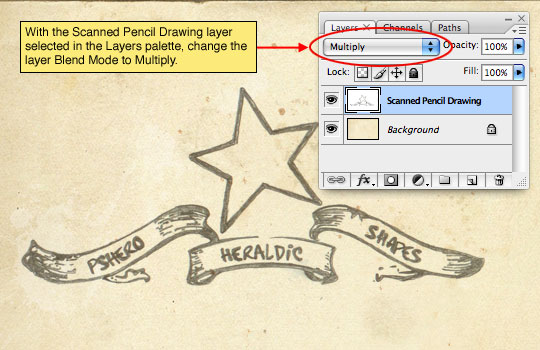
Obviously all that white background needs to be dealt with now, and this is the easy part. Make sure that the layer with your pencil drawing is active in the Layers palette and change the Blend Mode of the layer to Multiply. Depending on your background you may want to lower the layer opacity a little as well.
(*note: The Color Burn and Linear Burn blend modes can also produce good results depending on your background.)
Step 8
And there you have it! You’ve just added a pencil sketch into your design AND you’ve made people think you actually know how to draw!
Hope you can learn something new from this tutorial.
I feel really glad if you give me feedback through comment below. Soon i am going to show more interesting & innovative tutorials so please keep visit our blog. That’s for now.
Have fun!
Feel free to contact with Clipping Design for clipping path service, image editing service, image masking service or any kind of design support.
Thank you…
Credit: http://pshero.com
No comments:
Post a Comment