In today's tutorial we will present how to make a beautiful Valentine day poster in Photoshop. We use amazing color effect and basic Photoshop method. So let's have a look....
Step 1
Start by creating a document that’s 600X650px. Paste in your crumpled paper texture.

Step 2
Now apply a color overlay blending option to your texture background layer.
Color Overlay Settings:
Blend Mode: Normal
Color: ba0000
Opacity: 80%


Step 3
Now create a new layer called ‘highlight’.
Drag out a white to transparent radial gradient in the bottom-center of your canvas. Then change this layer’s blend mode to ‘overlay’.


Step 4
Now paste in your photo of a romantic couple. Cut out the couple using the pen tool:

Step 5
Now to give your poster a more stylized effect, apply a color overlay blending option to your couples layer:
Color Overlay Settings:
Blend Mode: Normal
Color: 000000
Opacity: 60%


Step 6
Now duplicate your couples layer.
Then go to edit>transform>flip vertical and move the flipped couple beneath your main couple.
Then go to filter>blur>gaussian blur and apply a 3.5px strength gaussian blur. Call this layer ‘couple shadow’.
Now reduce your shadow layer’s opacity to 50%.


Step 7
Now create a new layer beneath your couples layer called ‘line’. Use your path tool to create a bendy line stemming up from between your couple.
Now select a 1px black paintbrush (100% hardness). Select your path tool again, and right click on your path. Select ‘stroke path’ to create a bendy 1px line:

Step 8
Now download your heart splatter brush set.
Apply your brush as white, 197px.
If needed click several times for a bolder effect. Then if you’d like to make it slightly sharper go to filter>sharpen>sharpen.
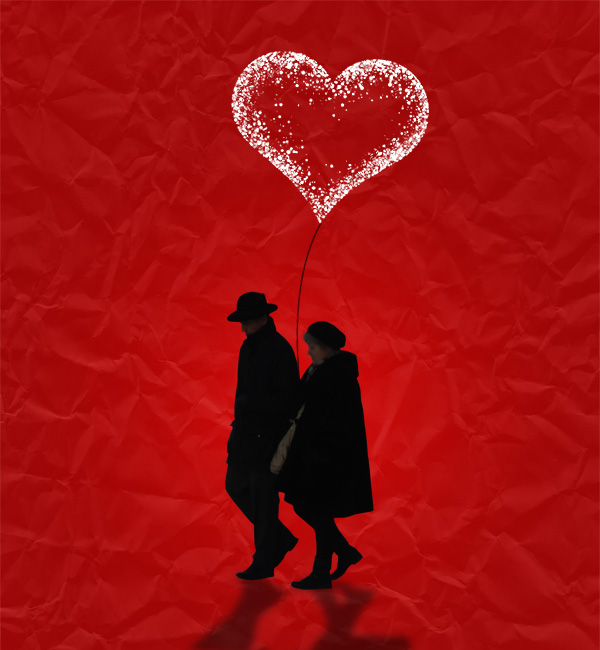
Step 9
Now apply a white outer glow blending option to your heart layer:
Outer Glow Blending Option Settings:
Blend Mode: Overlay
Opacity: 100%
Color: ffffff
Spread: 0%
Size: 10px


Step 10
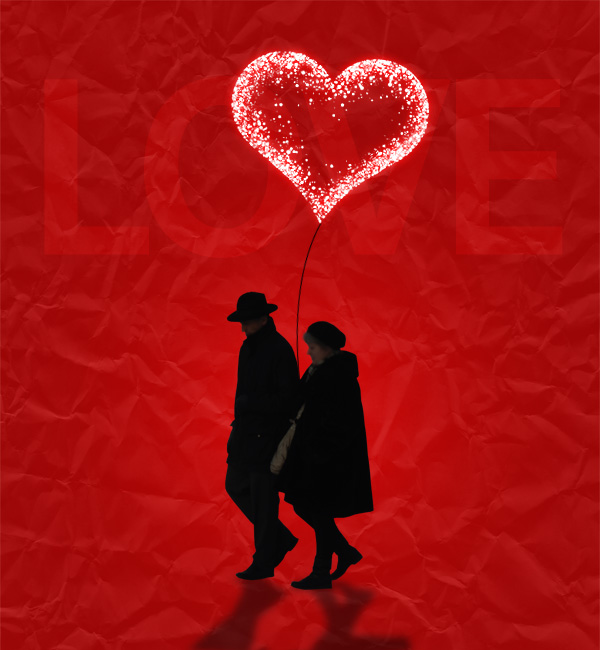
Now type out the word ‘LOVE’ on a new top layer.
Font Settings:
Font Face: DejaWeb
Color: ffffff
Size: 240pt
Kerning: -50
Then reduce this layer’s opacity to 20%, and change the blend mode to ‘overlay’.

And We’re Done!
You can view the final outcome below. I hope that you enjoyed this tutorial and would love to hear your feedback on the techniques and outcome.
Hope you can learn something new from this tutorial.
I feel really glad if you give me feedback through comment below. Soon i am going to show more interesting & innovative tutorials so please keep visit our blog. That’s for now.
Have fun!
Feel free to contact with Clipping Design for clipping path service, image editing service, image masking service or any kind of design support.
Thank you…
Credit: fanextra.com
No comments:
Post a Comment