
In today's tutorial we will presenting how to create a Selective Sepia in Photoshop We use to make this tutorial Photoshop method and effects. So let's have ha look......
Selective Sepia Photoshop Tutorial
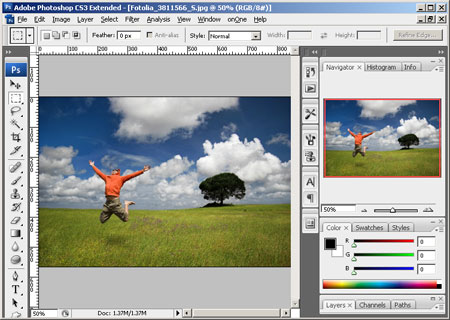
Step 1: Open an image into PhotoshopOpen the File menu and select Open. Browse for the photo you would like to add a selective sepia effect to and click OK.
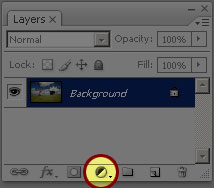
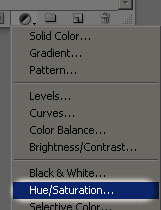
Step 2: Create a Hue/Saturation adjustment layerIn the Layers pallet, click on the New Adjustment Layer icon and select Hue/Saturation.
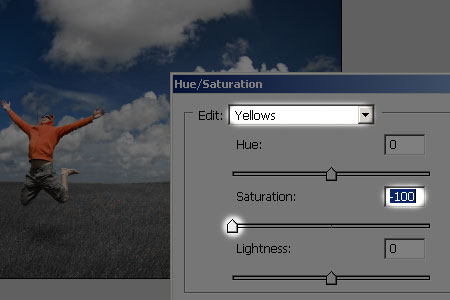
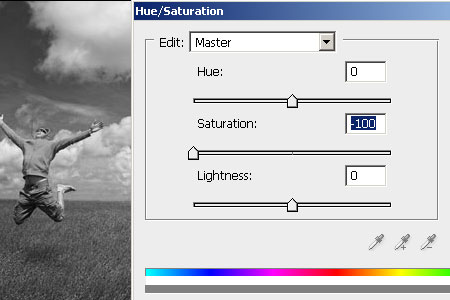
 A Hue/Saturation window should appear. With this tool, we’ll specify where the sepia effect will appear. Decide if you want to select the sepia toned areas according to the color of the image or by manually painting the areas where you would like the sepia tone. Choose one of the following:
A) Select by colorSelecting the sepia areas based on color will give the most natural effect. First, decide which color in the photo that you want to keep. Then, select from the edit drop down menu the each color in the list except for the colors you want to keep and reduce the saturation to -100. For example, to keep the reds in the photo use the following settings:
Reds: 0 Saturation
Yellows: -100 Saturation
Greens: -100 Saturation
Cyans: -100 Saturation
Blues: -100 Saturation
Magenta : -100 Saturation
B) Select manuallyManually selecting the sepia toned areas will let you specify precisely the area that you would like toned. Set the master saturation to -100 and click OK. Your image should now appear grayscale.
 Activate the layer mask by clicking on the layer mask thumbnail in the Layers pallet. Select the Eraser tool and erase the areas where you don’t want the sepia tone to be applied to.
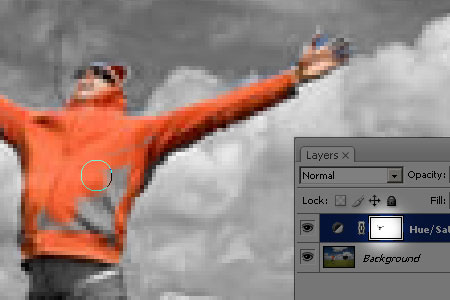
Step 3: Add a Black & White adjustment layerIn the Layers pallet, click on the New Adjustment Layer icon and select Black & White. If you are using Photoshop CS2 or older, select Hue/Saturation instead.
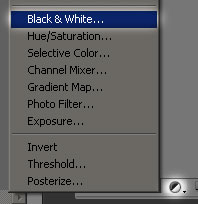 A Black & White (or Hue/Saturation if you’re using Photoshop CS2 or older) adjustment layer should appear. Simply click OK without editing the settings. Then, change the blend mode of the top adjustment layer to Overlay. Double click back on the icon of the layer to bring back the tool.
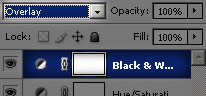 Photoshop CS2 or older: You will be using the Hue/Saturation tool to add a sepia tone. Checkmark “Colorize” and apply the settings below:
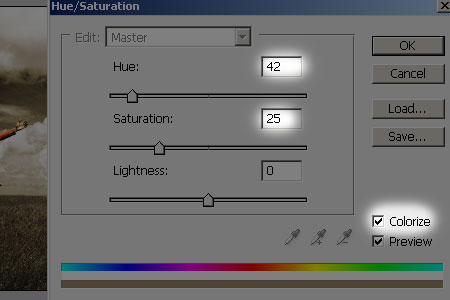
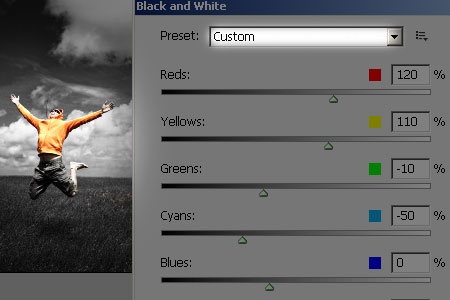
advertise herePhotoshop CS3: If you’re using Photoshop CS3, you can use the Black and White adjustment to add a sepia tone. This will give you more adjustable settings compared to using the Hue/Saturation adjustment. First, adjust the settings to get the black and white look that you like. Or, you can scroll through the presets menu to select one of your own. I chose the Red Filter preset to bring up the reds and darken the sky.
 Checkmark the Tint and adjust the tone to create a sepia effect. Click OK when done.
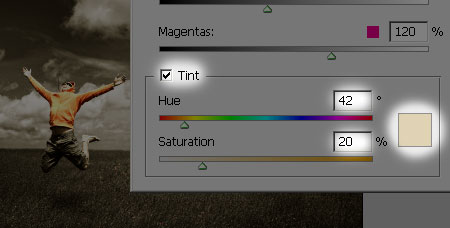
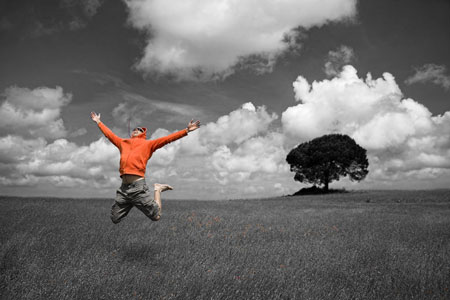
Final Results
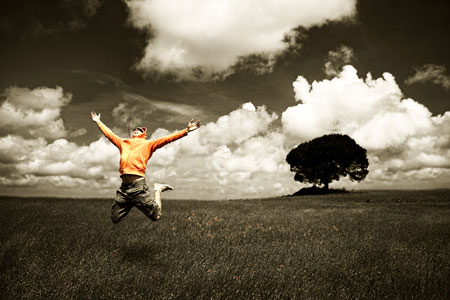 Red
Red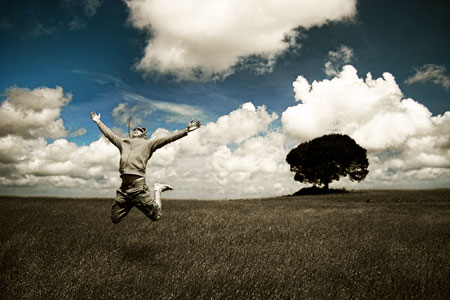 Blue and Cyan
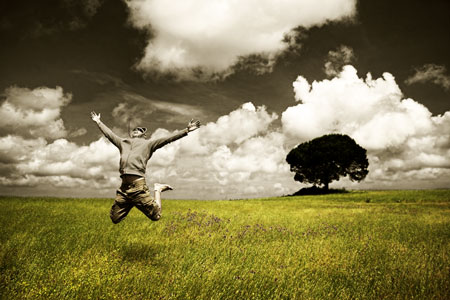
Hope you can learn something new from this tutorial.
I feel really glad if you give me feedback through comment below. Soon i am going to show more interesting & innovative tutorials so please keep visit our blog. That’s for now.
Have fun!
Feel free to contact with Clipping Design for clipping path service, image editing service, image masking service or any kind of design support.
Thank you…
Credit: photoshoptutorials
No comments:
Post a Comment