
Today's tutorial we will present how to make a stock image and turn it into a futuristic composition that uses various Photoshop techniques. We use Brush tool and implementing color and light effects to achieve the end result. So let's have a look.....
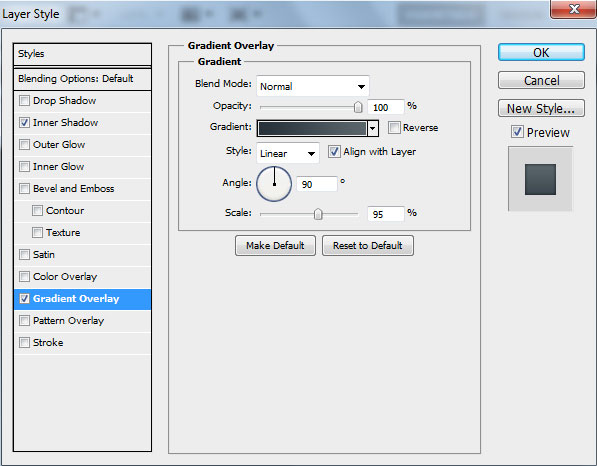
Start working by creating a new document (Ctrl+N) in Adobe Photoshop with the size 1024px by 1280px (RGBcolor mode) at a resolution of 72 pixels/inch. Select the background layer in Layers panel and click on Add a layer style icon from bottom part of the Layers panel to select Gradient Overlay.
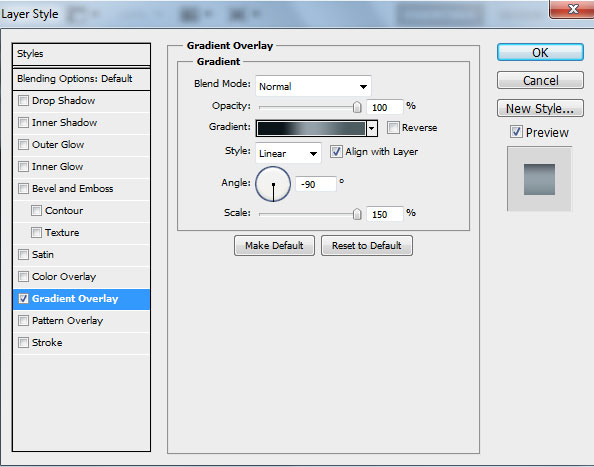
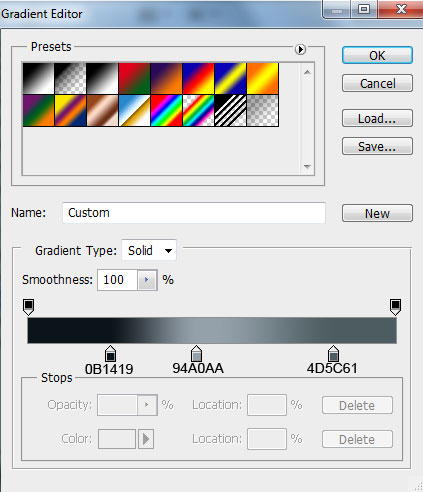
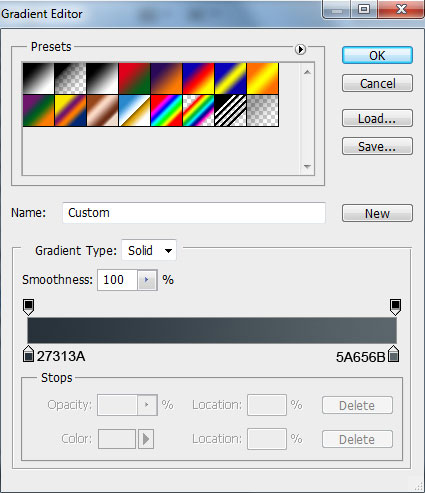
Click in the color bar to open the Gradient Editor and set the color stops as shown. Click OK to close theGradient Editor dialog box.
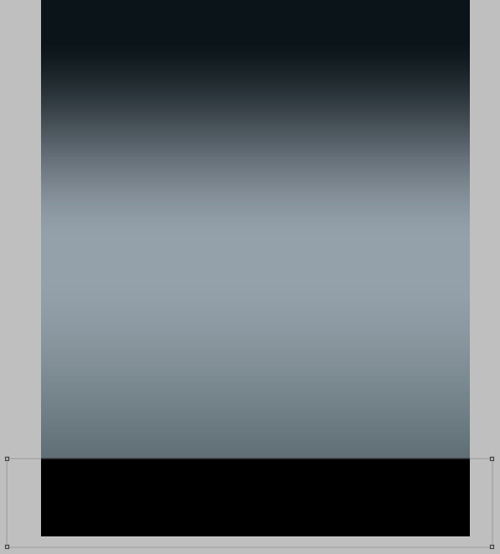
We’ve got the next background:

Use now the Rectangle Tool (U) to represent a kind of surface like the next one:
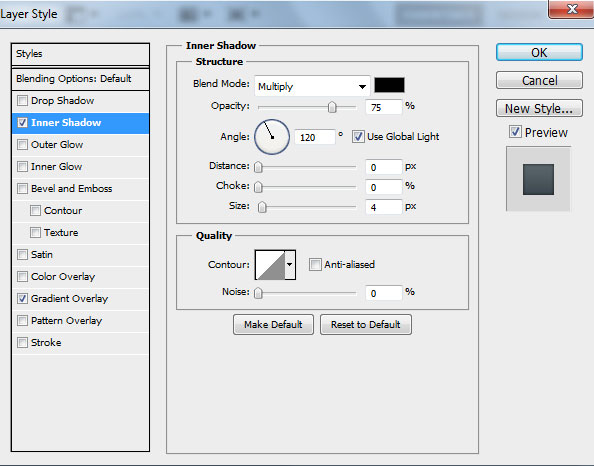
Click on Add a layer style icon from bottom part of the Layers panel and select Inner Shadow.
Add Gradient Overlay:
Click in the color bar to open the Gradient Editor and set the color stops as shown. Click OK to close theGradient Editor dialog box.
We’ve got the next result:

Create a new layer which must be filled using the Paint Bucket Tool (G) with #BBBCBA color.

Apply for this layer the enxt filter: Filter>Noise>Add Noise.
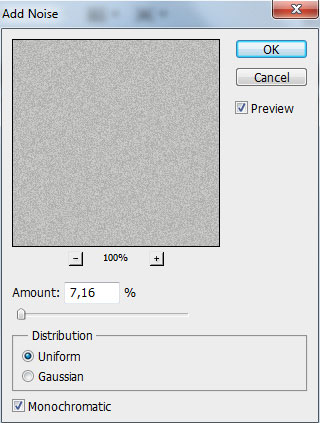
We’ve got the next result:

Set Fill to 39% for this layer and change the Blending mode to Divide.

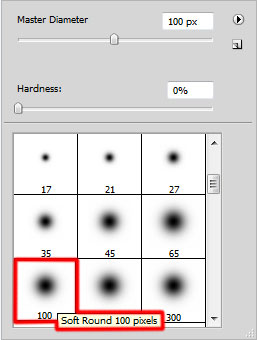
Create a new layer and select for it the Soft Round brush of black color (set Opacity to 20% in Options bar).
Use this brush to make darker the surfaces’ edge as it is demonstrated on the next picture:

Find a stock photo, I used this photo from Shutterstock. I would like to thank the author of this photo, or if you prefer, you can substitute similar image of your own.

Remove the background using your favorite tools like Pen Tool (P), Magic Wand Tool (W), Magnetic Lasso (L) or even a simple Filter>Extract and insert it on a new layer in our main document.

Create the next new layer and select for it the Soft Round brush of white color (set Opacity to 20% inOptions bar).

Use this brush to paint on the girl’s image the certain indicated zones.
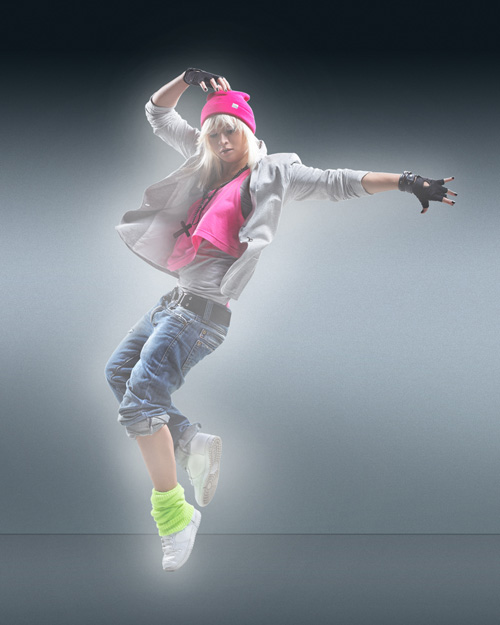
Set the Blending mode for this layer to Overlay.
Hope you can learn something new from this tutorial.
I feel really glad if you give me feedback through comment below. Soon i am going to show more interesting & innovative tutorials so please keep visit our blog. That’s for now.
Have fun!
Feel free to contact with Clipping Design for clipping path service, image editing service, image masking service or any kind of design support.
Thank you…
credit: adobetutorialz
No comments:
Post a Comment