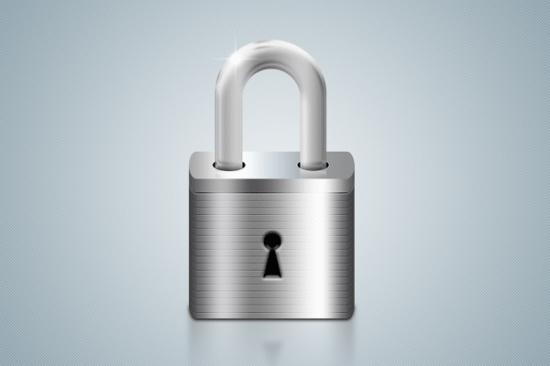
In today's tutorial we will show how to make a Padlock Icon in Photoshop. We use simple technique in Photoshop. So let's have a look......
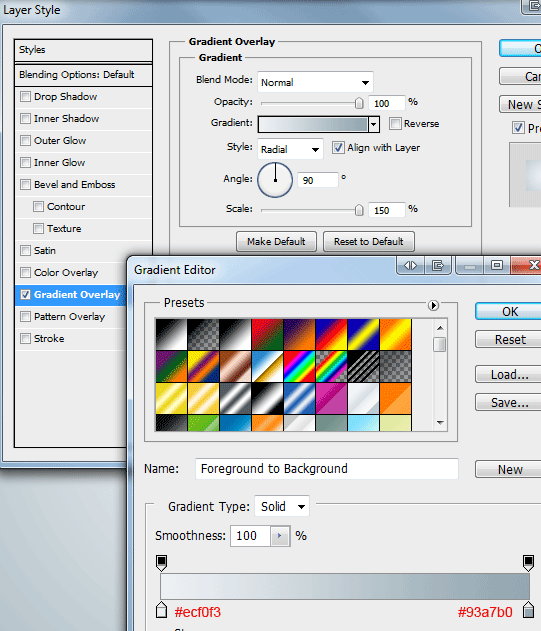
Create a new (Ctrl + N) document 800 x 800 pixels with any colored background. Right-click the background layer and select "Layer From Background" in the fly out menu. Now add a "Gradient Overlay" using the settings below.
Quick Tip:
By selecting "Layer From Background" it allows you to edit the background layer as if it were any other normal layer.
Creating The Lock Basic Shapes
Once you've sorted the background lets crack on with drafting out the shapes for our lock. Select the "Rounded Rectangle Tool" (U) with a radius of 20px.
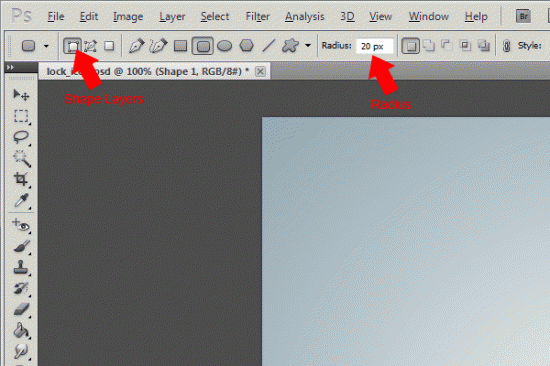
Drag the rectangle out making it roughly about 350 pixels long and about 40 pixels in height.

With the rectangle layer selected, select the "Free Transform Tool" (Ctrl + T). Now select one of the side middle anchor points and drag inwards.

The width of this first rectangle will determine the width of the padlock, when we resized the rectangle down the radius of the edges actually got a bit squarer making the lock a bit more realistic and no to round.

Duplicate the rectangle layer then drag the duplicated layer underneath the original layer. Select the "Move Tool" (V) and shift the duplicated rectangle down a couple of pixels.

We now need to join up the edges so that both rectangles meet, select the "Rectangle Tool" (U), hold down the shift key then drag out a rectangle joining both rectangles together.
Quick Tip:
Holding down the shift key will automatically add the new shape to the current vector mask.
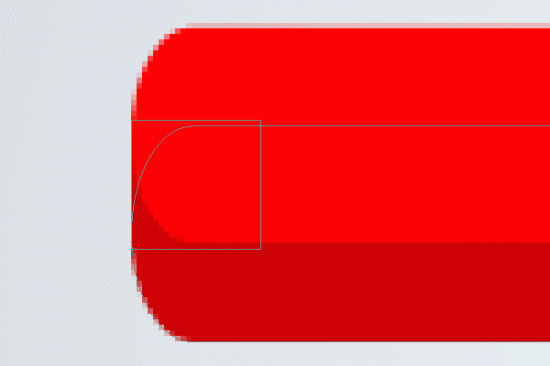
When joining the rectangles make sure you are adding to the vector mask and not making a new layer. Do both sides of the rectangle, when your done you should have something like this.

Duplicate the first rectangle again then with the "Move Tool" (V) shift the duplicated rectangle down past the second rectangle. This rectangle will determine the height of the lock.
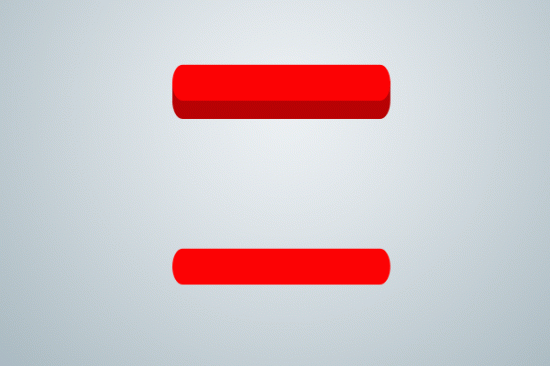
In the same way as we did with the 2nd rectangle join up the bottom rectangle by adding a bigger rectangle to the vector mask.
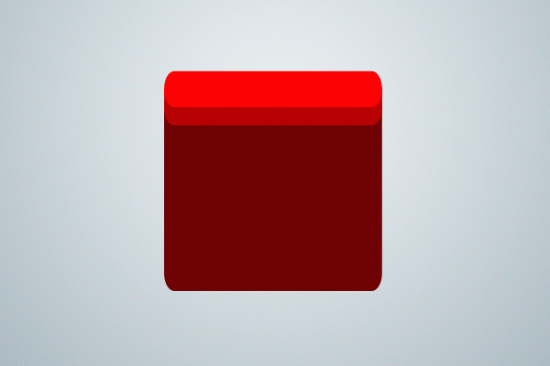
Bringing The Shapes To Life
Time for some organization, label the very top rectangle layer "Lock Top #1", the 2nd rectangle "Lock Top #2" and finally the Bottom rectangle "Lock Body".
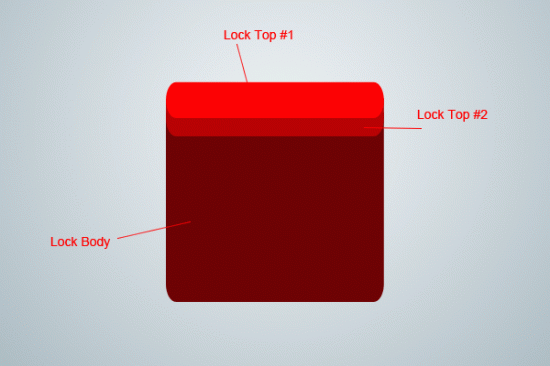
Lets add some layer styles to our lock, starting with the "Lock Body Layer".
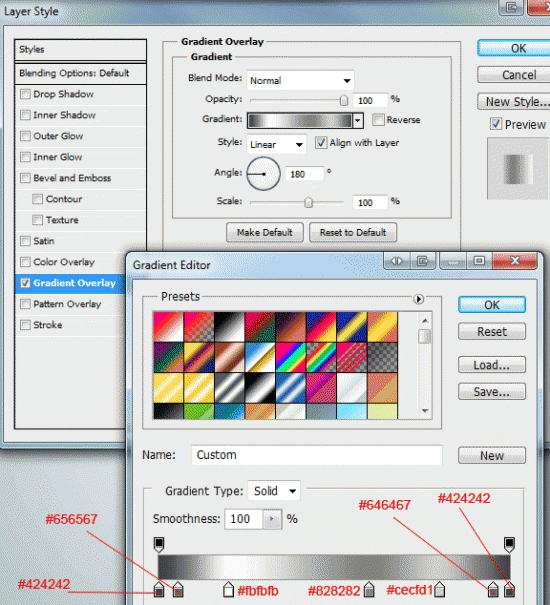
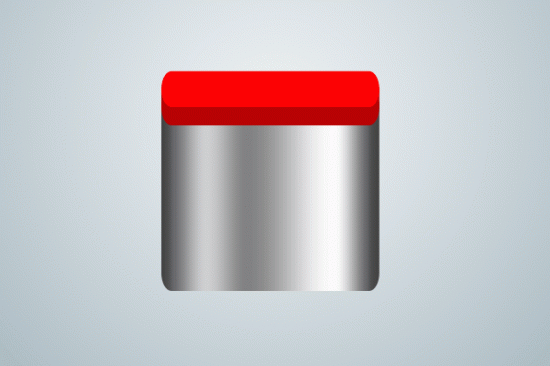
Next add a "Gradient Overlay" to the "Lock Top #2 Layer" using the settings below.
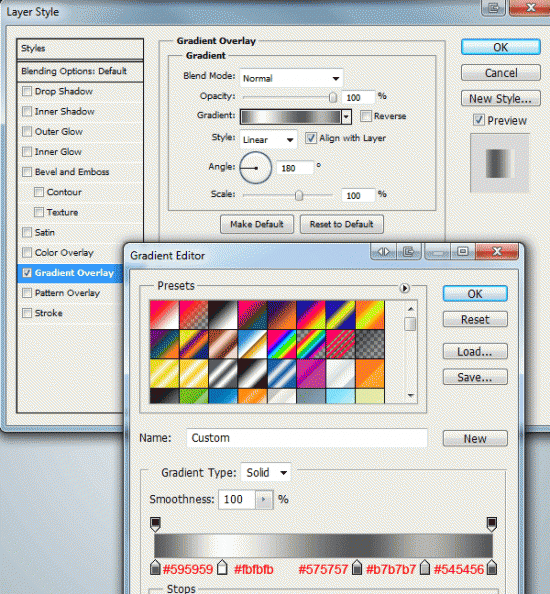
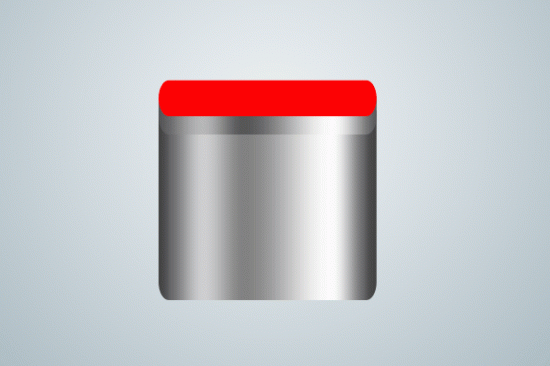
And finally, add a "Gradient Overlay" to the "Lock Top #1 Layer".
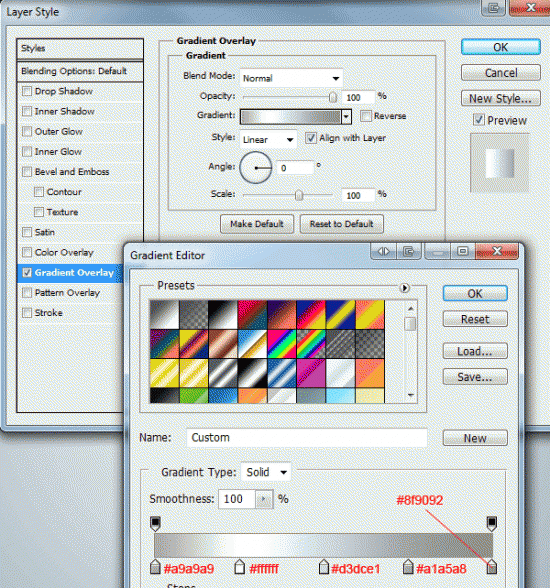
You should have something like this.
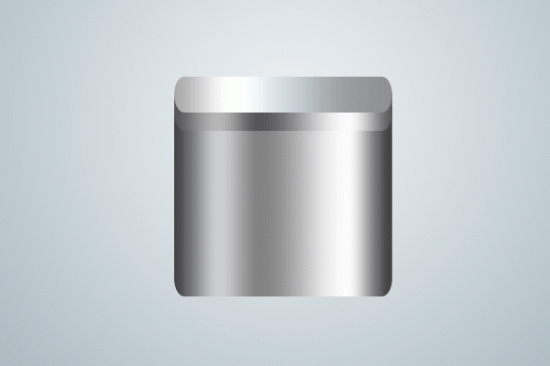
Creating The Groves
Load a selection around the "Lock Top #2 Layer", create a new layer above the "Lock Body Layer" then go to "Edit - Stroke".
Quick Tip:
To load a selection around a layer, first select the layer then go to "Select - Load Selection" or simply click the little thumbnail in the layers window whilst holding down the Ctrl key on the keyboard.
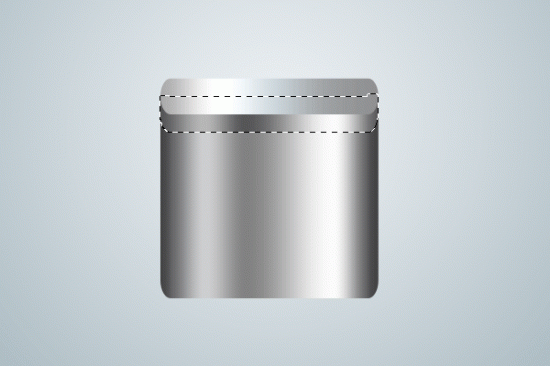
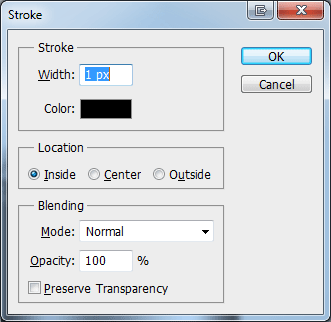
Once the stroke has been added deselect the selection (Ctrl + D) then with the "Move Tool" (V) move the stroke down 1 pixel.
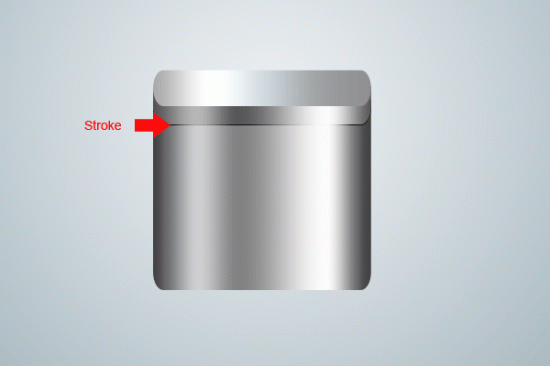
Duplicate the layer then move that layer down 1 pixel, then add a "Color Overlay" to the duplicated layer using the color white #ffffff. Finally set both layers blend mode to "Overlay" then just the white strokes layers opacity to 50%.
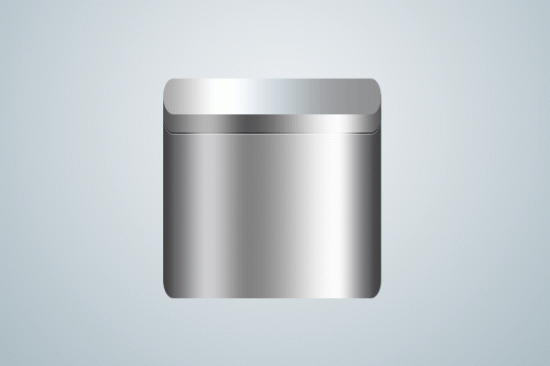
Duplicate both stroke layers then shift the two strokes down a couple of pixels, repeat this until the length of the lock is filled with the strokes leaving a nice even gap in between each set of strokes.
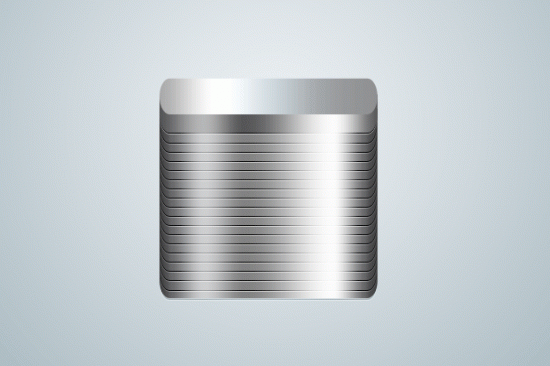
Select all the stroke layers leaving out the first set you created, once selected merge them together and adjust the opacity of the final layer to 35%. The blend mode should also be changed back to "Overlay" if it isn't already.
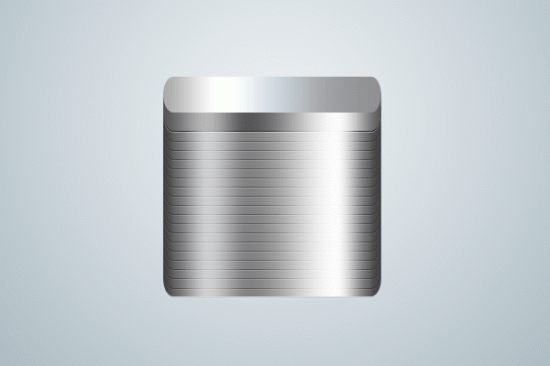
Creating The Key Hole
Select the "Ellipse Tool" (U) and drag out a circle onto the middle of the lock body. Once your happy with the ellipse select the "Pen Tool" (P), hold down the shift key and create a triangular shape.
Quick Tip:
Holding down the shift key will automatically add the new shape to the current vector mask.
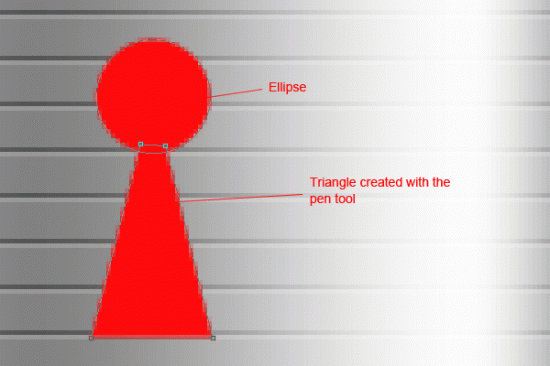
Finally add the following layer styles to the keyhole layer.
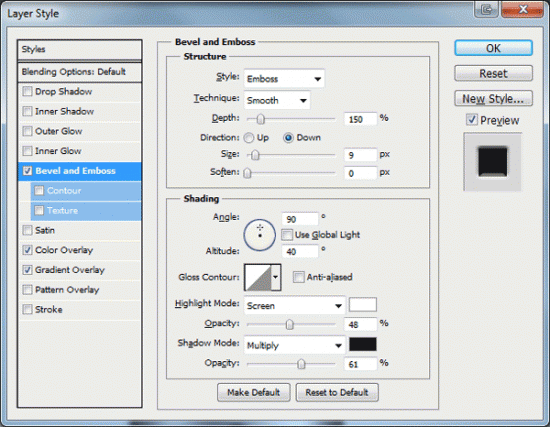
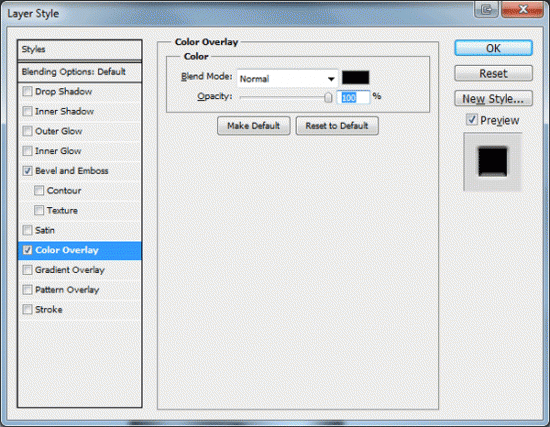
You should have something like this.
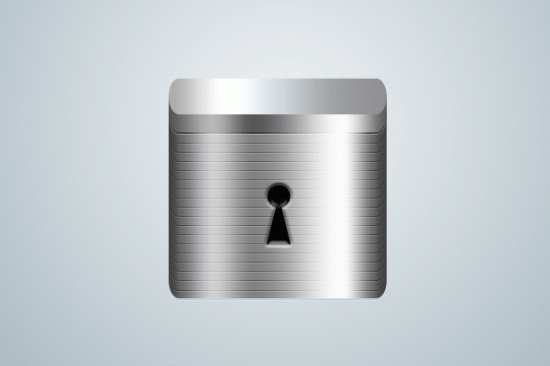
Creating The Shadow And Reflection
Select all the lock layers so far apart from the background layer then duplicate them all. Merge all the duplicated layers into one layer the flip the new single layer vertically "Edit - Transform - Flip Vertical". Move (V) the lock down underneath the original lock.
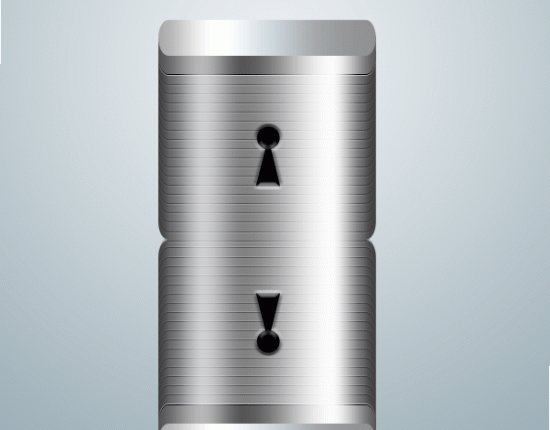
Blur the flipped lock by going to "Filter - Blur - Guassian Blur" blurring by 4px.
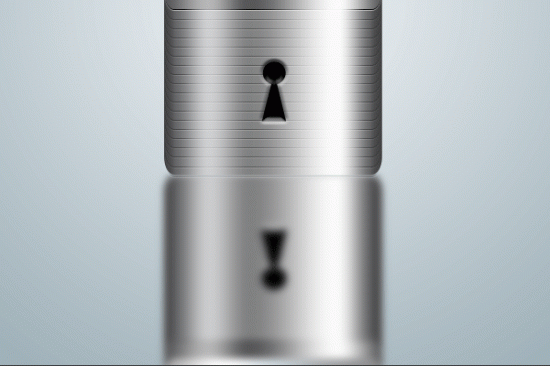
Label the layer "Reflection" then add a layer mask to the layer. Select the "Gradient Tool" (G) with a linear gradient then drag from the bottom of the reflection upwards.
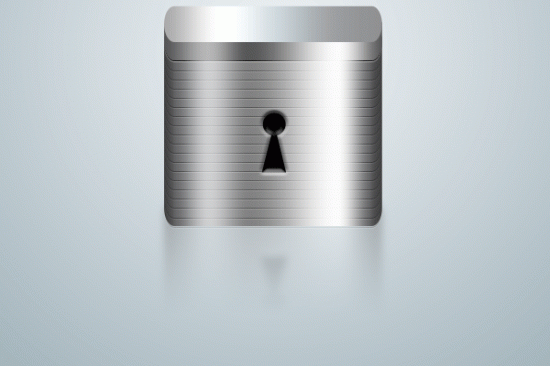
Now for the shadow, duplicate the "Lock Body Layer" then right click the duplicated layer and select "Rasterize Layer". Double click the layer and add a black #000000 "Color Overlay". Once the color has been added select the "Rectangular Marquee Tool" (M) and make a selection over the lock down to just above where the edges curve up at the bottom.
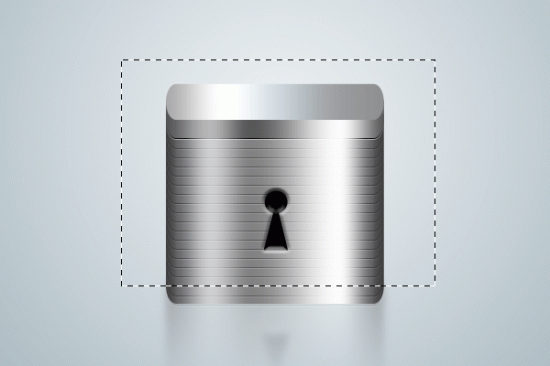
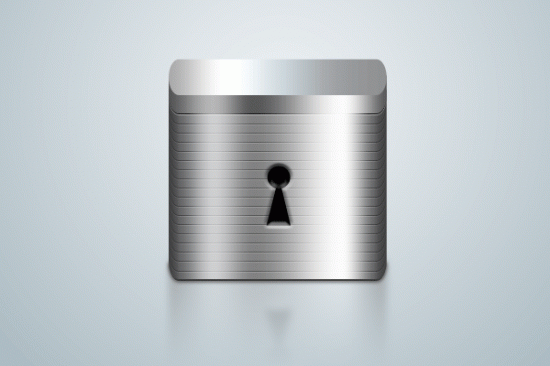
When the selection has been made hit the delete key to remove the top half of the shape. Select the "Move Tool" (V) and move the shape down a couple of pixels, finish the shadow by adding a guassian blur "Filter - Blur - Guassian Blur" and setting the opacity to 75%.
Creating The Chrome Lock
Select the "Rounded Rectangle Tool" (U) with a radius of 80px. Drag out a rectangle at the top of the lock.
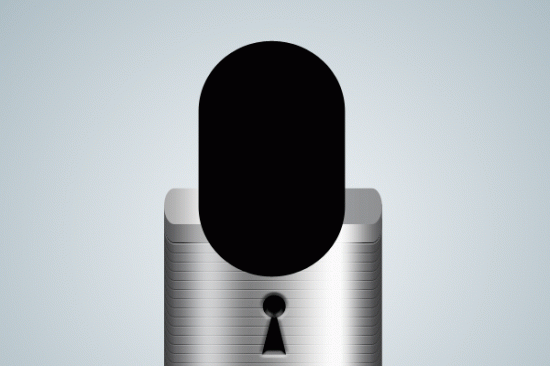
Still with the "Rounded Rectangle Tool" (U) only this time select "Subtract From Shape Area" from the options tool bar.
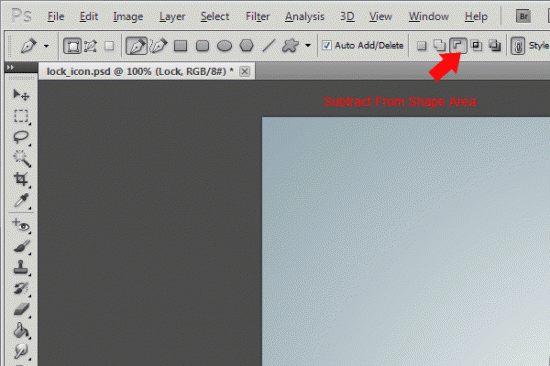
Once selected drag out another smaller rectangle inside of the rectangle you just created. Try and keep the width of the rectangle the same all the way around.
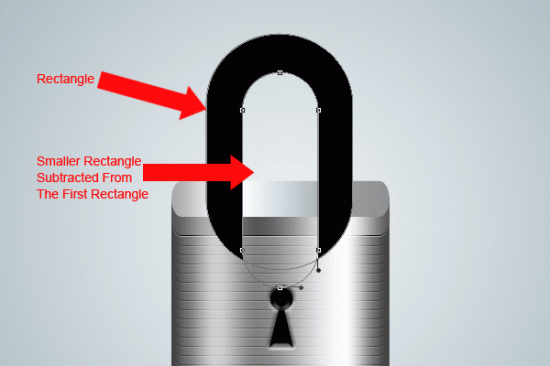
Select the "Pen Tool" (P) with the "Subtract" option still selected the round off the bottom edges of the lock.
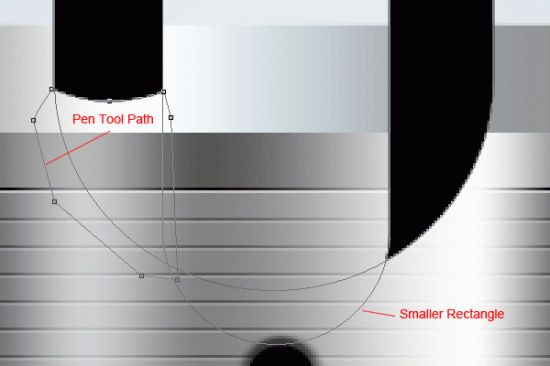
With both sides done you should have something like this.

Create The Lock Holes
Select the "Ellipse Tool" (U) then drag out two circles at the bottom of the lock where we rounded it off.
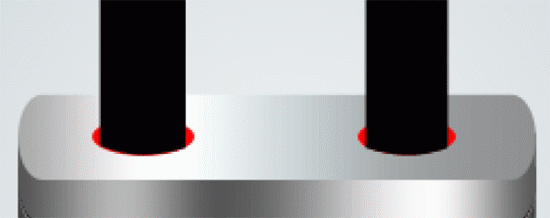
To the two lock holes add the following layer styles.
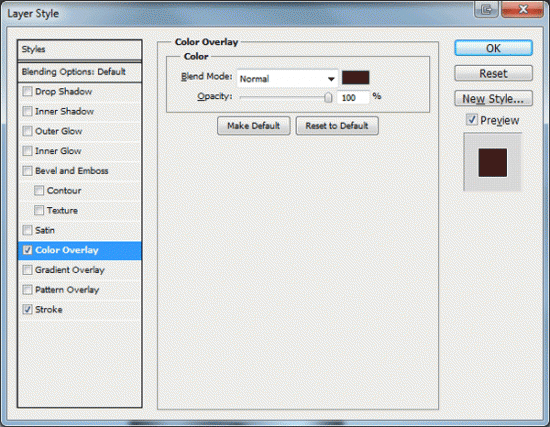
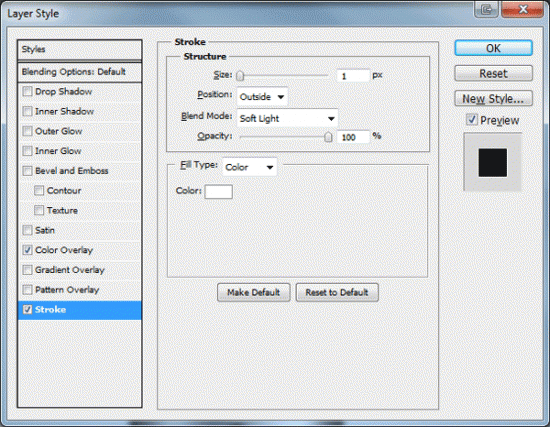
To the soon to be chrome looking lock add the following layer styles.
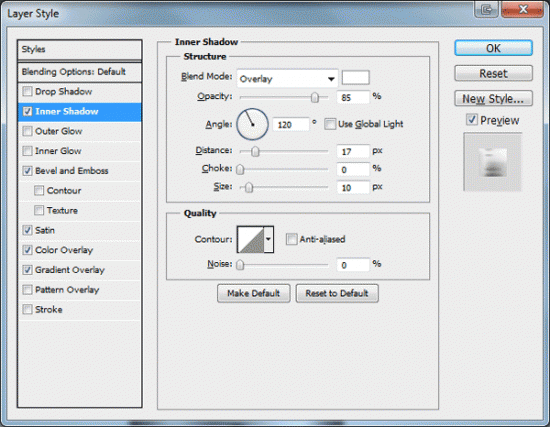
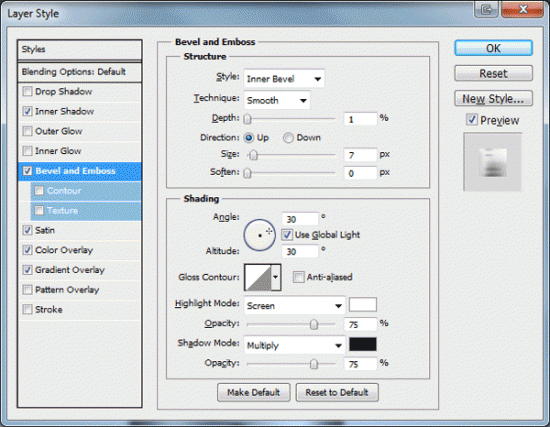
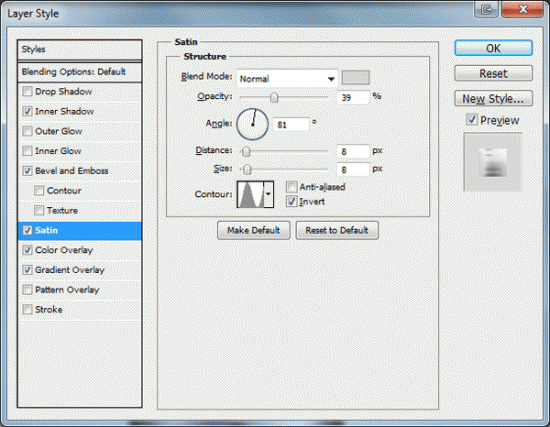
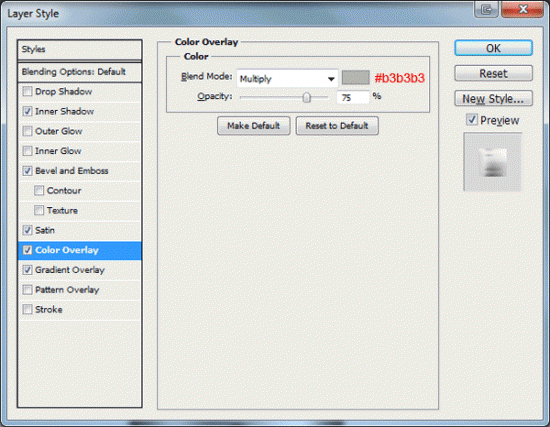
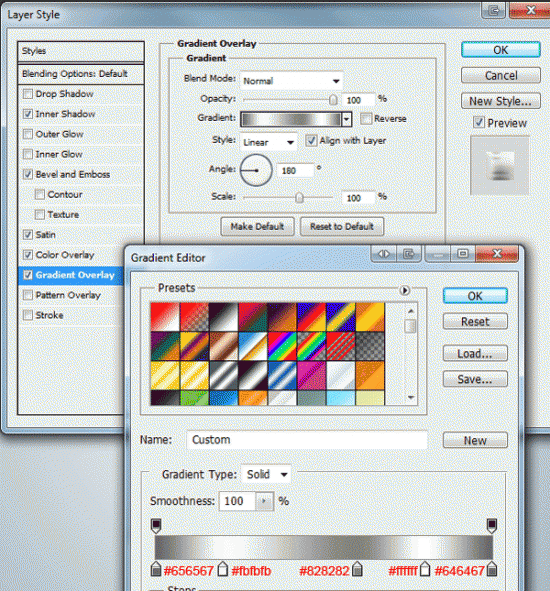

The lock should now be transformed into something like this.
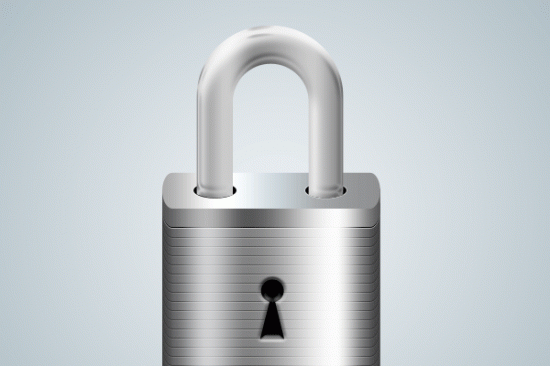
Adding The Reflections And Shadows To The Lock
Duplicate the lock layer then right click the layer and go to "Rasterize Layer". Once rasterized flip the lock vertically by going to "Edit - Transform - Flip Vertical" position the lock underneath the original.
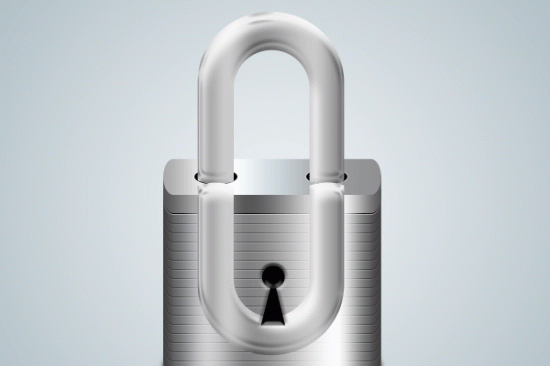
Load a selection around the "Lock Top #1" layer by selecting the layer then going to "Layer - Load Selection".
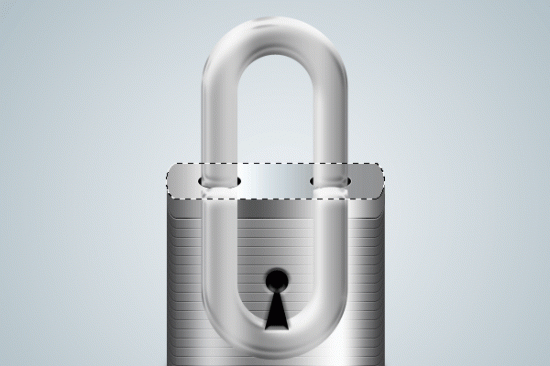
Now go to "Select - Inverse" then hit the delete key. You should be left with just the part of the lock which sits inside of the selection.

Finally add a layer mask to the layer and drag a linear gradient from the bottom upwards. For this reflection you aiming for a subtle reflection.
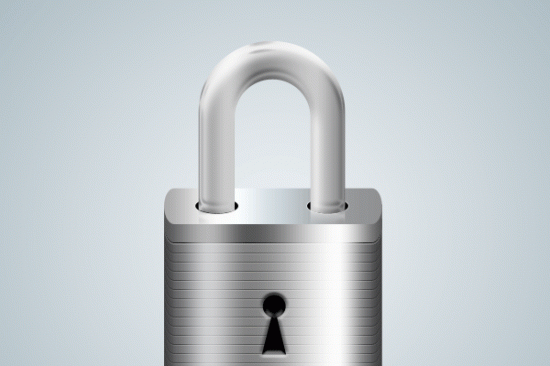
For the shadows load a selection around the lock holes.
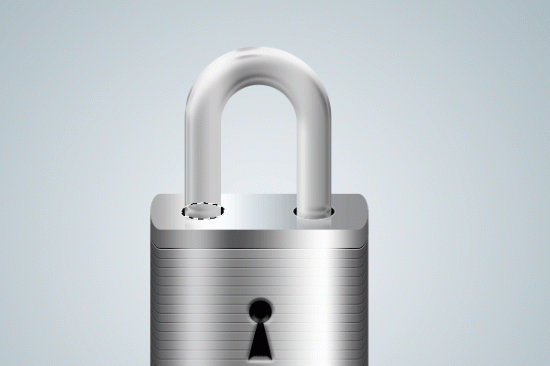
Create a new layer above the lock layer then select the "Gradient Tool" (G) with the gradient settings set to "Black #000000 to Transparent".
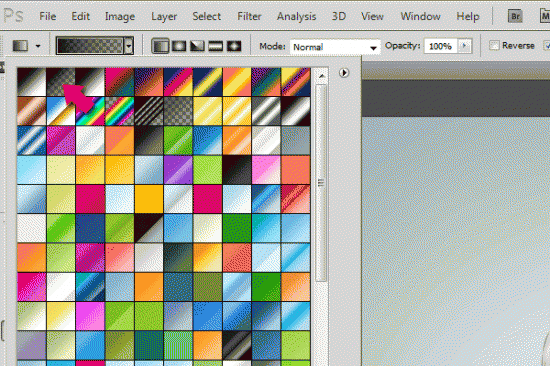
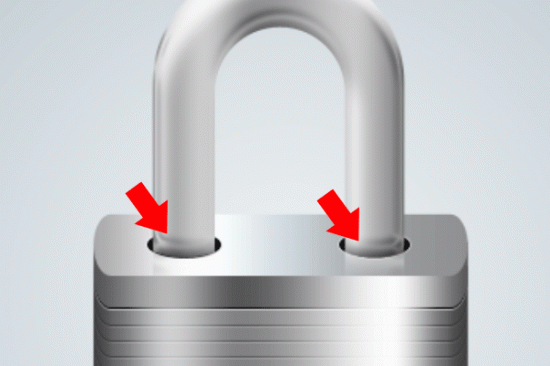
Drag the gradient upwards, again were aiming for subtle shadows. Repeat these steps for both sides.
Hope you can learn something new from this tutorial.
I feel really glad if you give me feedback through comment below. Soon i am going to show more interesting & innovative tutorials so please keep visit our blog. That’s for now.
Have fun!
Feel free to contact with Clipping Design for clipping path service, image editing service, image masking service or any kind of design support.
Thank you…
Credit: webdesign.org
No comments:
Post a Comment