
In today's tutorial we will show how to create a Wooden Face with Fiery Eye and Tear in Photoshop. Make this tutorial we use amazing photoshop technique, yexture and color adjustment. So let's have a look....

Step 1
Create a new document with a black background (size doesn’t matter), load the face image into Photoshop, use the pen tool to draw a path as shown below:

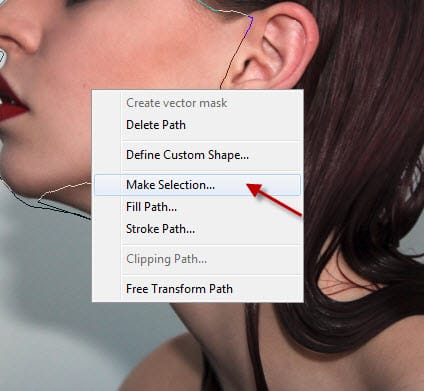
Make a selection of this path by right-clicking within the path and choose “Make Selection”: (set to 1px feather)
Copy and paste the selection on our document, resize and centre it:

Use a soft eraser to remove the edges of the face (especially the back) as shown below:

Step 2
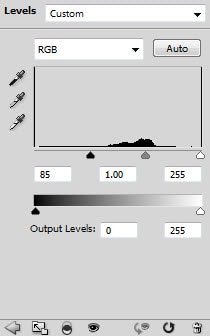
Add the following adjustments layer over the face layer as clipping mask:
Black and white

Levels
Layer mask on the levels adjustment layer:

Curves

and you will have the following effect:

Step 3
Now we will add the wood texture. Load the tree bark image into Photoshop, select the following area:

Copy and paste the selection onto our document, resize and rotate it as shown below:

Make this layer a clipping mask, and change the blending mode to “overlay”:

Add the following 2 adjustment layers as clipping mask again for this wood layer:
Black and white

Levels

Go back to the wood layer, use a soft eraser to remove some parts of the wood texture to reveal some skin:

and you will have the following effect so far:

Step 4
Now we will make the fiery eye. Load the fire image into Photoshop and select the following portion:

Smooth the edge out with the following refine edge filter settings:

Warp the fire texture as shown below to adjust its shape:

Change the blending mode of this fire layer to “hard light”, and remove the edges with a soft eraser:

Duplicate this fire layer once and change the layer blending mode of the duplicated layer to “Screen”, layer opacity to around 50%. You will have the following effect:

Step 5
We will now add some tear drop to the eye. Use the fire image and select the following portion:

Copy and paste the selection over the image, resize it and attach the smaller version to the eye, use a soft eraser to remove the edges to form a teary effect:

Use either a cloud brush or cloud filter to add some cloud effect around the face (this cloud layer should be under the face layer):

Step 6
Now let’s add some shining hair for the model. To do this, create a new layer and paint a white dot as shown below:

Use the liquify filter to warp the line as shown below, until it forms some sorts of hairy effect:

Duplicate this layer a few times and attach them to the head area:

I then use some abstract brushes to add some textures around the model, you can find plenty of those brushes on the internet:

I then further added some colour effect onto the image, and here is the final effect I have: (click to enlarg
Hope you can learn something new from this tutorial.
I feel really glad if you give me feedback through comment below. Soon i am going to show more interesting & innovative tutorials so please keep visit our blog. That’s for now.
Have fun!
Feel free to contact with Clipping Design for clipping path service, image editing service, image masking service or any kind of design support.
Thank you…
Credit: psdvault.com
No comments:
Post a Comment