Step 1
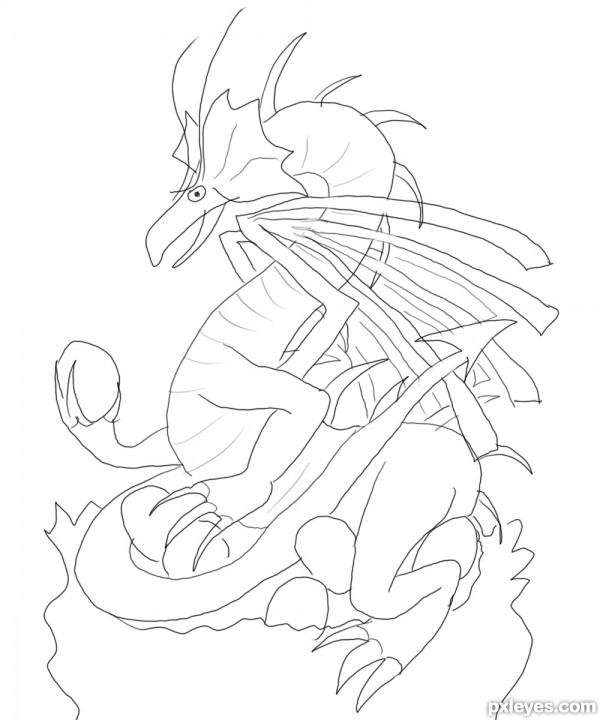
In the first step, you must draw a sketch. This sketch will be the base to our work.You can save this image to your pc and use it as your base.
Step 2
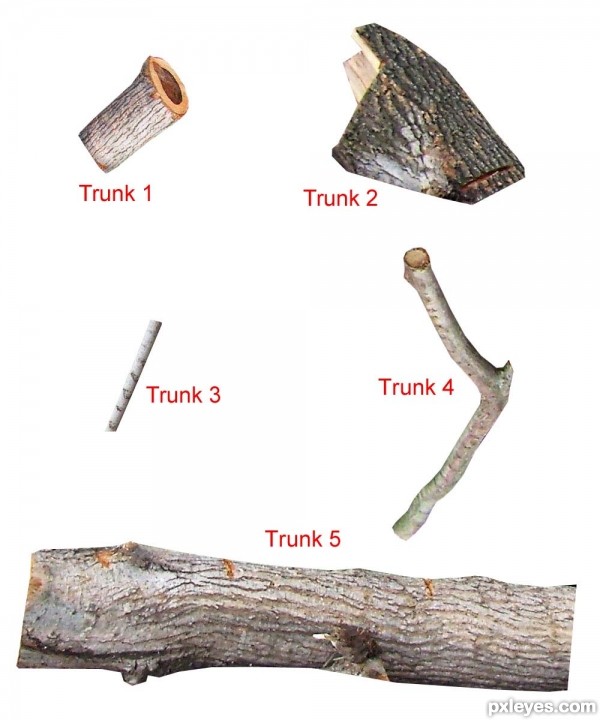
1. From the image "To Burn" provided for Pxleyes, you must cut out some wood parts to be used in this work and save it in separate layers.2. Keep a copy of each layer for future uses.
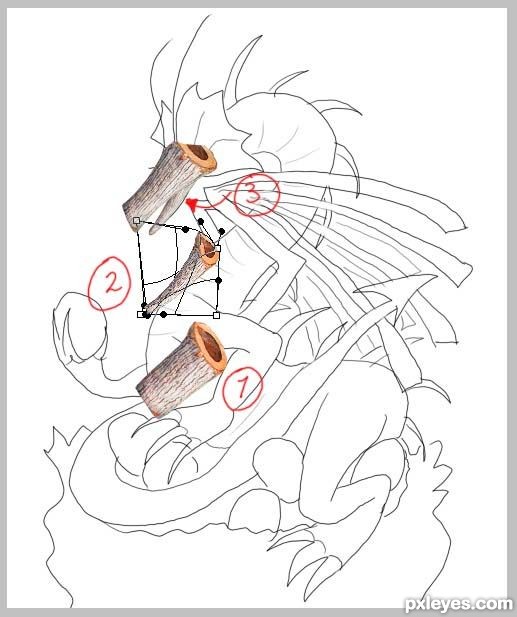
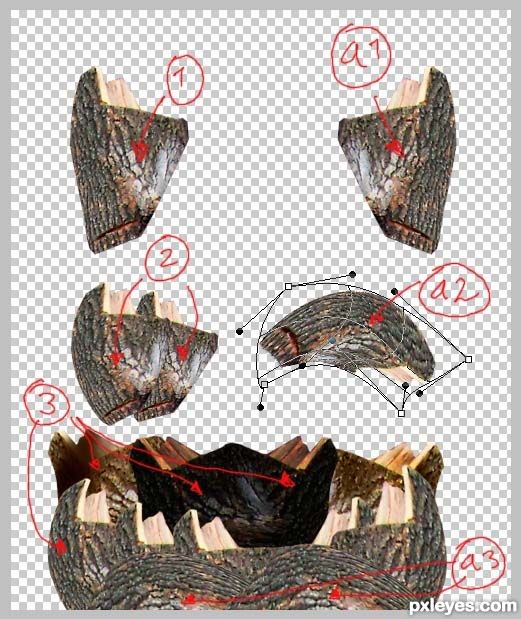
Step 3
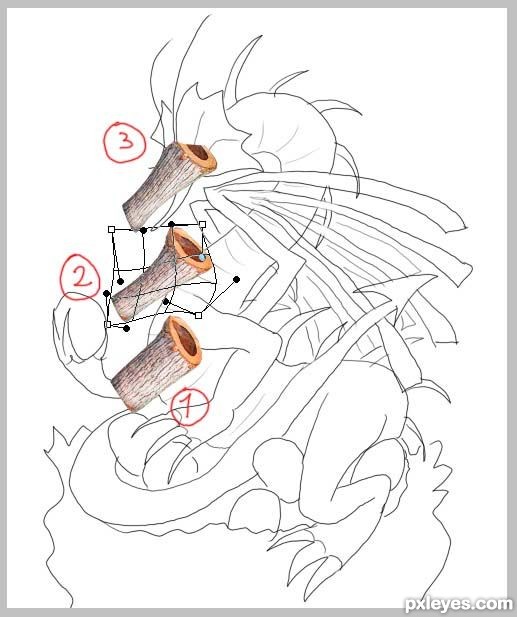
Let´s do the dragon's face.1. Take a copy of the layer "Trunk 1".
2. Adjust its form With WARP.
3. Put it in its place following the sketch base.
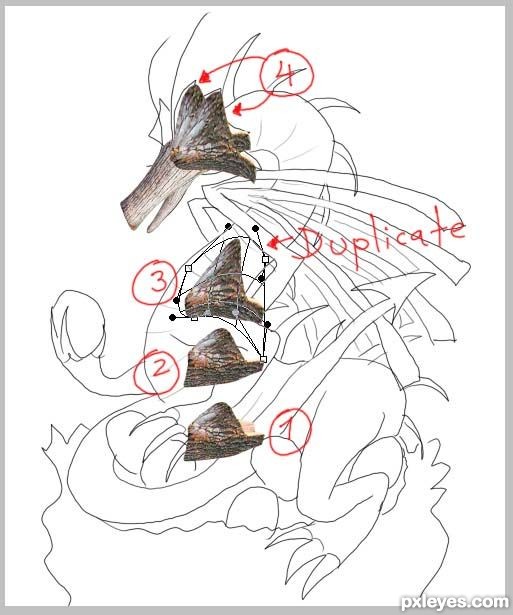
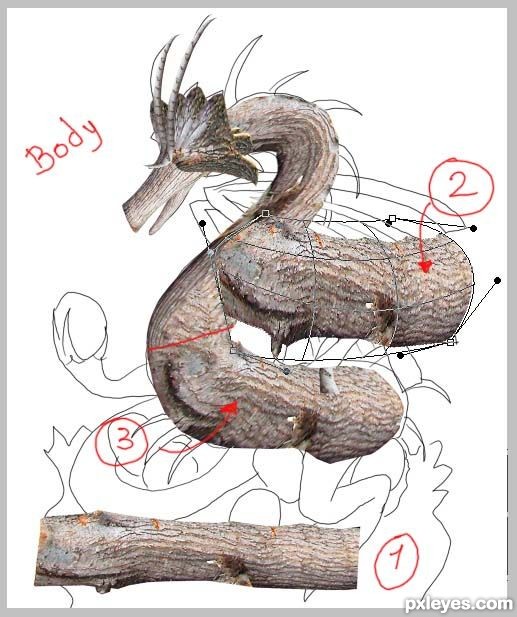
Step 4
Dragon's face (inferior part)1. Take a copy of the layer "Trunk 1".
2. Adjust its form With WARP.
3. Put it in its place (under the face) following the sketch base.
Step 5
Dragon's "ears"1. Take a copy of the layer "Trunk 2".
2. Cut out the white area of the image.
3. Adjust its form With WARP and duplicate this layer, you will need 2 parts to make the complete section of the "ears".
4. Put it in its place following the sketch base.
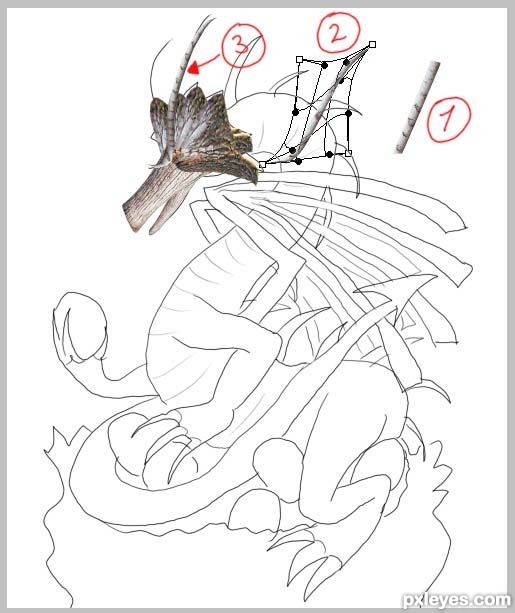
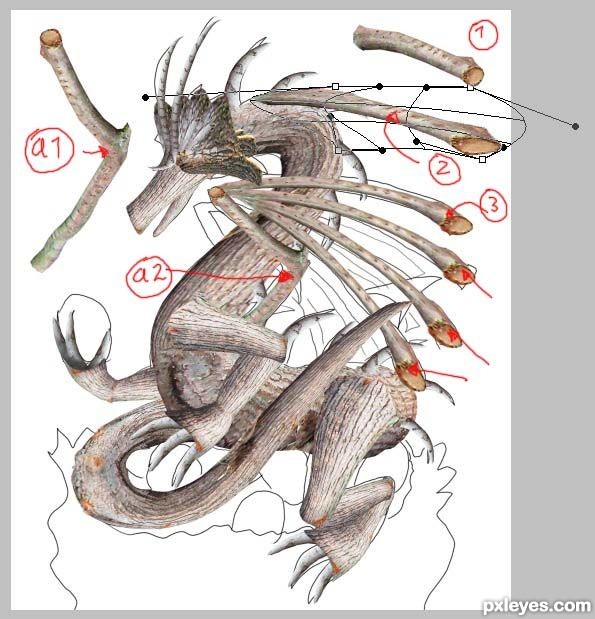
Step 6
Dragon's eyebrushes1. Take a copy of the layer "Trunk 3".
2. Adjust its form With WARP.
3. Put it in its place following the sketch base.
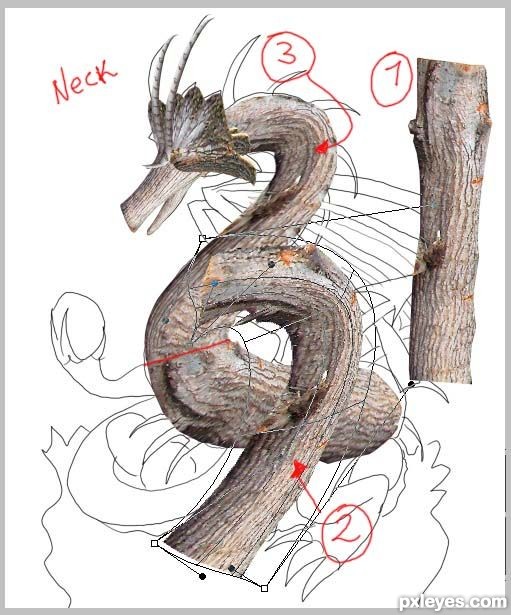
Step 7
Dragon's Neck:1. Take a copy of the layer "Trunk 5".
2. Adjust its form With WARP.
3. Put it in its place following the sketch base.
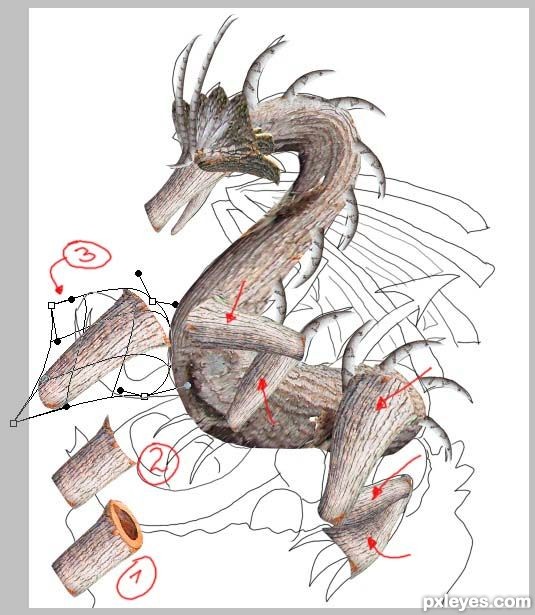
Step 8
Dragon's body:1. Take a copy of the layer "Trunk 5".
2. Adjust its form With WARP.
3. Put it in its place following the sketch base.
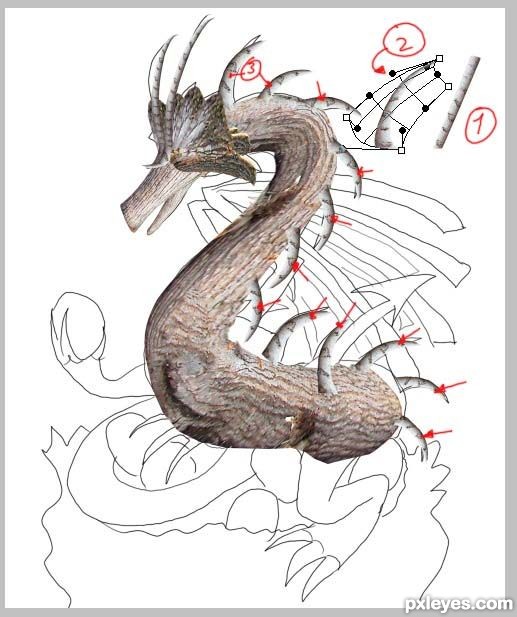
Step 9
Dragon's spike:.1. Take a copy of the layer "Trunk 3".
2. Adjust its form With WARP.
3. Put it in its place following the sketch base.
You must duplicate this layer many times as needed to fill all the spikes.
Step 10
Dragon's arms, legs:1. Take a copy of the layer "Trunk 1".
2. Cut out the yellow area in the image.
3. Adjust its form With WARP.
4. Put it in its place following the sketch base.
This layer is used to make the arms, legs, hands and feet.
Duplicate it many times as needed.
Step 11
Dragon's claws:1. Take a copy of the layer "Trunk 3".
2. Adjust its form With WARP.
3. Put it in its place following the sketch base.
You must duplicate this layer many times as needed and adjust its form to make all
the claws.

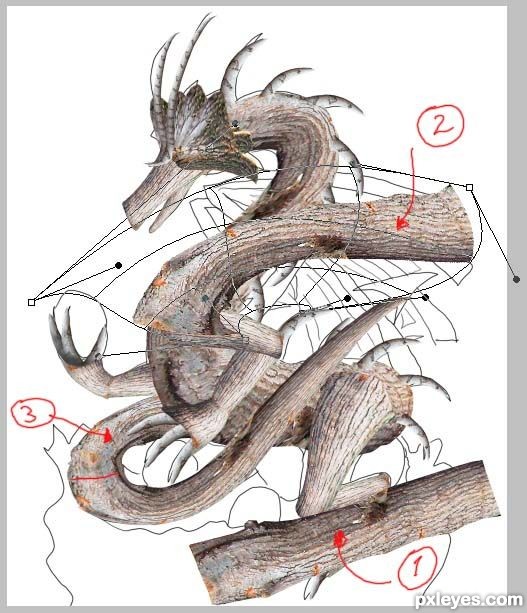
Step 12
Dragon's tail:1. Take a copy of the layer "Trunk 5".
2. Adjust its form With WARP.
3. Put it in its place following the sketch base.

Step 13
Dragon's tail 2:1. Take a copy of the layer "Trunk 5".
2. Adjust its form With WARP.
3. Put it in its place following the sketch base.
Step 14
Dragon's wings:Wing base:
a1. Take a copy of the layer "Trunk 4".
a2. Put it in its place following the sketch base.
Wing "feathers":
1. Take a copy of the layer "Trunk 1" and cut out in the middle.
2. Adjust its form With WARP.
3. Put it in its place following the sketch base. Duplicate it 3 times to complete.
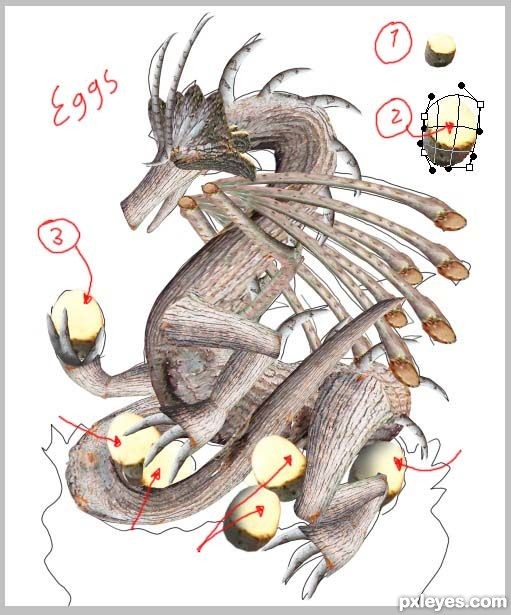
Step 15
The eggs:1. From the source image cut out some extreme of wooden trunk.
2. Adjust its form With WARP.
3. Put it in its place following the sketch base.
Duplicate it many times as needed to complete all the eggs.
Step 16
The nest:1. Take a copy of the layer "Trunk 2".
2. Adjust its form With WARP.
3. Put it in its place following the sketch base.
Duplicate many times as needed, with this layer you must fill all the nest area.
Nest details:
a1. Take a copy of the layer "Trunk 2".
a2. . Adjust its form With WARP.
a3. Put it in its place following the sketch base.
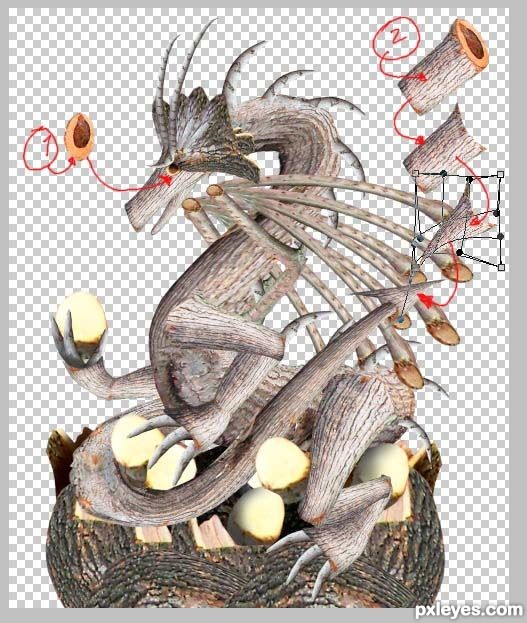
Step 17
Eye and tail:1. Take a copy of the layer "Trunk 1". Select and cut out only the circular area.
Adjust its form With WARP.
Put it in its place following the sketch base.
2. Take a copy of the layer "Trunk 1". Delete the circular area.
Adjust its form With WARP.
Put it in its place following the sketch base.
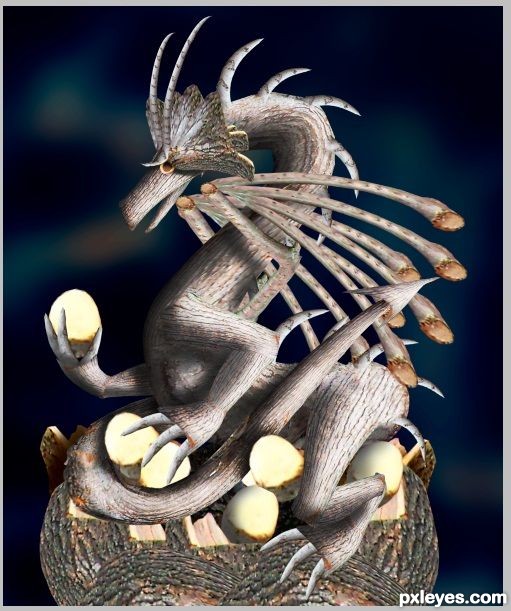
Step 18
The background:1. Take the source image provided by pxleyes.
2. Apply GAUSSIAN BLUR with a value of 45,8 to give depth.
Step 19
The background 2:2. Select the background layer and apply a color change.
Image - Adjust - Color Balance
with the values:
Midtones= Cyan = 0 / Magenta =0 / Yellow + 63

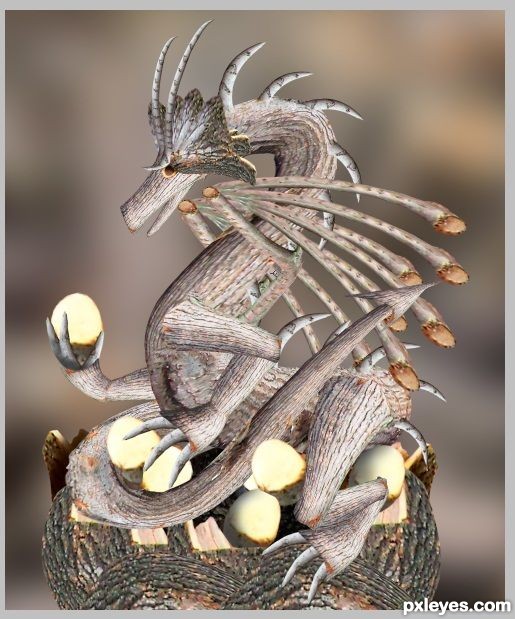
Step 20
Shadows and highlights:1. With the BURN Tool add shadows to the dragon's body.
2. With the DODGE Tool add lightings.
Step 21
Shadows and highlights 2:1. With the BURN Tool add shadows to rest of the image..
2. With the DODGE Tool add lightings to rest of image.
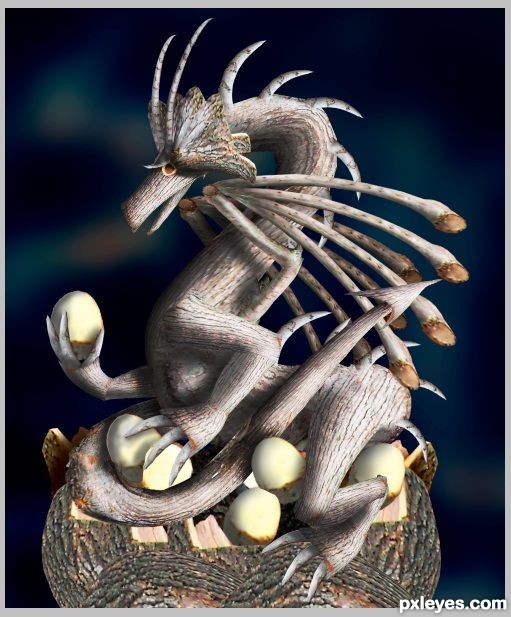
Step 22
1. Select thelayers that form the nest and change their color 1 by 1:Image - Adjust - Color Balance
with the values:
Mid Tones= Cyan +22 / Magenta=0 / Yellow -20
Shadows = Cyan +30 / Magenta=0 / Yellow -20
This will give another color to the nest.
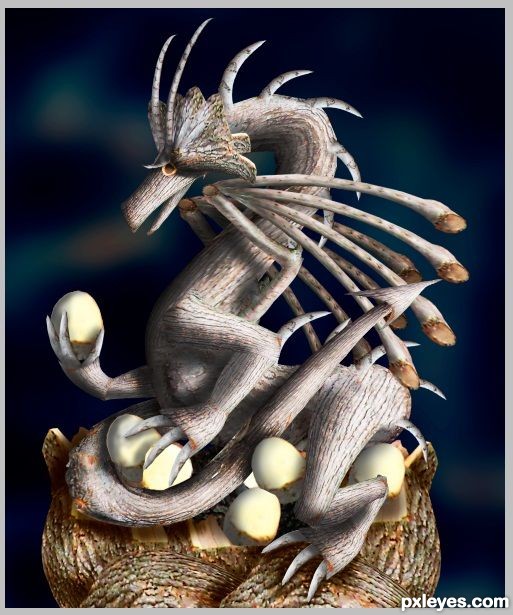
Step 23
Finishing the image:1. Select all the layers.
2. Merge all.
3. Apply
Image - Adjust - Bright/contrast = Contrast +15
*******************************************************************************
Image - Adjust - Color Balance
with the values:
Shadows= Cyan = +10 / Magenta =0 / Yellow -10
*******************************************************************************
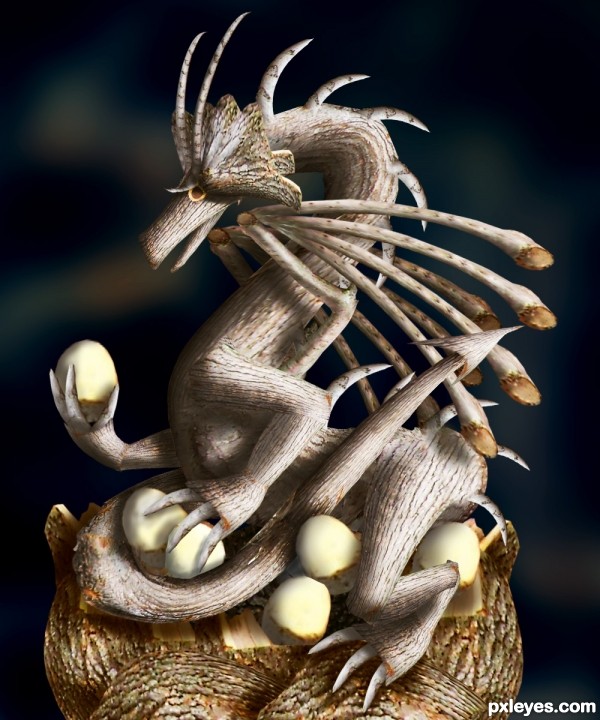
The image is finished... Enjoy!!!!!!
Hope you can learn something new from this tutorial.
I feel really glad if you give me feedback through comment below. Soon i am going to show more interesting & innovative tutorials so please keep visit our blog. That’s for now.
Have fun!
Feel free to contact with Clipping Design for clipping path service, image editing service, image masking service or any kind of design support.
Thank you…
Credit: pxleyes.com
No comments:
Post a Comment