
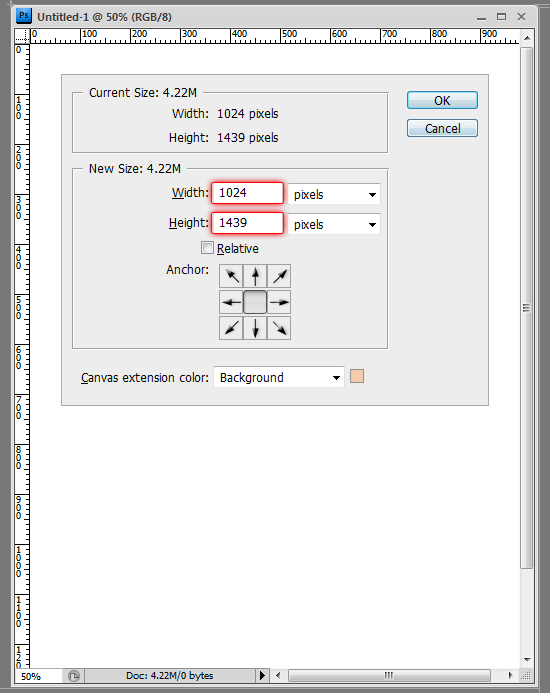
We need a blank canvas to start working. Create a new file something similar to the one here. Whenever you are not sure about the dimensions just start with something and later you can always increase or decrease the canvas size.
Step 2
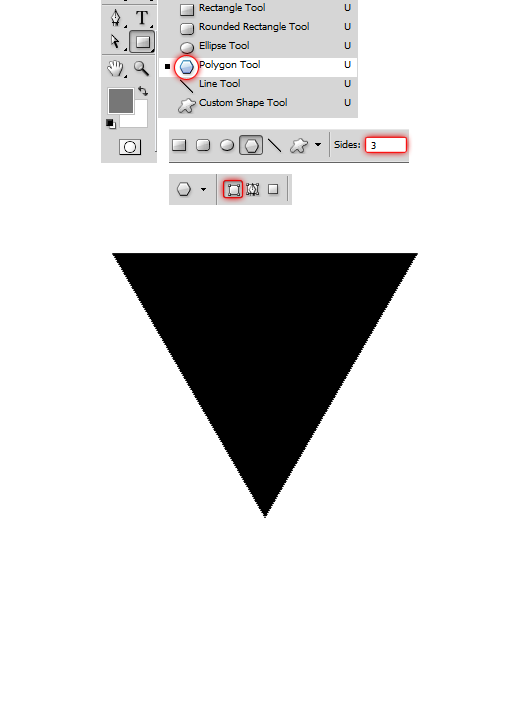
Here we will create some basic shapes around which we will build our design. Select the Polygon Tool from the from the tool bar. We can edit the number of sides of the polygon. Since we need to draw a triangle, set the sides count to 3. Same time select the shape layers option and draw. This will create a new layer with an editable vector path. We can use the path for several different things.
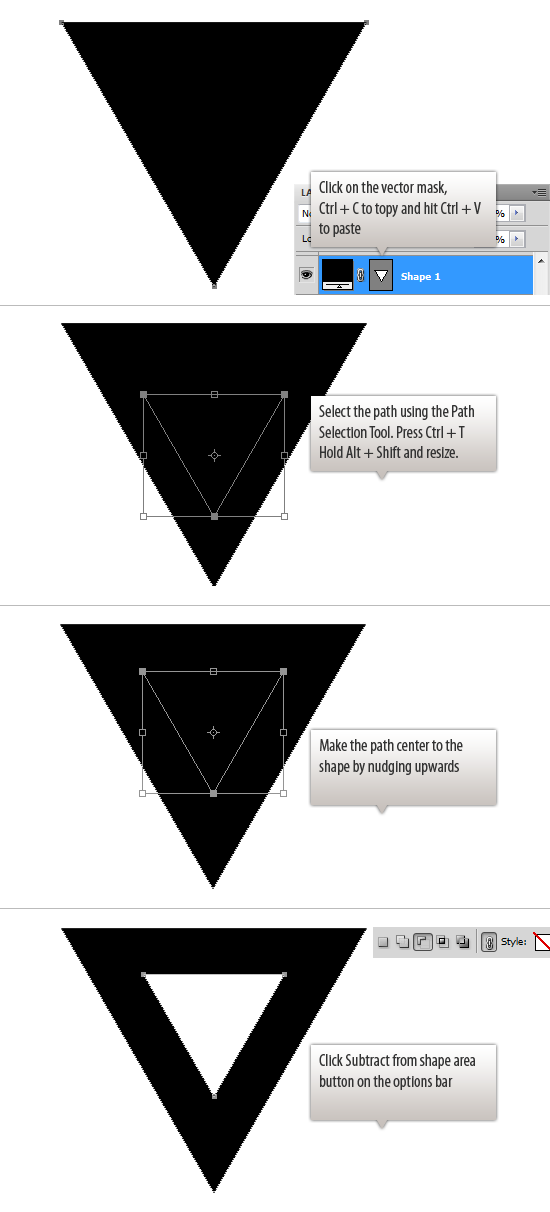
We have the triangle here which is a shape layer. It has a vector path associated with it. We can use to perform path operations like adding, subtracting, excluding and so on. So here you can see how to use the path of the shape layer to cut a hole in the shape. First copy and paste the path. Then scale it down and position it. Once the path is in desired position and select Subtract From Shape Area option.
Step 3
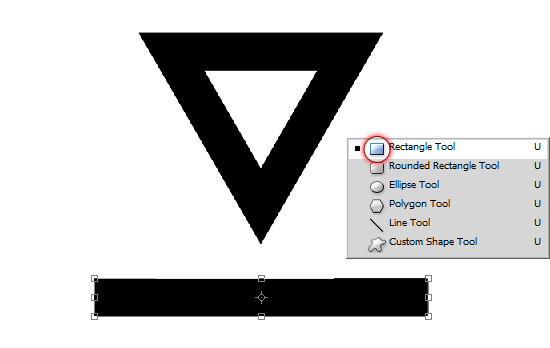
Here I am going to add more elements that will define the outline. Use the Rectangle Tool to create the shape.
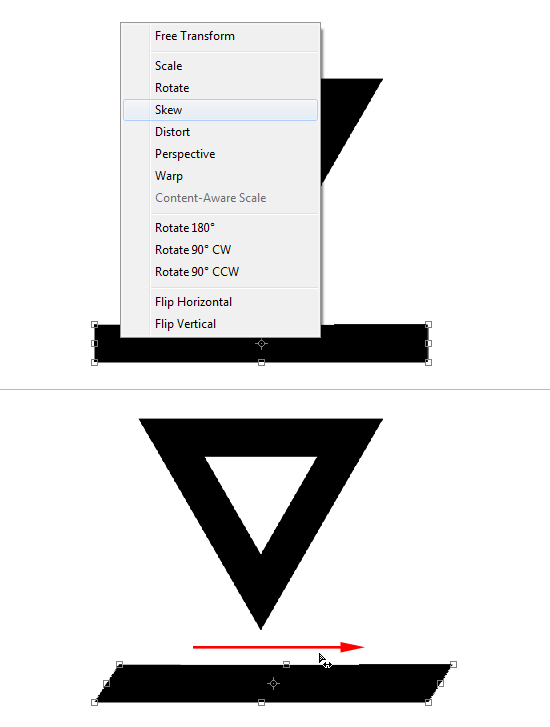
Step 4
Press Ctrl + T to enter transform mode. Right click on the shape and choose Skew. Click and move the pointer across shape.
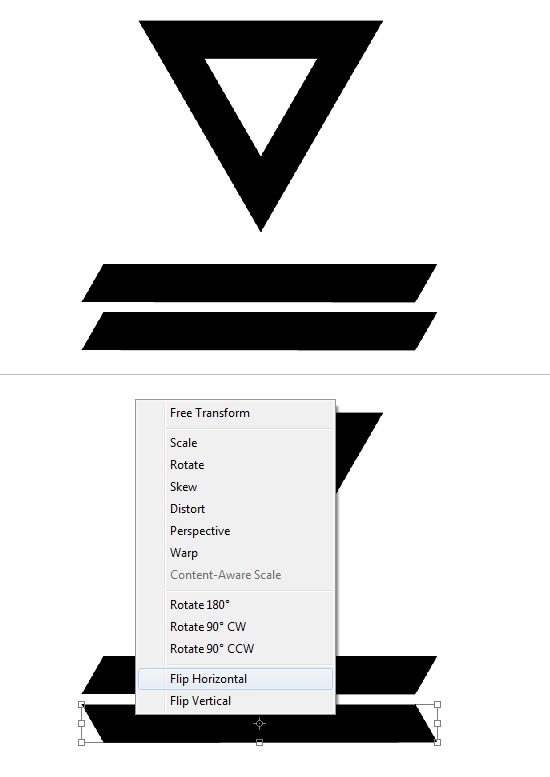
Step 5
After you skewed the shape, duplicate it by simply pressing Ctrl + J. That will create a copy of the shape. Select the shape and press Ctrl + T. Choose Flip Horizontal from the menu.
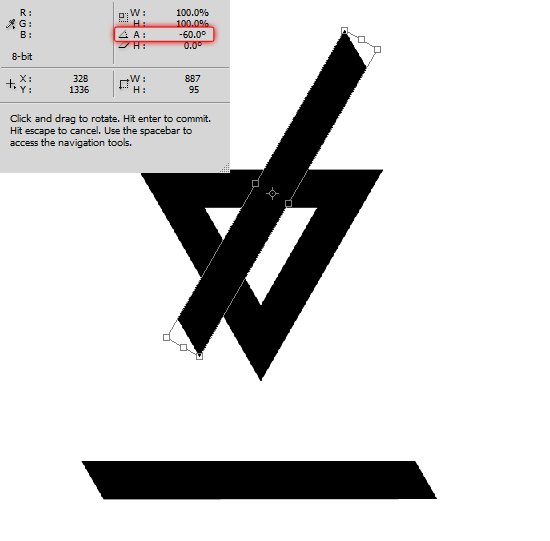
Step 6
Now position the slanted shapes over the triangle. Press Ctrl + T and rotate the shape by -60 degrees. Use the Info palette (F8) to view the coordinates.
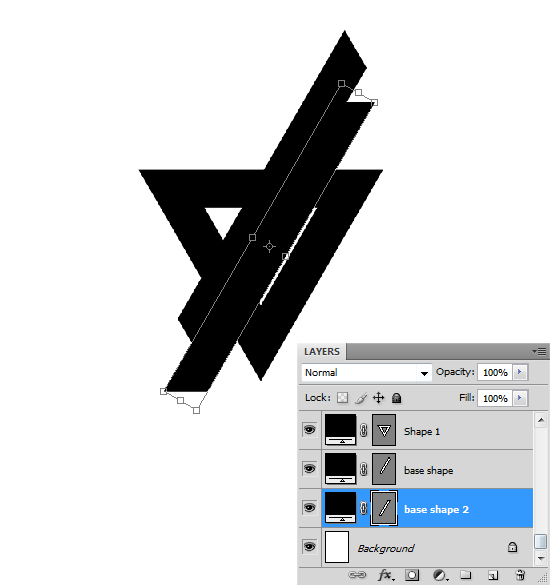
Step 7
Rotate and reposition the other shape as well. Place both the shapes underneath the triangle layer.
advertise here
Step 8
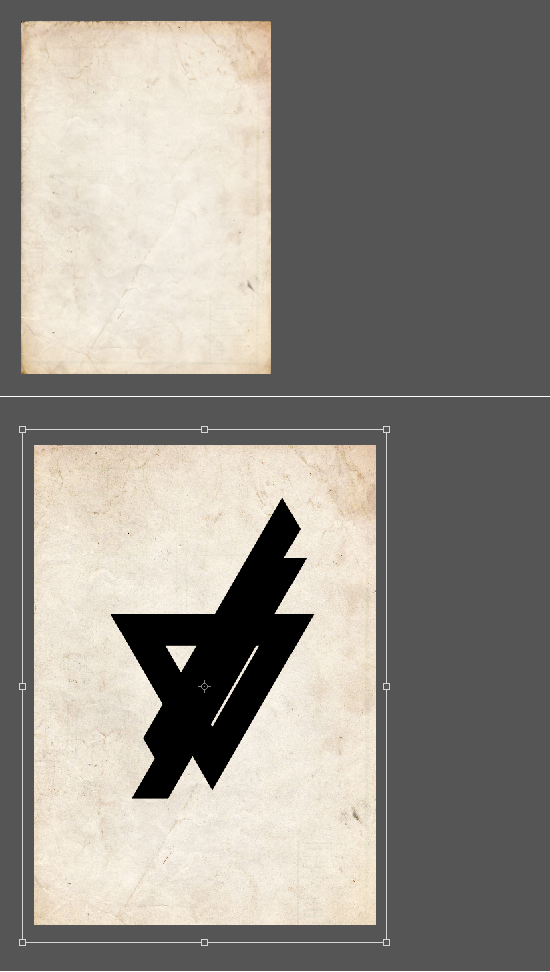
Open up the paper texture. Drag and drop the texture in to the design. Place it at very bottom in the layer stack.
Step 9
Flip the texture first vertically then horizontally.

Step 10
Take off the color from the texture. The simple shortcut is Ctrl + Shift + U. You can achieve the same result by using the Hue/Saturation dialog box and reducing the saturation to -100.

Hope you can learn something new from this tutorial.
I feel really glad if you give me feedback through comment below. Soon i am going to show more interesting & innovative tutorials so please keep visit our blog. That’s for now.
Have fun!
Feel free to contact with Clipping Design for clipping path service, image editing service, image masking service or any kind of design support.
Thank you…
Credit: photoshoptutorials
No comments:
Post a Comment