Step 1
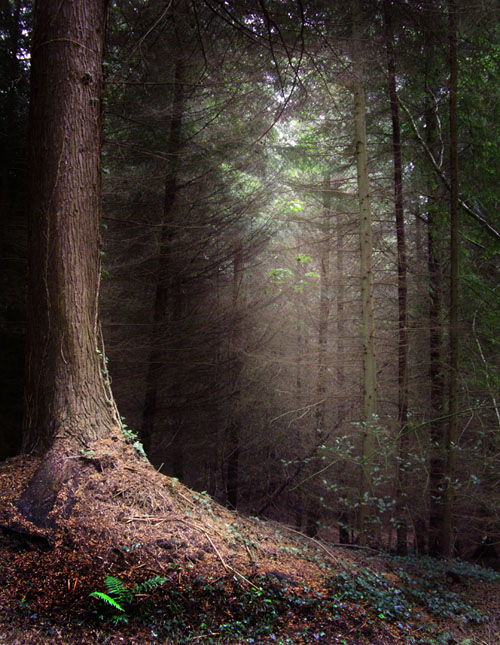
Open the Forest image provided by PandoraLore-Stock. Double-Click on the layer to unlock it, so that we can make modifications in the next steps. Rename the layer to “forest” and save the file under the name “MotherNature.psd.”
Step 2
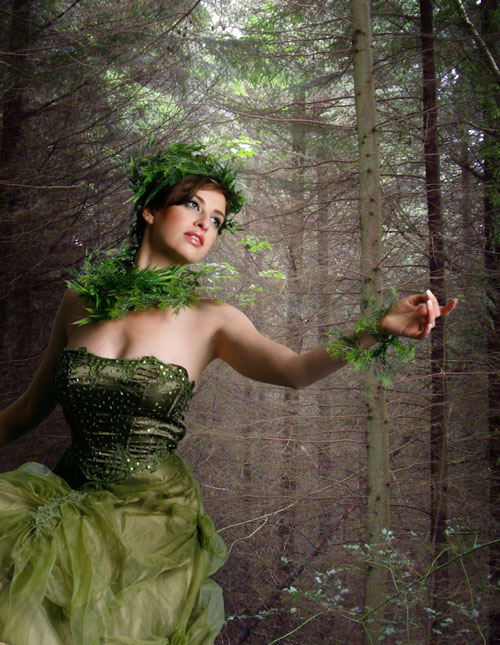
Import the Model image provided by Marcus J. Ranum into our scene.
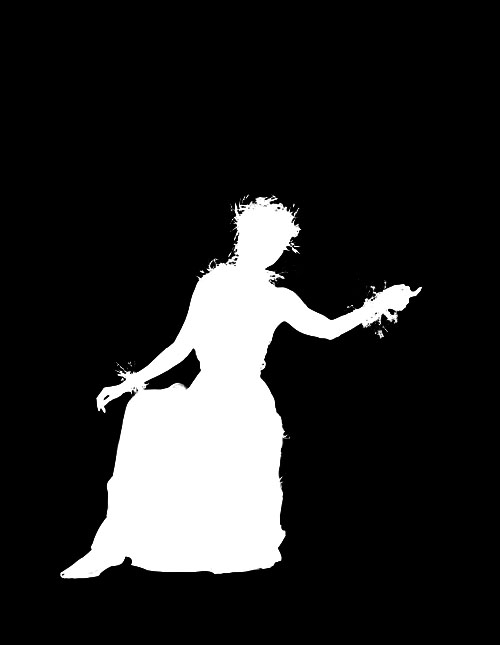
Create a layer mask and mask out the background so that just the woman is visible on our forest background. You can use either the Pen Tool (P),
the Magic Wand Tool (W), the Quick Selection Tool (W), the Magnetic Lasso (L) or even a simple Soft Brush with a black color to mask out our model.
Just paint with a black color on the layer mask over the background from the model and the background will disappear. Note that if you paint with a white color on the layer mask, you can paint in parts from the original images again.
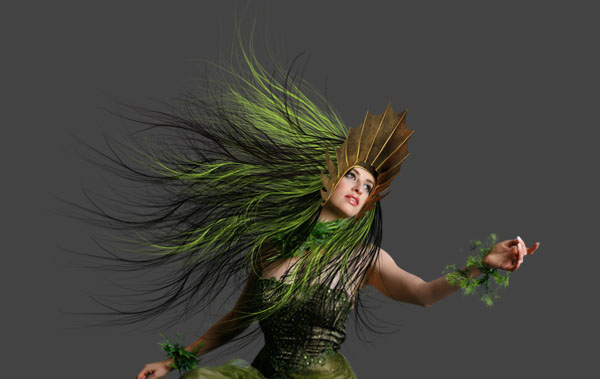
Press Command + T to switch to the Transform mode. Scale and move the woman until she is positioned like in the image below. Rename the layer to “girl.”
Step 3
Select the Smudge Tool (R). Choose a small, soft brush about 10-20px with 10-15% strength, then smudge carefully over the arms and face of the model. Change the brushes size on smaller parts like the eyebrows or the fingers. Doing this will make the skin look smoother and cleaner.
Step 4
In the following steps we will add some awesome hair to the model. First, remove the ivy and parts from the hair. Now simply paint with a black color on the layer mask to hide them. Create a new empty layer over the “girl” layer and select the Brush Tool (B).
Load the Painted Hair brushes provided by trisste-brushes.
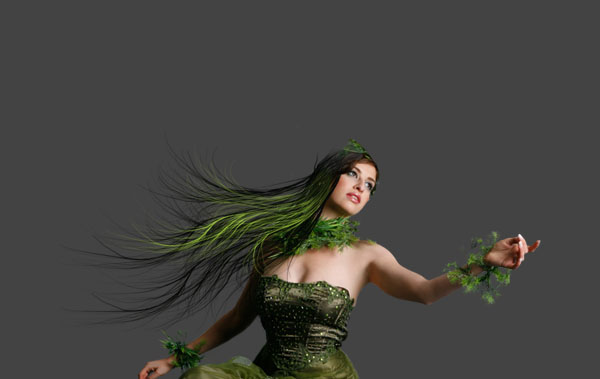
With a black color click 2-3 times on the new layer to create the first part of the new hairstyle.
Press Command + T and rotate the hairs to fit the head of the woman. Finally, you can can switch one more time to Transform mode using Command + T. Now choose Edit > Transform > Warp. With the Warp Tool you have the possibility to control the hair flow even more accurately. You should end up with something like the image below (I used a gray background here so that you can see the hairs better).

Step 5
Duplicate the “Hair” layer (Command + J), press Command + T and move the new layer into position so that the result looks similar to this image below.

Step 6
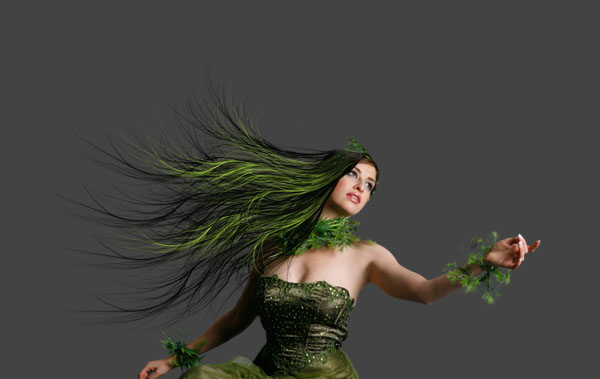
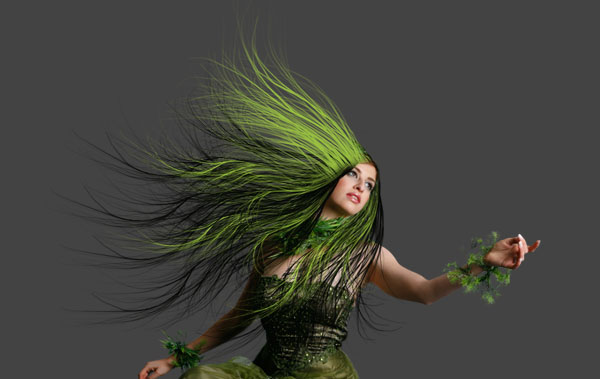
Since simply using black hairs would look boring for our image, I decided to use a second color. Choose #9ac33e as the foreground color and paint a new strand of hair on a new empty layer over our tow existing “hair” layers.
Finally, you can erase the hairs that goes over the face of the model. Also, play a little with the eraser opacity and erase some green hairs here and there. Doing this will make the black and green hairs flow more natural together. Now use the Transform and the Warp Tool again to position the hairs as you please.
Step 7
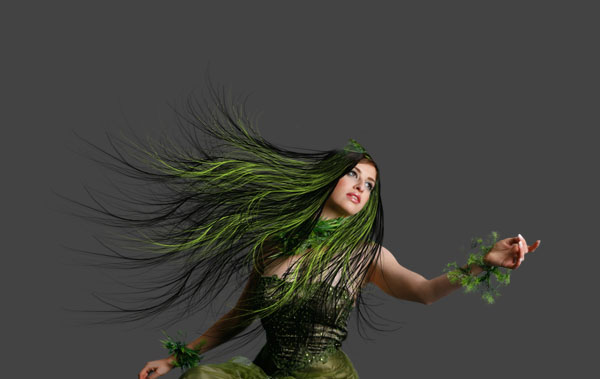
We’ve already made a good start on the hairs ,but there is still a lot of work to do until our hairs look like a believable hairstyle. Select all of our three “hair” layers and flatten them by pressing Command + E. Press Command + J on the flattened “Hair” layer to create a duplicate of it. Move and rotate the duplicated layer so that we get better looking hair.
Step 8
Create a new layer on top of our “hair” layers and paint some black hair strands that go over the woman’s left shoulder. Like always move and rotate them into place. Finally, add little green hairs like we did in the previous steps. You should end up with something similar to the image below.
Step 9
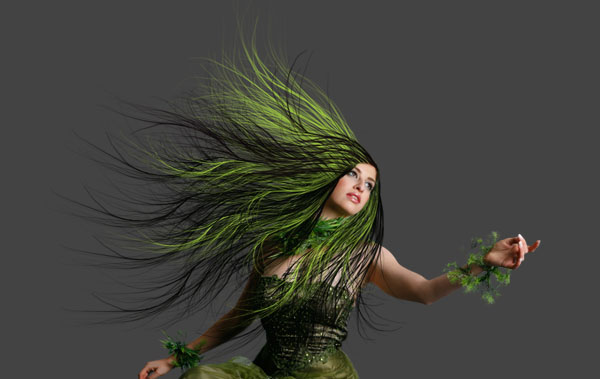
To finish up the hairstyle of our model we’ll paint some green hair strands and bring them into place. Now paint for last time some black hairs strands over the green ones. When you are happy with the hairs, select all the “hair” layers and flatten them by pressing Command + E. Rename the flattened layer to “hair.” The final hairstyle should look similar to the image below.
Step 10
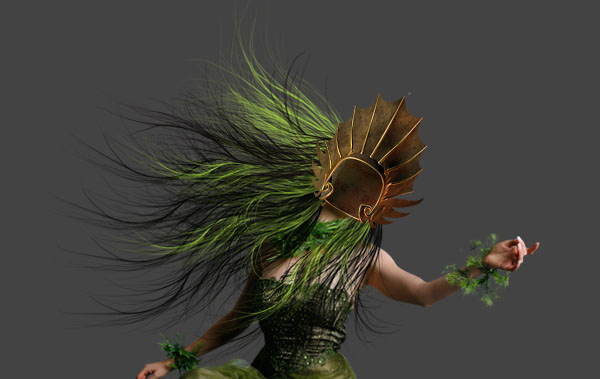
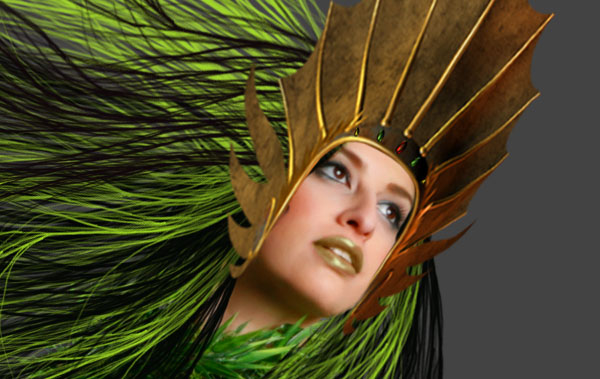
Import the Fantasy-headwear image provided by unholy-stock into our scene. Delete everything accept the crown in the center of the imported image, then move this crown on top of our existing layers. Scale the crown down until its size fits the size of the girls head.
Press Command + T to enter Transform mode. Press Command while click-dragging the corner points to move the crown into perspective. Finally, create a layer mask for the crown and choose a small, soft brush. Now paint with a black color on the inside of the crown so that we can see the face of our model again.
Step 11
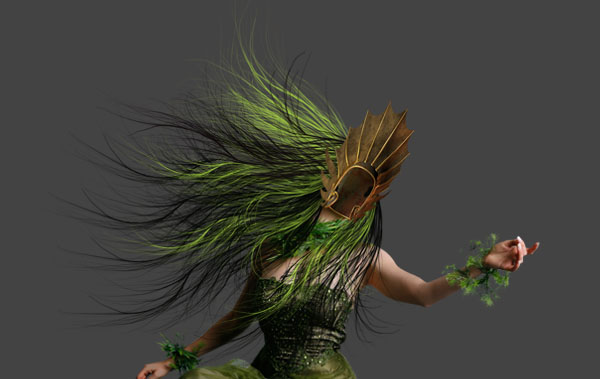
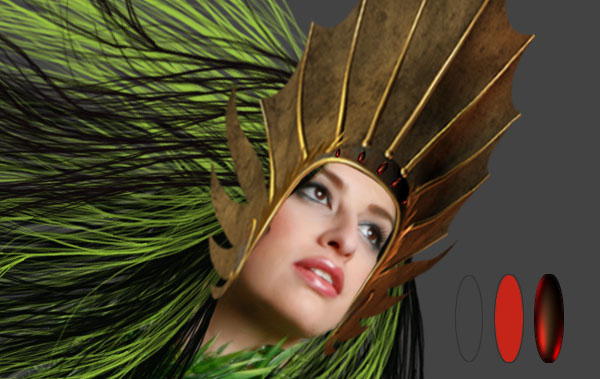
To give the crown a final touch we will paint in some kind of jewel.
Simply use the Elliptical Marquee Tool and stroke the outside with a very dark gray (1px). Fill the inside of the ellipse with red #c52418. To give the whole jewel a look we will use the Burn Tool (O) to darken some parts. Finally, set some highlights with the Dodge Tool (O).
Use the Dodge and Burn Tools with a low exposure at about 10%. In the image below you see the step to create a jewel. Scale and place the ready jewel in the center of the crown and create four more duplicates using Command + J as shown.
Step 12
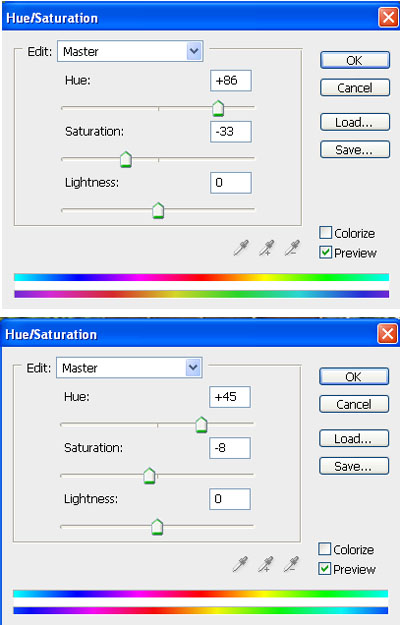
Flatten the whole “jewel” layers into one by selecting them and pressing Command + E. I think the crown will look better if the jewels have different colors. Create a Hue/Saturation Adjustment Layers over the jewels.
Use the values from below or choose your own color if you prefer. Now click on the layer mask and fill it with a black color. With a small, soft, white colored brush paint over the jewels which should get the new color. Repeat this step one more time with another Adjustment layer and a different color.

Step 13
OK, now it’s time to add some animals around “Mother Nature,” otherwise she wouldn’t be Mother Nature. We’ll start with a bird, which will sits on her right arm.
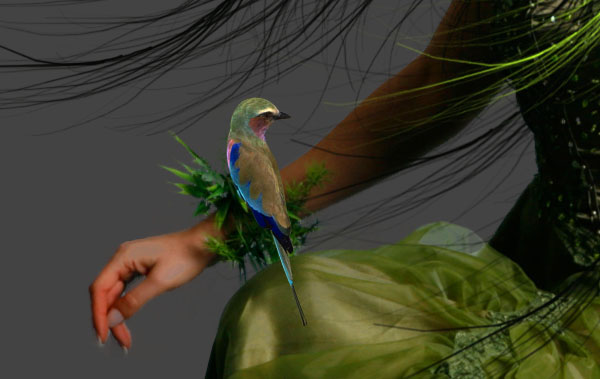
Import the Bird image provided by emo-kiddo-stock. Cut the bird out from his background and place him on the right arm of the girl. Use Edit > Transform > Flip Horizontal so that the bird is facing at our Mother Nature. Scale him down until he has a realistic size.
Step 14
Since this is a fantasy image, I want the bird also to look more fantasy like. We will do this with the help of the Smudge Tool (R). Use a spatter brush with a size between 10-20px. Smudge the bird with a strength about 10-20%. When you are ready, set the strength to about 80% and smudge the tail, wings and beak. The result will be a bird that looks painted.


Step 15
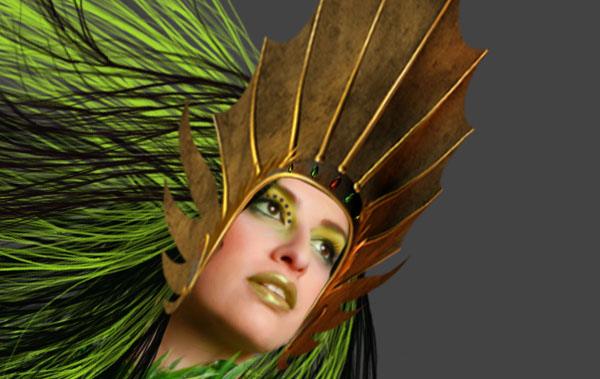
OK, now it’s time to add some lipstick to our girl. I think green will fit perfectly for her. Take a small, soft brush. Choose #577615 as the color and brush over her lips on a new layer. Set the blend mode from the new layer to color and lower the Opacity to about 60%.
Step 16
To perfect the face of our Mother Nature figure we will also add some eyeshadow. As in the step before, paint with a green color on a new layer. Now choose a light yellow color and paint with an Opacity of around 20% carefully over the image. Blend the new layer with a color and lower the blending Opacity if necessary.

Step 17
In this step, we will give the face the final touches. We’ll add some diamonds to her eyelids. Create a new layer above our “makeup” layers (“lipstick,” “eyelids”) from before. Choose a small, soft brush (6px) and a dark gray color (#343434).
Follow the contour of the eyelid and make about 6 or maybe 7 points there. Now lower the brush size to 3px and choose a very light green color (#e0eebf). With the new color place small highlights into the gray points. Do the same for the second eyelid as well.


Step 18
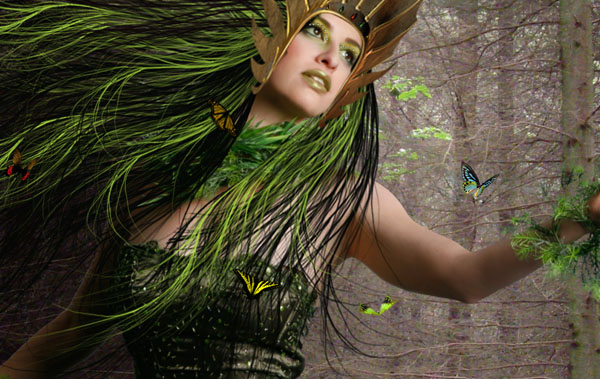
OK now we’ll add some butterflies around the model. Create a new empty layer and select the Brush Tool (B). Load the Butterflies Brushes provided by SeraphimStock and the
Butterfly Brushes provided by bmjewell-stock.
Place approximately eight butterflies around our Mother Nature figure. Feel free to use different colors and choose the butterflies that you like the most. Place them for example on her dress, leg, arms, or hairs so that they interact with her.
Step 19
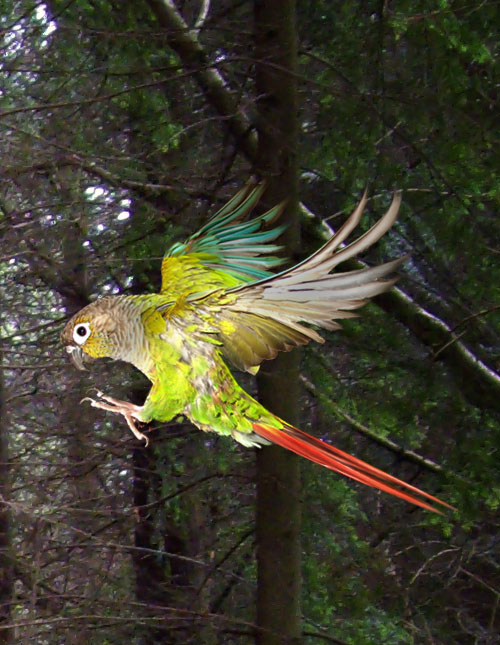
Import the Greencheek in flight image provided by greencheek.
Use the Pen Tool (P) or your preferred Selection Tool to cut out the bird from his background. Switch to Transform Mode (Command +T) and move the bird into position.
Scale him down till he gets a realistic size. The bird should look like he will land in just a few second on mother natures arm.
Step 20
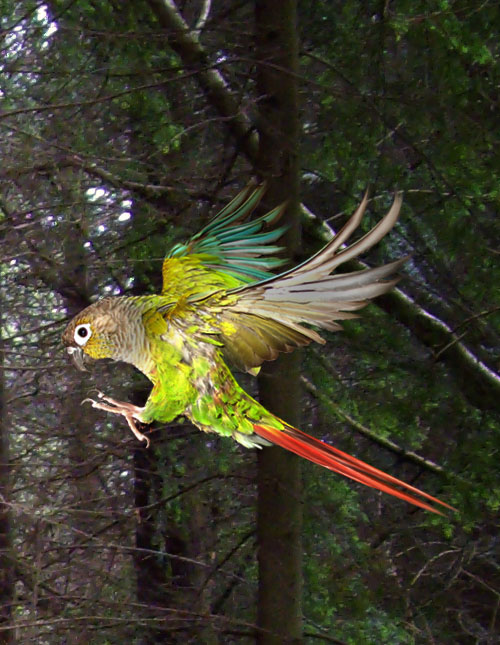
In this step, we’ll make some further adjustments to our flying bird. Create a new empty layer above the “bird” layer. Choice Edit > Fill, under Contents Use choose 50% gray. Press Command + Alt + G to create a new clipping mask. Set the blend mode to Soft Light. Choose small, soft brushes about 10px with 10-20% strength.
Now you have the possibility to paint in shadows or highlight depending on if either you are using a black or a white color. You could get the same results by using the Dodge/Burn Tool (O) instead, but with the method I introduced you, you work non-destructive. This means you don’t need to work directly on the “bird” layer which is a very helpful!
Create a new Hue/Saturation Adjustment Layer on top and lower the Saturation to -27. Press Command + Alt + G to create a clipping mask from our Adjustment Layer.

Step 21
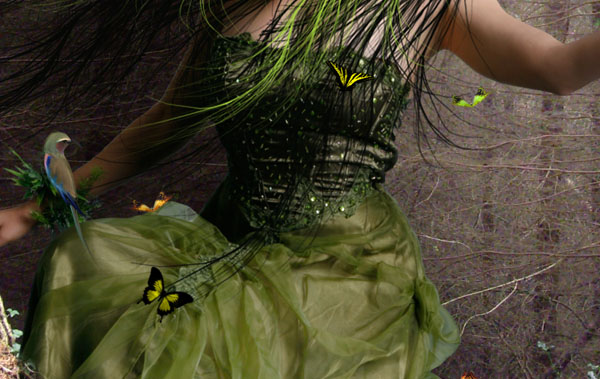
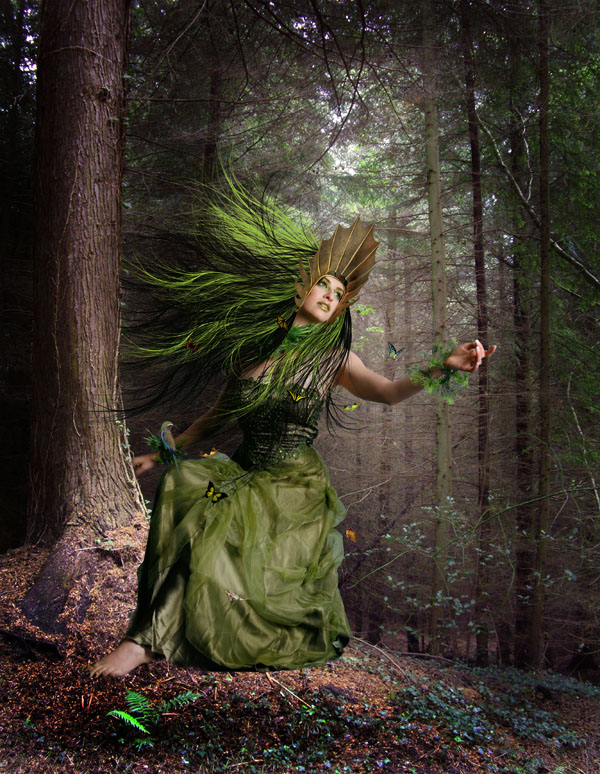
Alright we’re almost done. Select the layer with our girl and create a layer mask if you didn’t already. Select the layer mask and paint the leg and parts from her skirt out. Simply use a small, soft brush and make sure that you use a black color. Look at the image below as reference.
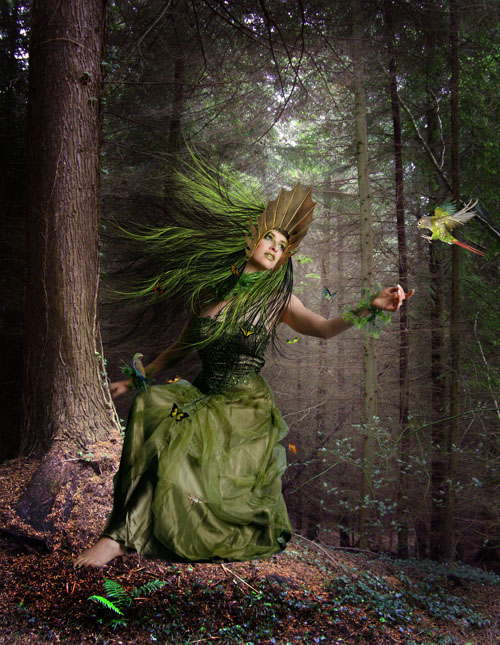
Step 22
Create a new empty layer above the model layer. Select the Clone Stamp Tool (S), make sure that you sample from the current and below layers. Try to clone some parts from the skirt to get the effect that the skirt is hanging over.
Look at the image below to get an idea. Also, try to avoid sharp edges like in the first image. Simply go over it with a soft eraser and an Opacity of around 35% over the sharp edges.

Step 23
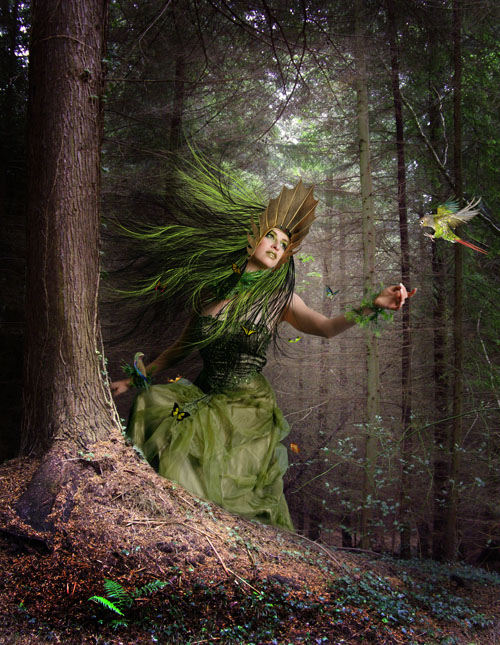
Now we will match the background with the rest of the image. We’ll use a technique from before so it should be very easy to follow this step. Create a new empty layer above the “forest” (background) layer and fill it with 50% gray. Set the blend mode to Soft Light. Grab a Soft Brush with a black color and lower the Opacity to 30-40%. Start to paint on the gray layer to darken the highlights.

Step 24
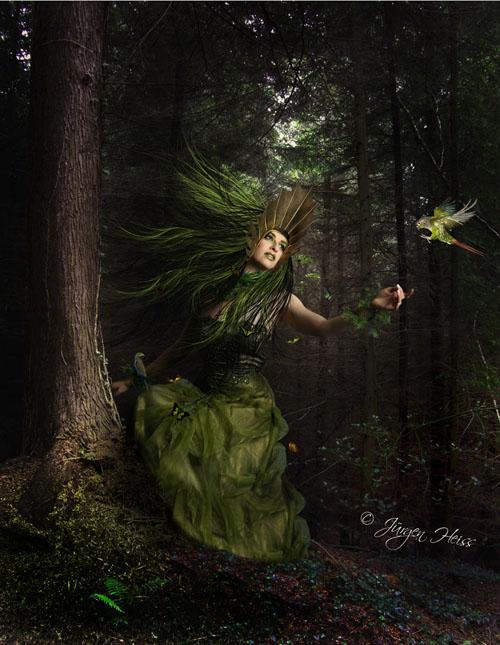
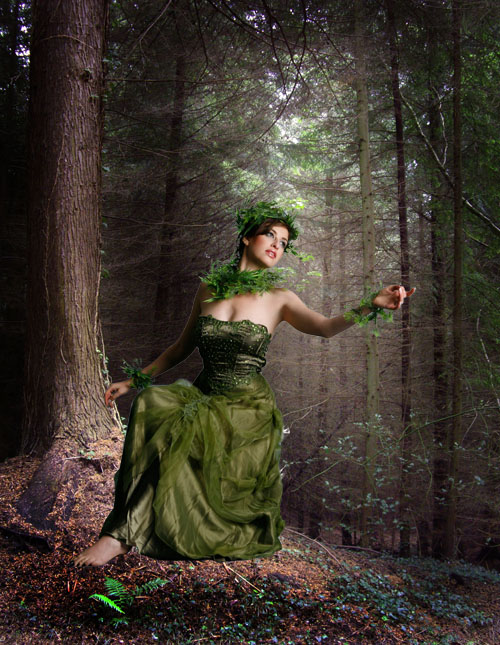
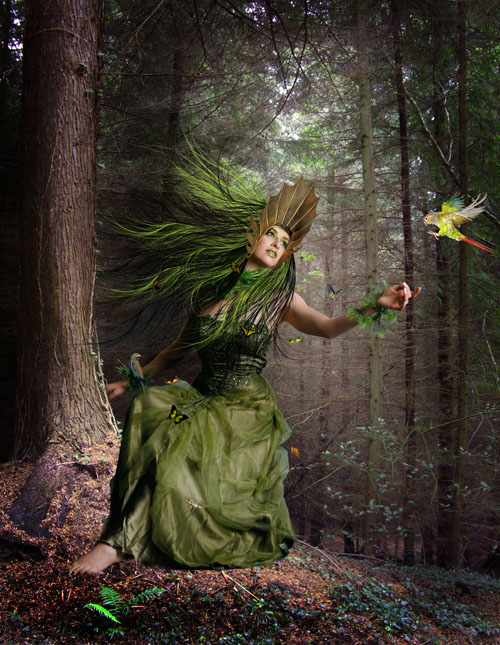
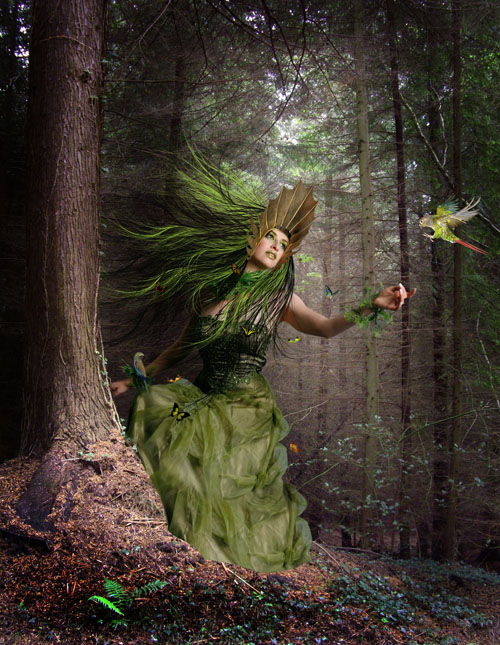
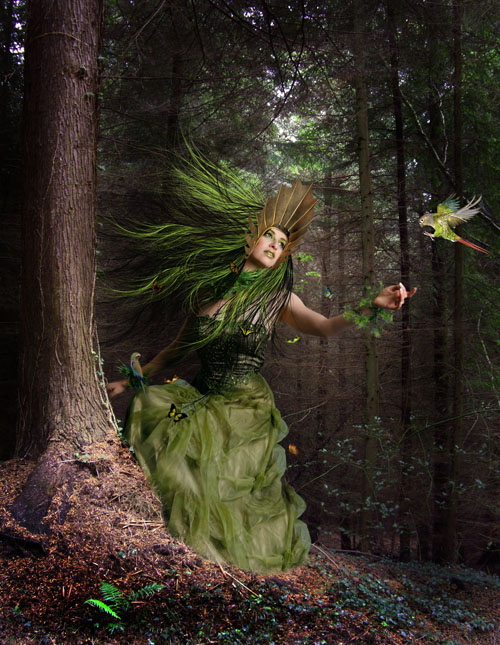
In addition you can give the whole image a color tint or use curves to darken the whole image slightly. This depends really on your own taste. If you want you can add your signature to brand your image. You can use either a Graphic tablet or some font like Scriptina.
In the image below I used curves to darken the whole image. On a new layer I painted with different green colors over the left bottom so that the ground there looks greenish instead of brown. As a blend mode you can use Color or Soft Light. Finally, I added my signature.

Hope you can learn something new from this tutorial.
I feel really glad if you give me feedback through comment below. Soon i am going to show more interesting & innovative tutorials so please keep visit our blog. That’s for now.
Have fun!
Feel free to contact with Clipping Design for clipping path service, image editing service, image masking service or any kind of design support.
Thank you…
Credit: http://psd.tutsplus.com
No comments:
Post a Comment