This tutorial you will learn how to make a adding shadow in Photoshop We use amazing effects and shadow. So why not a look...
Step 1
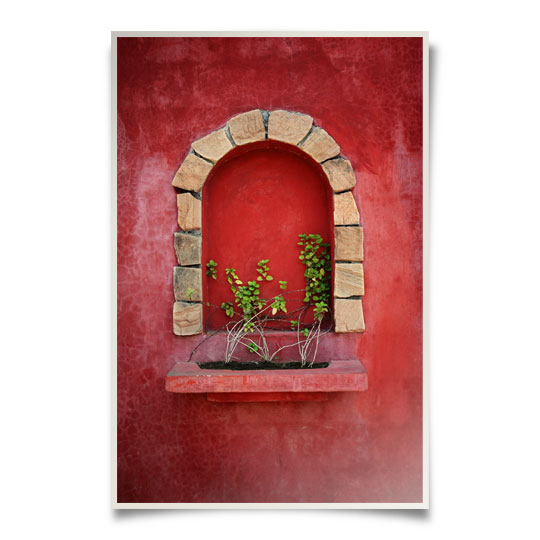
Lets jump right in and open a new document (mine is 540×540 pixels at 72ppi).
Obviously we’ll need a photo to work with so open up your photo press Command-A (PC: Ctrl-A) to Select All, then copy the photo by pressing Command-C (PC: Ctrl-C) then close the photo file to return to your newly created working document.
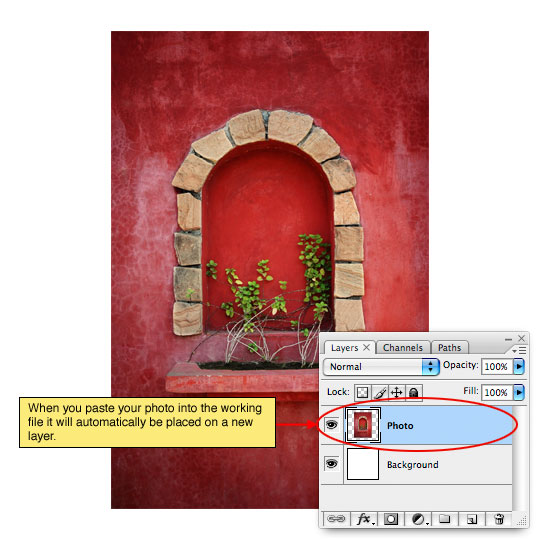
Press Command-V (PC: Ctrl-V) to Past the photo we just copied into the document and resize the photo if needed by pressing Command-T (PC: Ctrl-T) to invoke the Free Transform tool. Remember to hold down the shift key when resizing to constrain the proportions of your photo.
Step 2
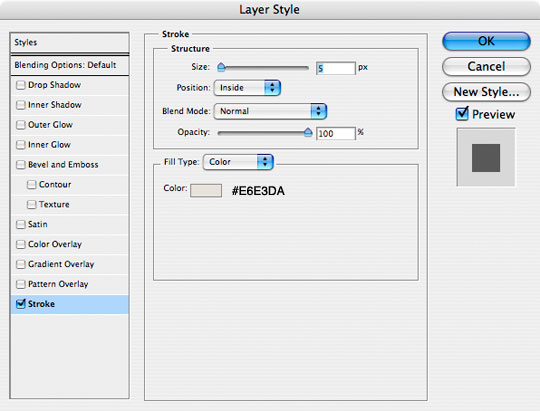
This effect looks best when the image has a border of some kind and for this exercise we’ll use a Stroke layer style to create the border. Control-Click (PC: Right-Click) on the Photo layer and choose Blending Options from the menu to bring up the Layer Styles dialog box. Choose Stroke from the list on the left and enter the following settings. Click OK when you’re finished to commit the Layer Style.
(*note: Notice that I’ve switched the placement of the Stroke to "Inside", by doing this we avoid the rounded corner effect created by leaving the Stroke on the outside of the photo thus retaining the crisp sharp corners.)
Step 3
With the border in place it’s time to add a highlight to the photo. Command-Click (PC: Ctrl-Click) on the Photo layer’s thumbnail in the Layers palette to load the photo as a selection. Create a new layer by clicking the Add New Layer icon at the bottom of the Layers palette (I named this layer Highlight).
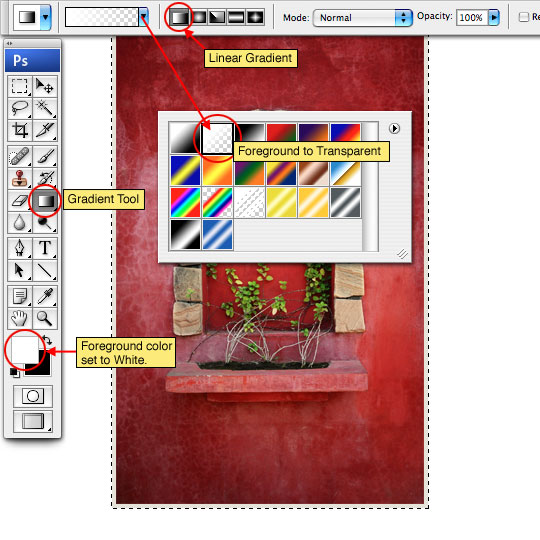
Press the G key to switch to the Gradient tool. Press the D key to reset the foreground and background colors to black and white, then press the X key to switch white to the foreground color in the Tools palette. From the Gradient Options bar that appears at the top of Photoshop choose the Foreground to Transparent swatch from the Gradient Picker and make sure that the Linear Gradient style is selected.
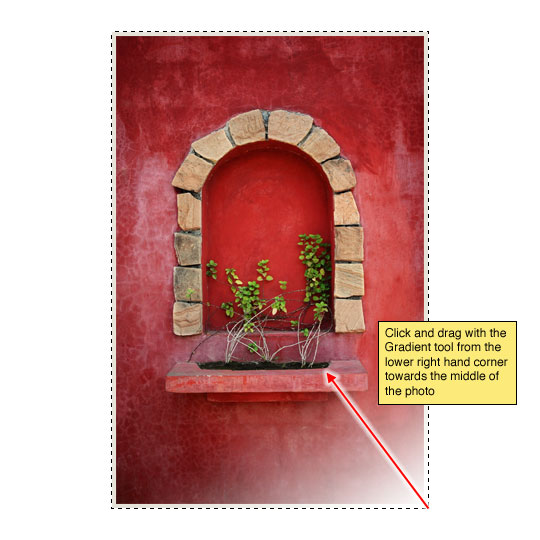
Step 4
Now lets create the highlight by clicking and dragging a the gradient from the lower right hand corner towards the center of the photo as shown below. Drop the Fill opacity of this Highlight layer to around 50%.
Don’t deselect just yet, we’ll be using this selection for a few more steps.
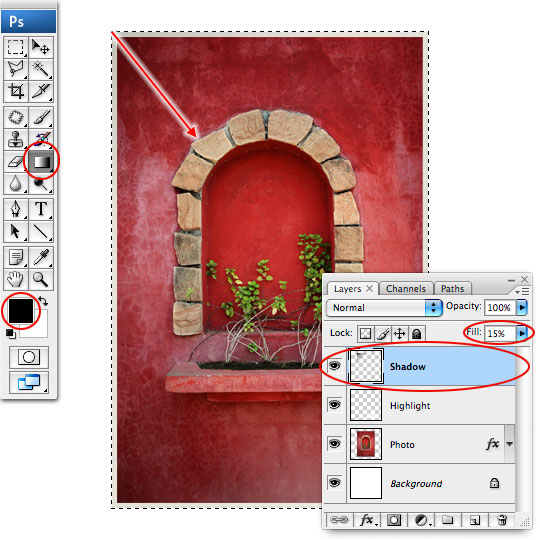
Step 5
Create a new layer above the Highlight layer called Shadow. With the gradient tool still selected press the X key to switch black to the foreground color and click and drag from the upper left corner of the photo towards the center to create the shadow as shown below. Lower the layers Fill opacity to around 15%.
Nope, don’t deselect yet!
Step 6
Now we’re going to create the drop shadow for our photo that will give it that "jumping off the page" effect.
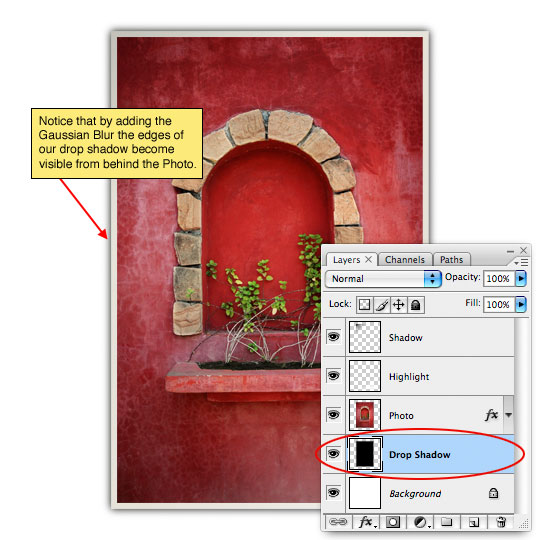
Start by creating a new layer below the Photo layer called Drop Shadow. Press Option-Delte (PC: Alt-Backspace) to fill the selection with black. Of course this black rectangle won’t be visible because it’s behind the photo but we’ll take care of that in a minute.
To soften the edges of the shadow we’re going to use a Gaussian Blur. Press Command-D (PC: Ctrl-D) to deselect and then choose Filter>Blur>Gaussian Blur from the main menu. For my example I’ll use a setting of 4 pixels, then click OK to commit the blur.
Step 7
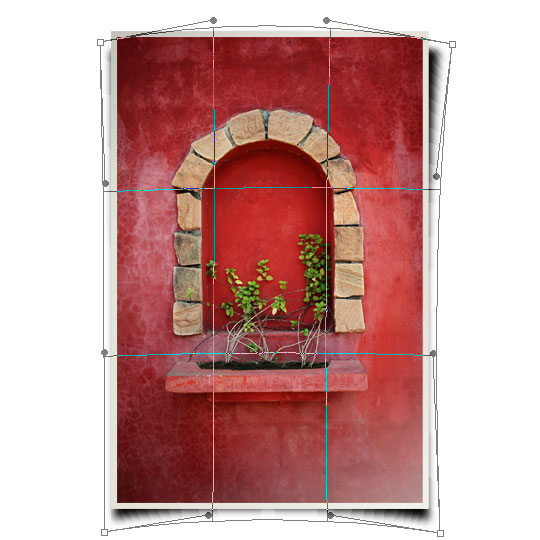
All that’s left is to reshape the shadow to create the right look. We will be using the Warp feature of the Free Transform tool to accomplish this so choose Edit>Transform>Warp from the main menu to invoke the Warp function. Unlike Free Transform, the Warp function allows us to transform in all sorts of cool ways by dragging end points or any spot inside the bounding box.
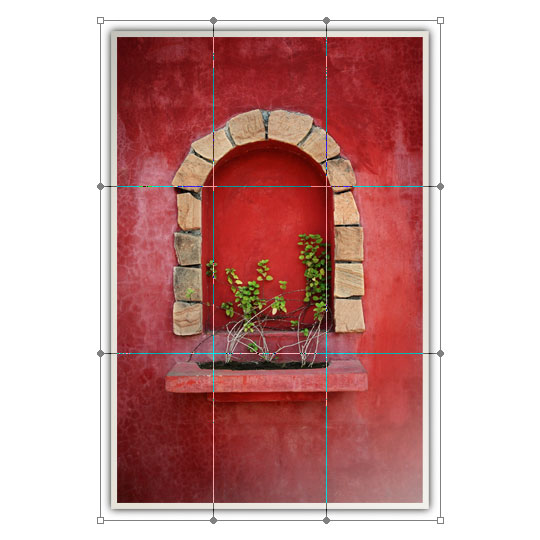
Step 8
Go from corner to corner dragging the points into position and then drag the sides of the bounding box to their appropriate spots to create a look like the one below.
Step 9
Drop the fill opacity of this Drop Shadow layer to around 50% to finish off the effect.
Step 10
Add a subtle background, rotate the photo, add another… have some fun. Remember that any rotation of the photos will change the way the shadow is cast as well as the highlight and shadow layers above the photo. Keep your effect believable by being consistent in your lighting.
Hope you can learn something new from this tutorial.
I feel really glad if you give me feedback through comment below. Soon i am going to show more interesting & innovative tutorials so please keep visit our blog. That’s for now.
Have fun!
For clipping path service, image masking service or design support please contact ClippingDesign.com.
Thank you… 
Credit: http://pshero.com
No comments:
Post a Comment