In Today's we will present how to make a Realistic Egg in Photoshop. We use basic Photoshop method. So let's get start...
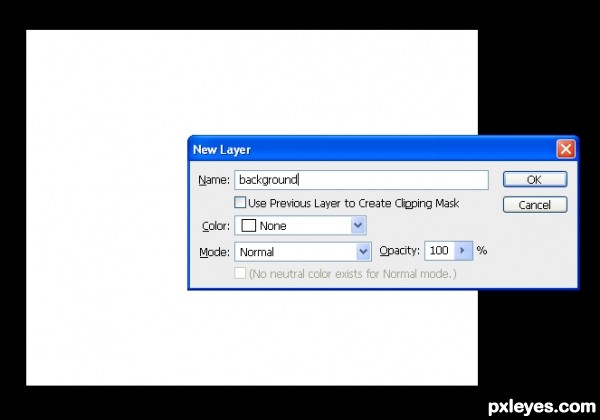
Step 1
Start with a new blank document in 300 dpi (Ctrl+N), then create a new layer (Ctrl+Shift+N) and name it ‘background.’
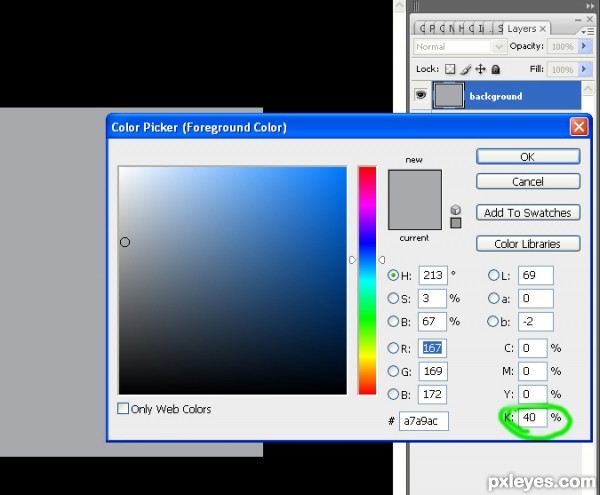
Step 2
Fill the background with grey color, I choose k:40
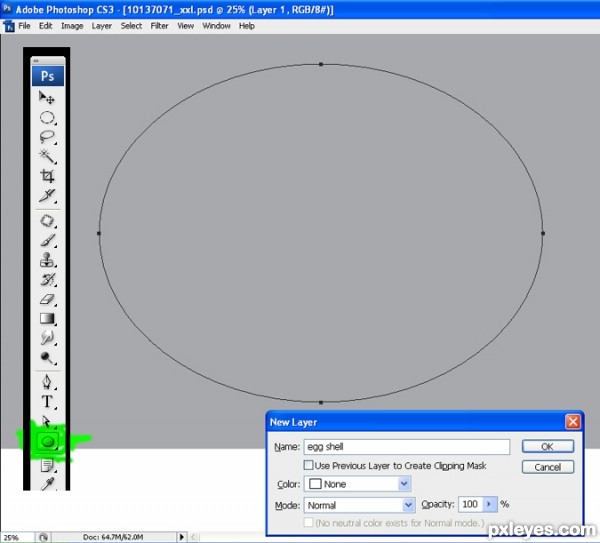
Step 3
In a new layer, create an elipse from the ‘shapes’. Rename the layer to ‘eggshell’
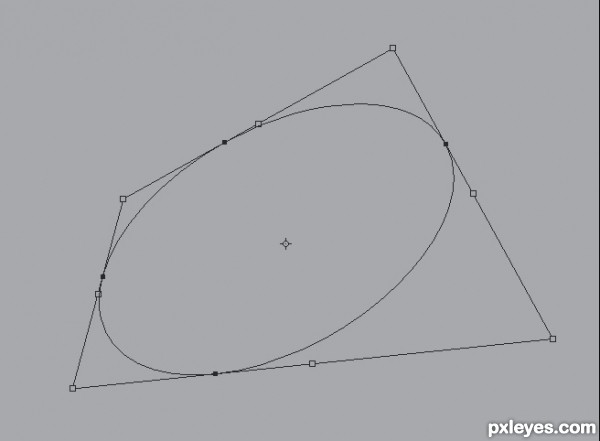
Step 4
Press Ctrl+T (transform tool) and distorst the elipse as shown in the figure.
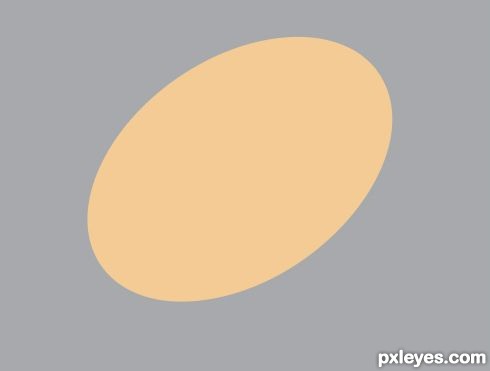
Step 5
Hit Ctrl+Enter and fill any color.
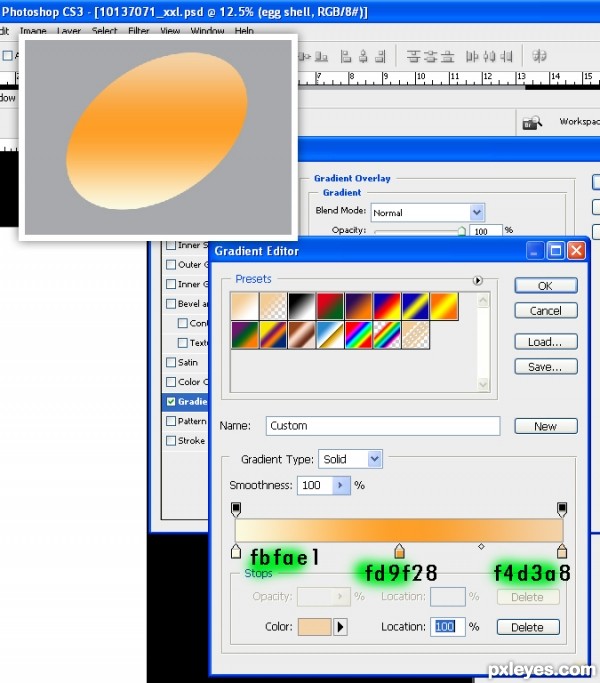
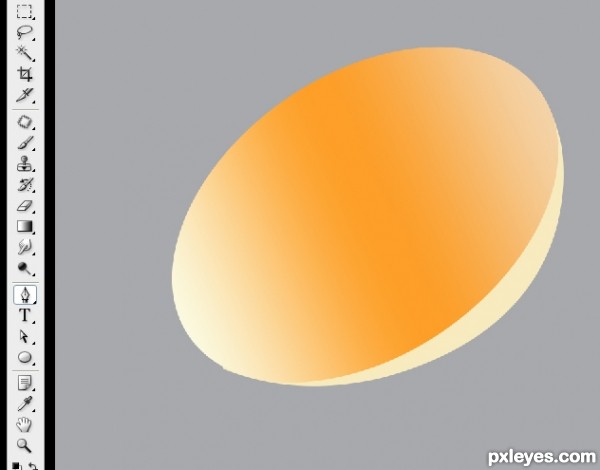
Step 6
Add a gradient overlay to the layer ‘eggshell’ the color codes are as follows.. location 0: # fbfae1 location 50: # fd9f28 and location 100: # f4d3a8
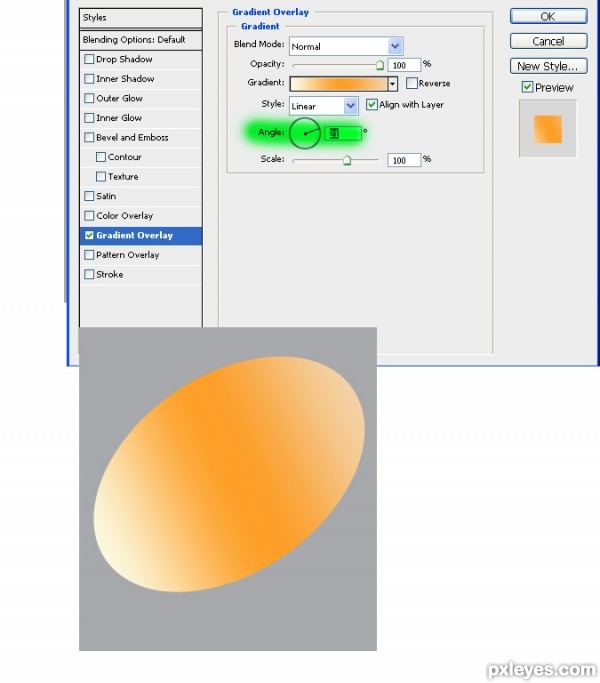
Step 7
Then I changed the angle to ‘21’. Kept all other settings default.
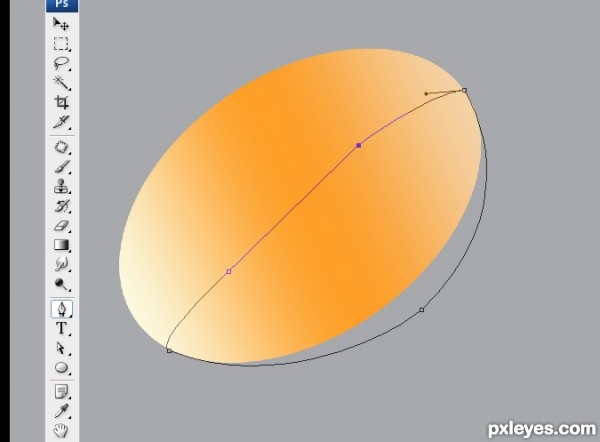
Step 8
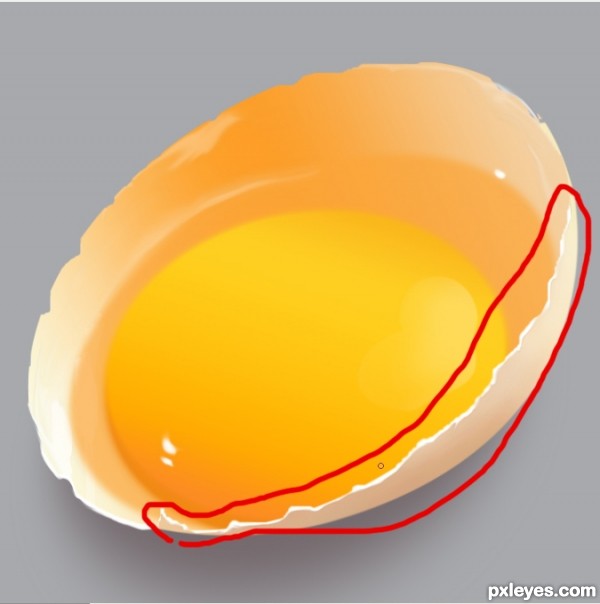
Use the pen tool and draw a shape as in the figure.
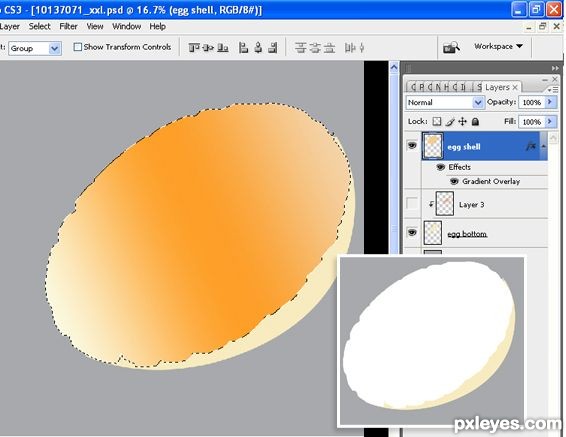
Step 9
Create a new layer and name it ‘egg bottom’ fill it with # f7ebbf. Keep this layer below the ‘egg shell’ layer.
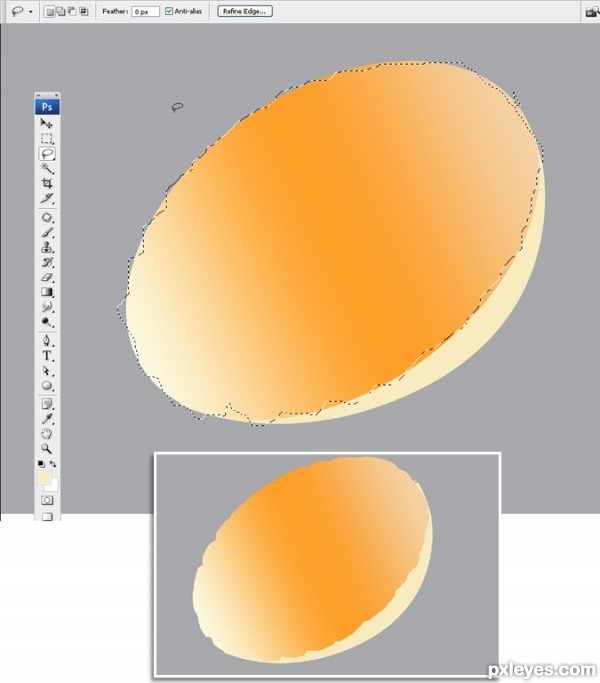
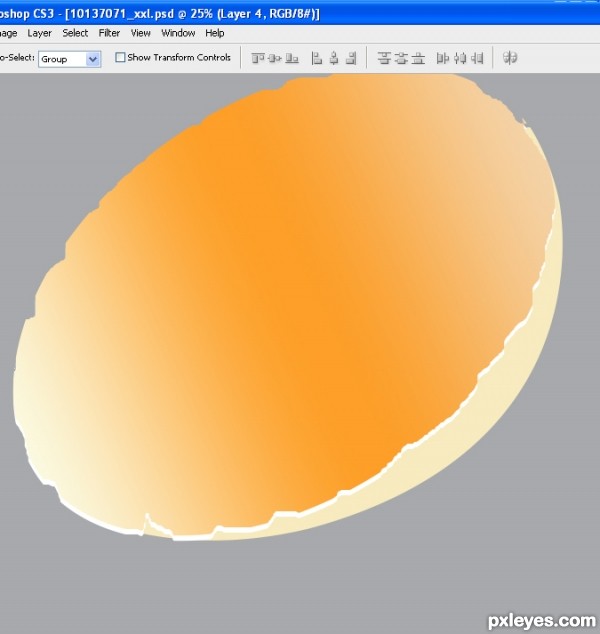
Step 10
Use the laso tool and make the ‘egg shell’s’ edges jaggy.
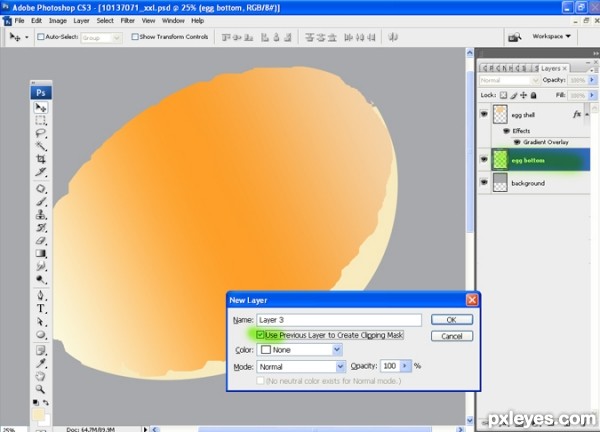
Step 11
Create a new layer and make it cliiping mask to the ‘egg bottom’ layer. All shading and lighting to the ‘bottom layer’ will be done in this layer. You can name it shade- highlight or whatever you like.
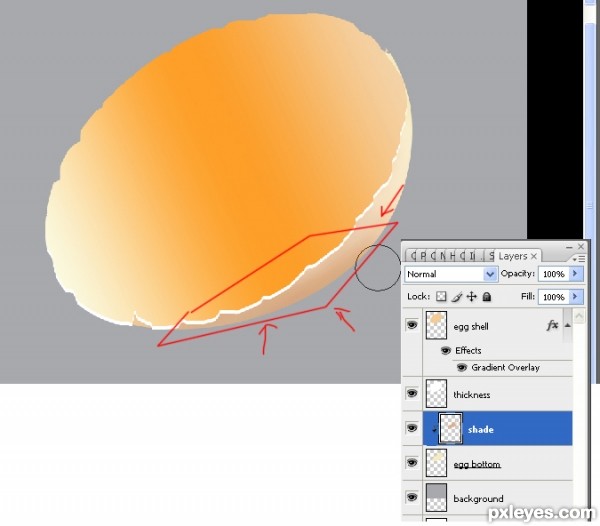
Step 12
Before shading we must add some thickness to the egg shell. It is very easy. Hold Ctrl and click on the ‘eggshell’ layer. Then create new layer and fill it with white color or offwhite color.
Step 13
Now, place the layer under the ‘eggshell’ layer then move it a little down and a little right. See the picture. (do not add any feather while making selections. Let it be sharp. We will be fixing it later.)
Step 14
In this step we will add some shade to the bottom of the egg. Select the layer ‘shade’ and with soft rounded brush (opacity 10-20, flow 60-70) then with the color # b99e7c shade the marked area. Don’t rush in this step. 2 or 3 strokes will be enough.
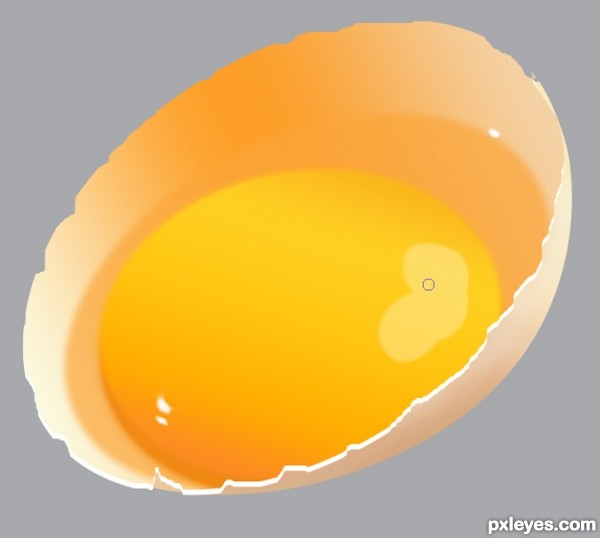
Step 15
Now the fun part. Making the egg yellow. Before that, create a new layer and merge it down with ‘egg shell’. Further layers will be added clipping mask to this layer. Create a new layer for the yellow part of the egg. Rename it as ‘yellow’ and add it clipping mask to the egg shell ‘layer. Then create a circle and fill it with any color. Before filling you can add a feather with radius ’15-20’
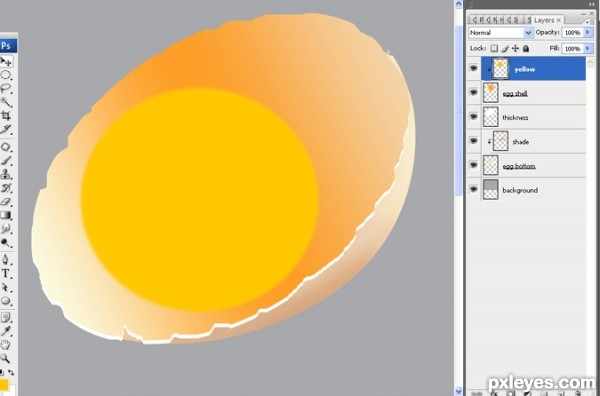
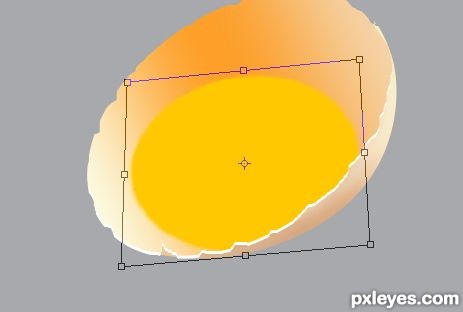
Step 16
Now distort the shape and positon it as shown in the figure. ( make sure it is clipping masked with the layer ‘egg shell’)
Step 17
Now add a gradient overlay to the layer ‘yellow’ set the angle to 75. And set the gradient colors as. Location 0: # fc8b24, location 20: ffaa03, location 50 : ffc411, location 80: fece22, location 100: fbb71c

Step 18
Create a new layer and name it highlights. Make it clipping mask to the below layer ‘yellow’ then create some complex shapes as in the figure. I made 3 circles.
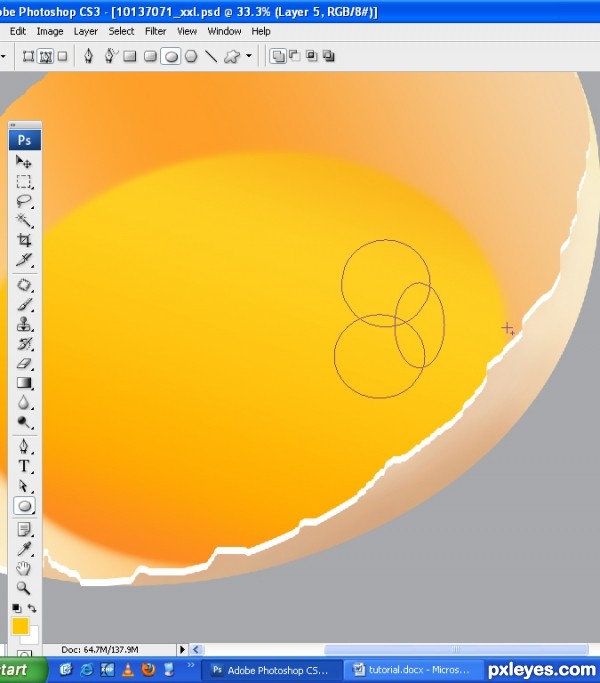
Step 19
Hit Ctrl+ Enter and fill with white. Reduse the opacity of the layer into 20-30.
Step 20
Create a new layer and name it ‘egg white’ place it between the laeyers ‘egg shell’ and ‘yelow’ the create a an elipse and transform ( if you are using a marque tool then right click and ‘transform selection’. ) as shown in the figure.
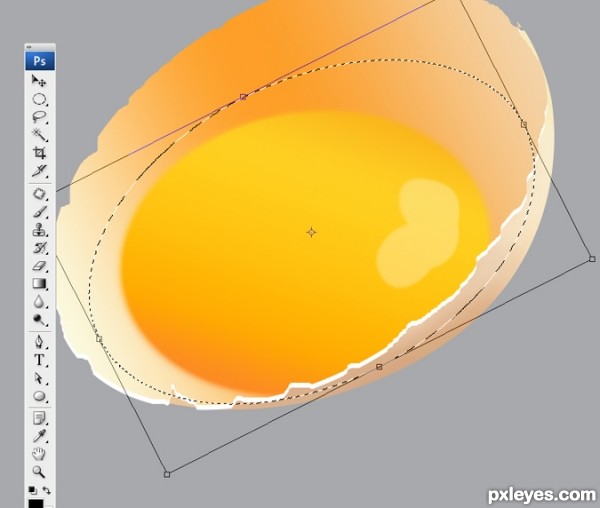
Step 21
Hit enter and add a 10 radius fether fill it with # fba63a and reduce the layer opacity to 70.
Step 22
Ctrl + click on the layer yellow. Add a feather with radius 20 then fill with # f09128.

Step 23
Now place the layer under the layer ‘yellow’ and move it a little down and to the left see the figure and layer palete.
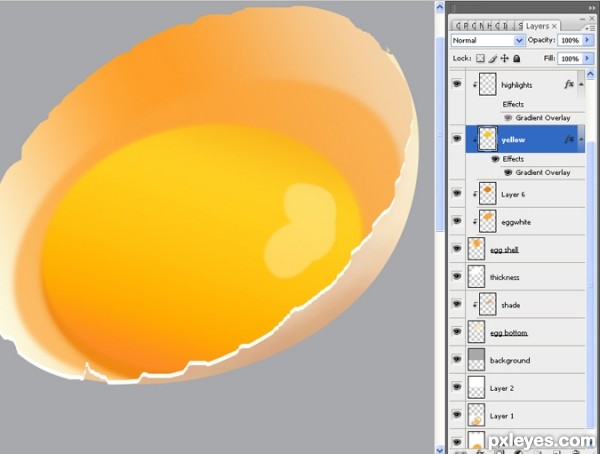
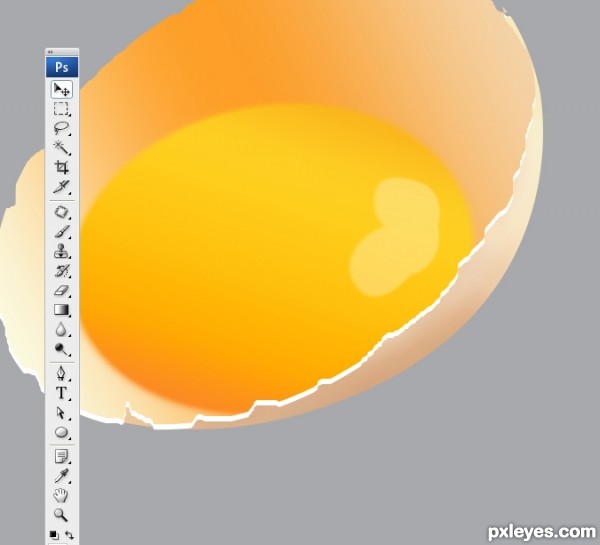
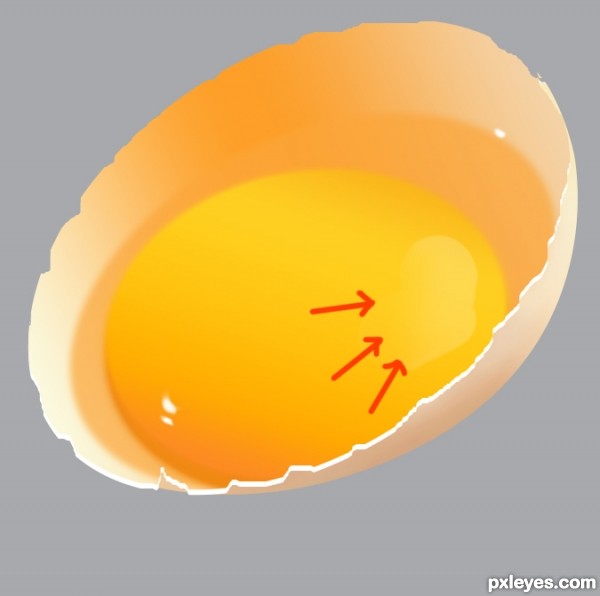
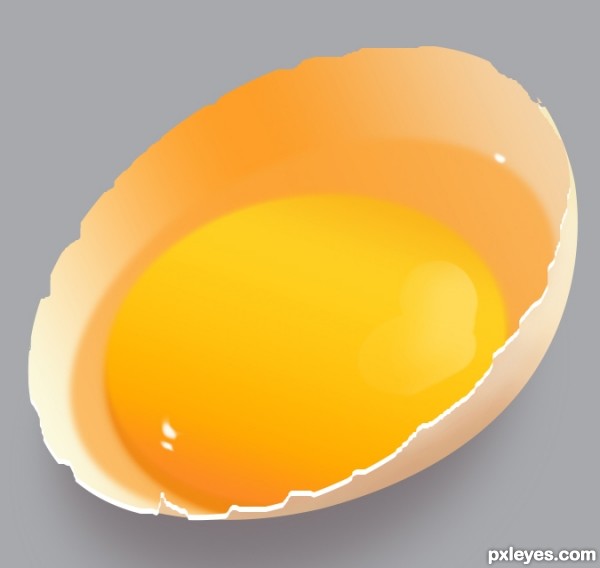
Step 24
Create a layer on top of all layers and add some white highligts as shown in the figure. Use a soft edged brush with hardness around 70-80 and if need use the smudge tool to make it perfect.
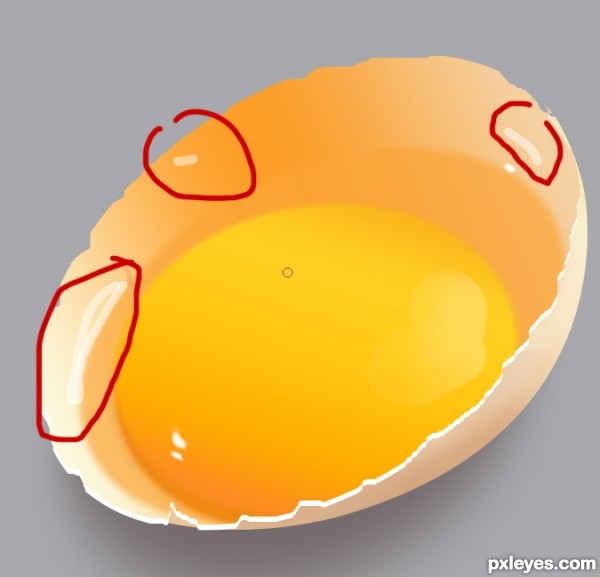
Step 25
Take a soft edged earaser with opacity around 20 and erase the marked area. Now it is more realistic
Step 26
Now create a new layer just above the back ground layer and fill it with # 6d7074. This will be our shadow.
Step 27
I applied a gaussian blurr (from filters) with radius 80 and reduced the opactiy of the layer to 80. Then I distorted the shadow using the transform tool.
Step 28
Create a new layer above the ‘egg shell’ layer and add some white strokes and spots.
Step 29
Use the smudge tool and smudge the strokes as in the figure. Then reduce the opacity to 70-80.
Step 30
Use the blurr tool and smooth the edges. ( layer ‘bottom’, and layer ‘eggshell’)

Step 31
Also use the smudge tool on the edges of the layer ‘thickness’
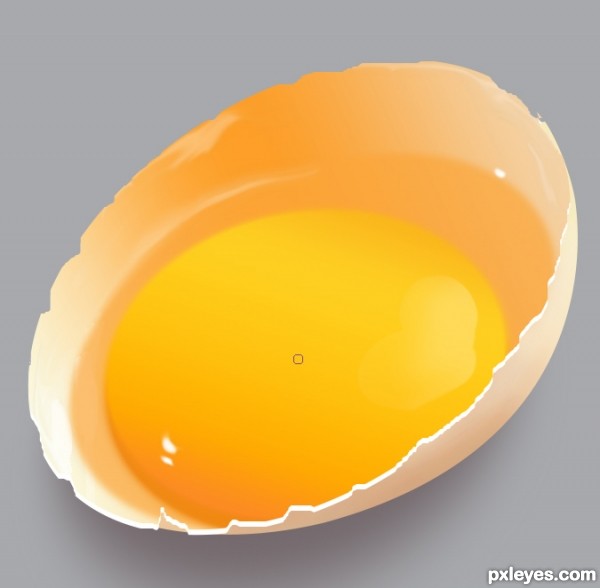
Step 32
Finaly change the background layer to gradient overlay and use a gray to white combination.
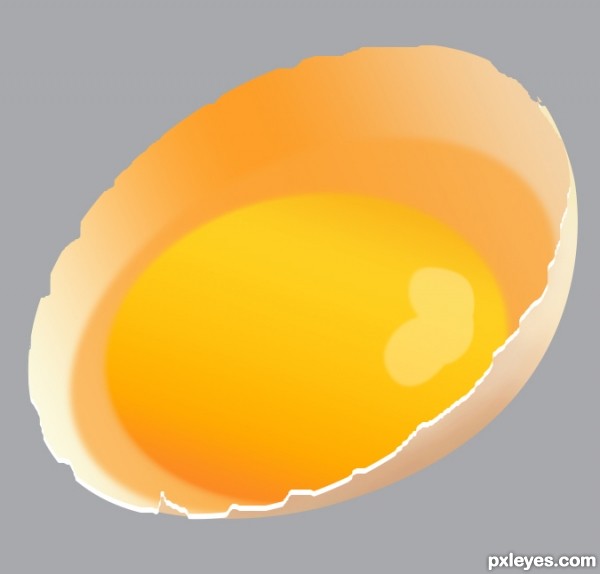
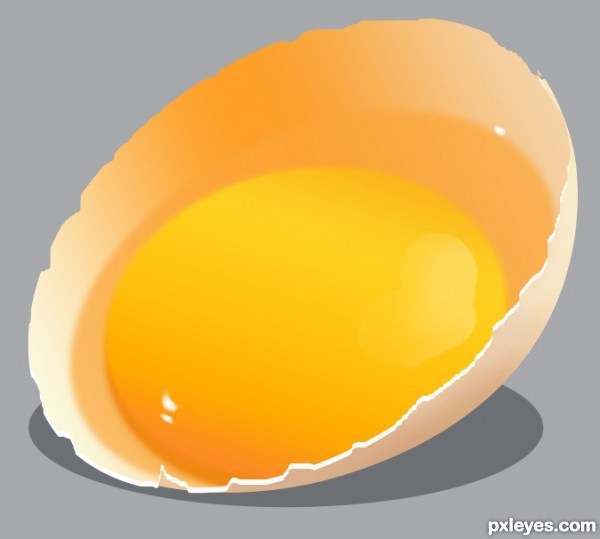
Thanks for reading my tutorial.
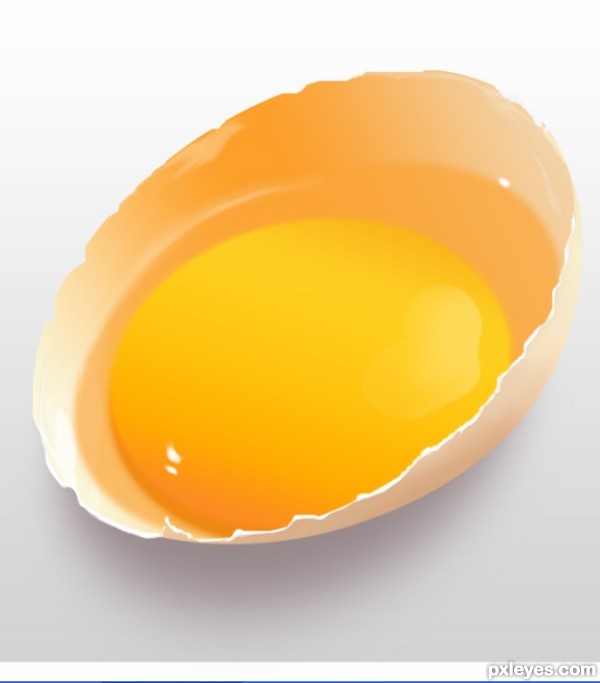
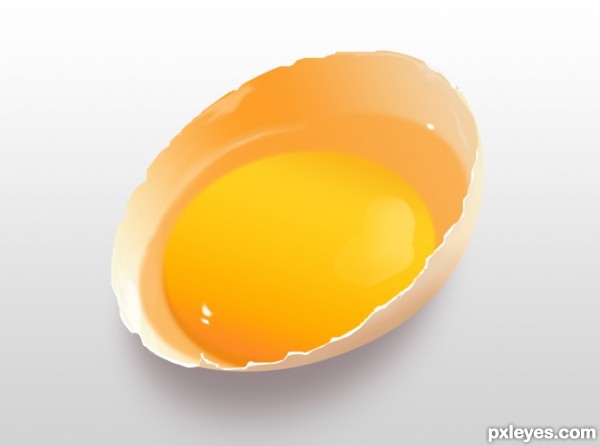
Step 33
FInal result
Hope you can learn something new from this tutorial.
I feel really glad if you give me feedback through comment below. Soon i am going to show more interesting & innovative tutorials so please keep visit our blog. That’s for now.
Have fun!
Feel free to contact with Clipping Design for clipping path service, image editing service, image masking service or any kind of design support.
Thank you…
Credit:pxleyes.com
No comments:
Post a Comment