Step 1: Creating the background
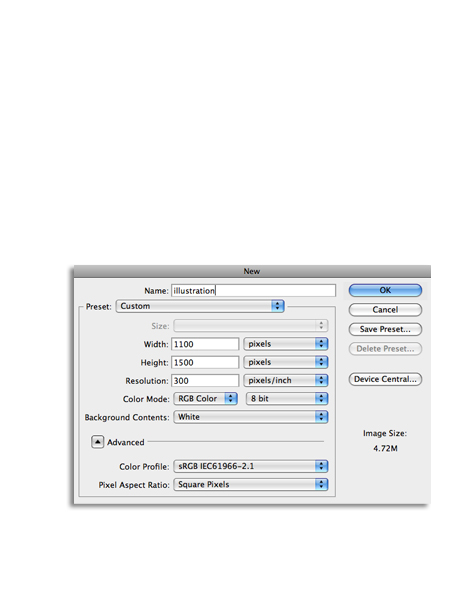
To begin, open a new 1100 x 1500 Photoshop document.
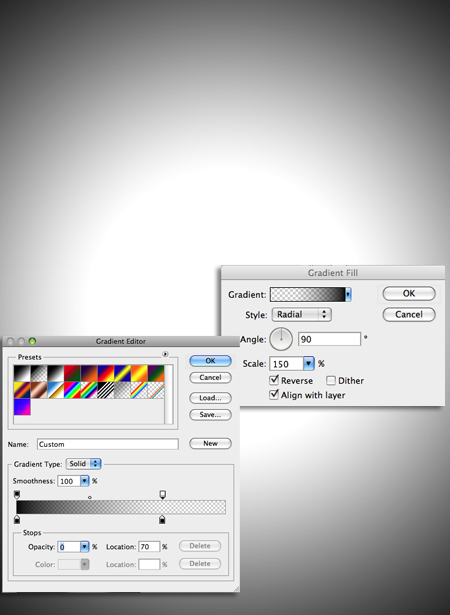
Next add a Gradient Fill adjustment layer by clicking on the adjustment layer button at the bottom of your layers panel, and choosing Gradient.
Use Radial gradient with the Scale at 150%, and check Reverse. Click on the Gradient bar to bring up the Gradient Editor. Create a black to transparent gradient, and move the sliders on the right inwards to 70%.
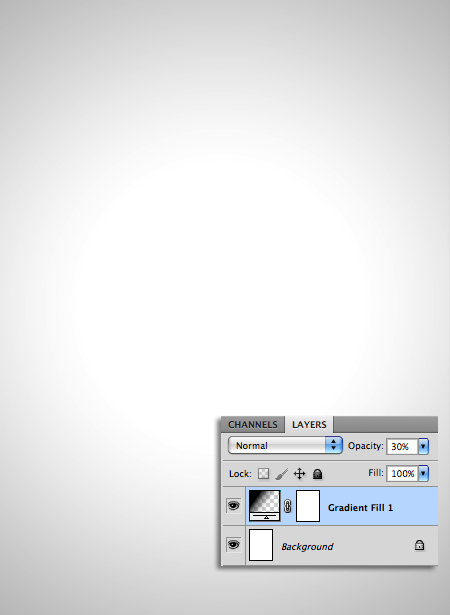
Take the Opacity of the Gradient layer down to 30%.
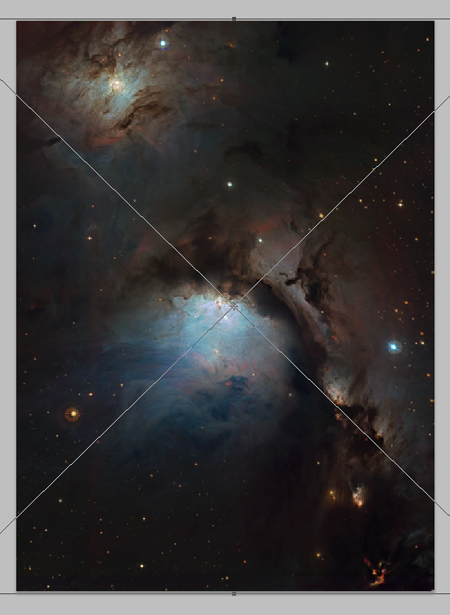
To add texture to the background we'll add an astral backdrop, which you can download here: http://apod.nasa.gov/apod/ap110127.html
Once you've downloaded the stock image, you can drag it straight into your file, and resize it so that it covers the whole image.
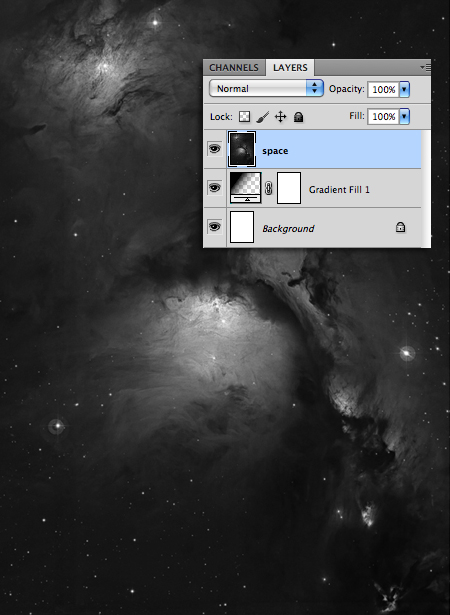
Go to Image > Adjustments > Desaturate, to turn the texture black and white.
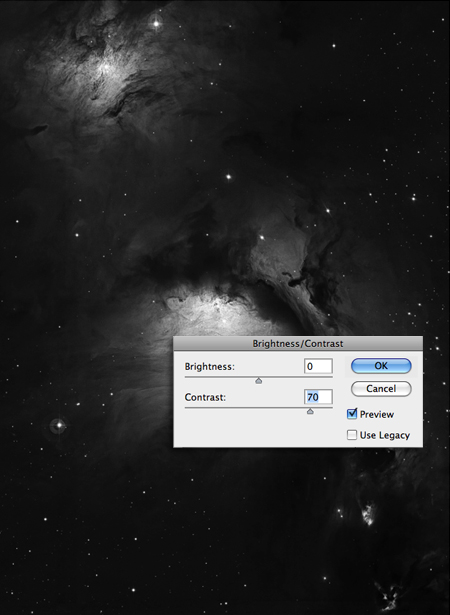
Then go to Image > Adjustments > Brightness/Contrast, and take the Contrast up to +30.
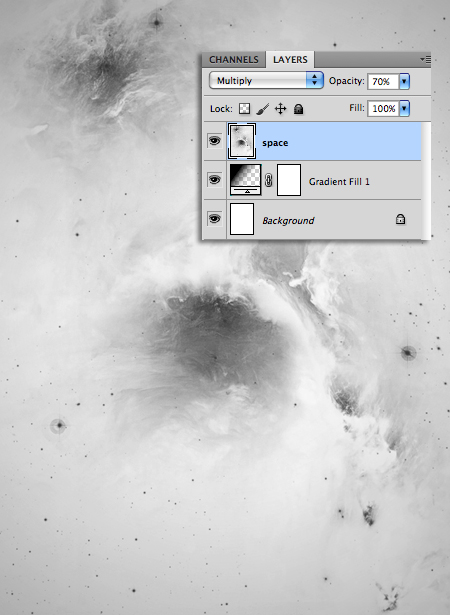
Finally, go to Image > Adjustments > Invert, then set the blending mode to Multiply and the Opacity to 70%.
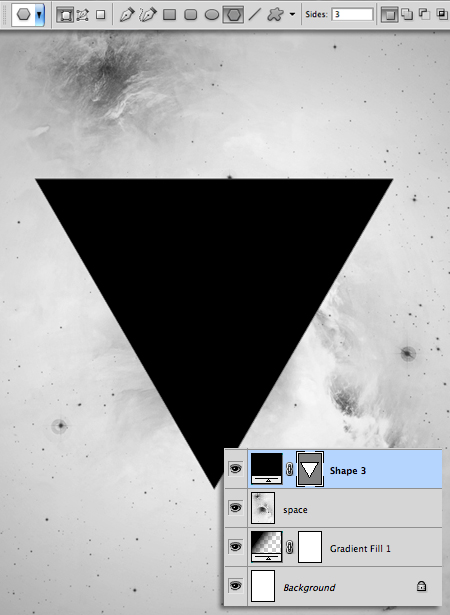
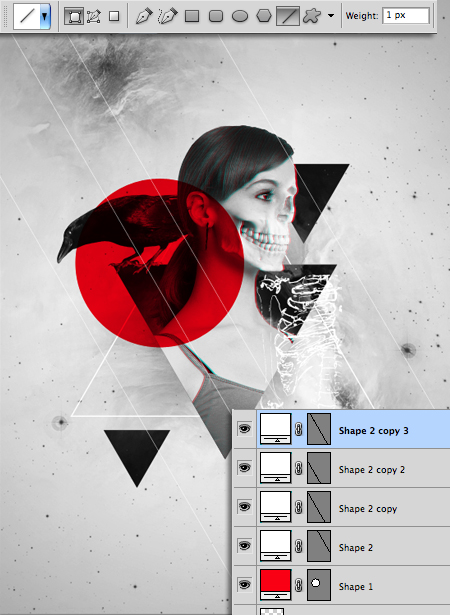
Step 2: Adding the triangles
Select the Polygon Tool, and in the Sides box set the number to 3.
Drag out your triangle shape and rotate it so that it points downward.
Duplicate the triangle layer twice, and move the duplicate triangles to the positions shown below.
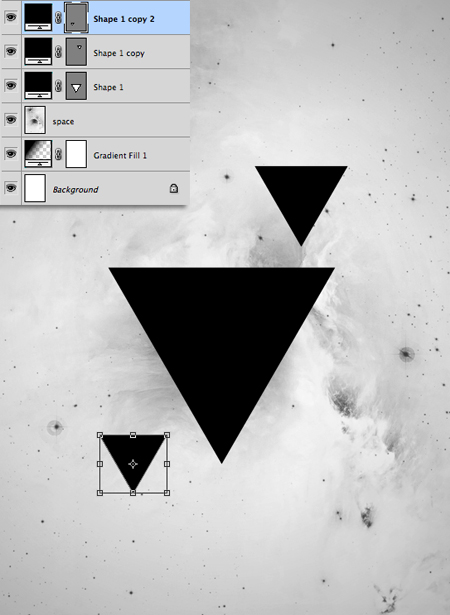
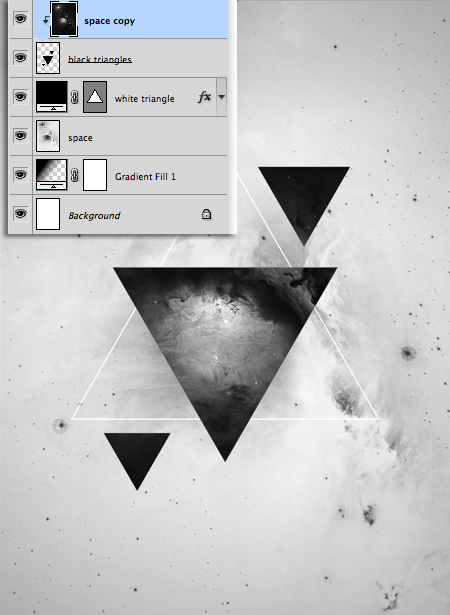
Duplicate the large triangle one more time, and rotate it so that it points upward. Move it's layer below all the other triangles, then double click on the layer to bring up the Layer Styles dialog box.
Take the Fill Opacity down to 0%, then click on Stroke. Set the Size to 3px, the position to Inside, and the color to white.
Click OK.

Select the three black triangle layers, right click on them and choose Merge Layers.
Now duplicate the space backdrop layer, Invert it, then move it above the black triangles layer. Right click on the layer and choose Create Clipping Mask so that the layer is only visible where it overlaps the triangles.

With the background finished, we're now ready to add the subject of our image.
Step 3: Blend photos in photoshop
In this part of the tutorial, we will be going through how to blend photos in photoshop. The female stock image we'll use for this tutorial can be downloaded here: http://nikxstock.deviantart.com/art/1-18-09-One-111088945
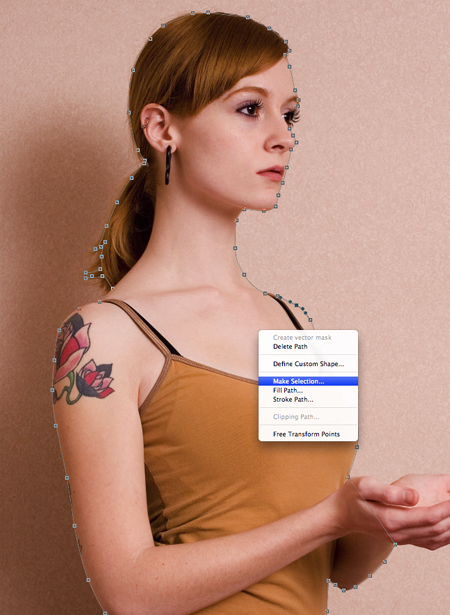
Once you've downloaded the image, open it in Photoshop, and use the Pen tool to draw carefully around the edge of the model.
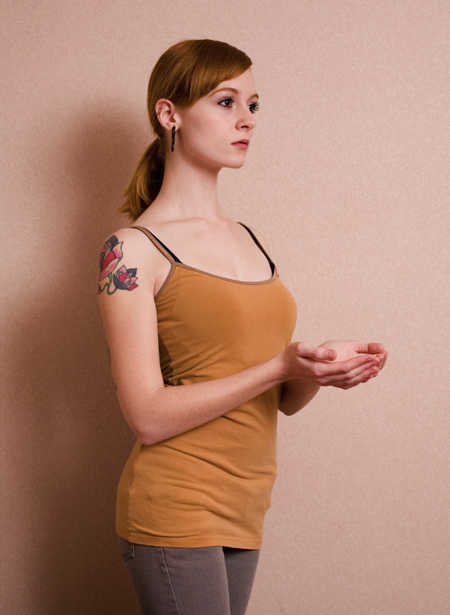
Don't worry about the hair too much, we'll tidy it up next. When you're finished, right click and choose Make Selection.
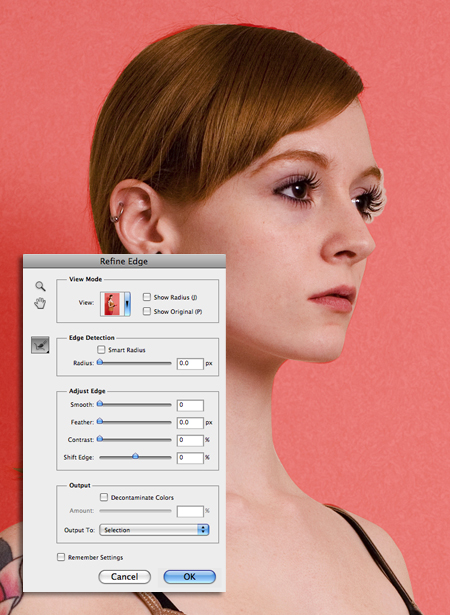
Now go to Select > Refine Edge, and use the Refine Edge tool to draw over the edge of the hair and eyelashes.
When you're done, click OK.
Invert the selection and delete the background.
For more advice on making selections, including tips for using the Pen Toll, see this tutorial:
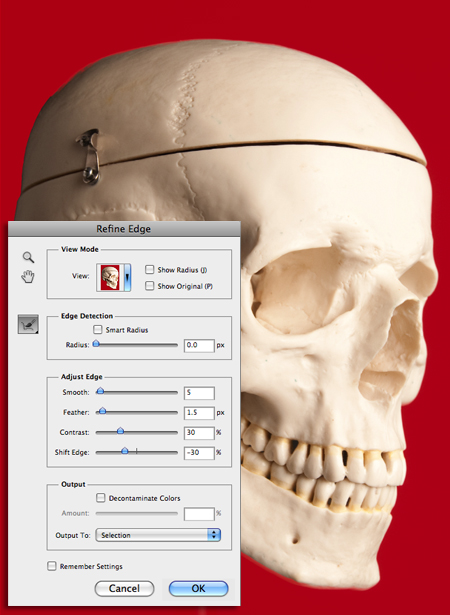
Now, we will blend another photo with this image of the female model. You can download the skull stock here: http://tpenttil.deviantart.com/art/Kallo-2-272493357
With the skull open in Photoshop, make a selection of it using the Quick Selection tool, then bring up the Refine Edge box. Use the Refine Radius Tool and the Adjust Edge sliders to make sure the edges where the face is are tidy.
When you've made your selection, copy it and paste it into the model file.
Resize it, and position it over the face of the model.
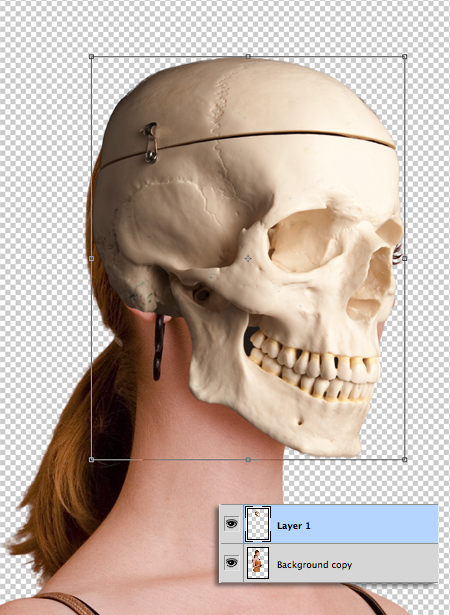
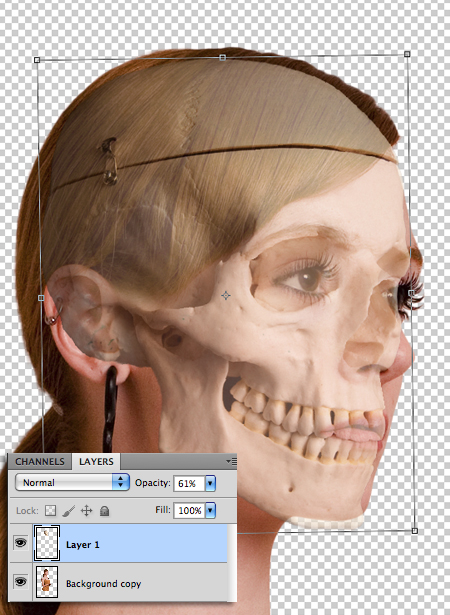
Take the Opacity of the skull layer down so you can see the face beneath it. Carefully adjust its size and position so it fits naturally over the model's face.
When you're done you can bring the opacity up again, and move the skull layer below the model layer.
Give the model layer a layer mask by selecting the layer and clicking on the layer mask button at the bottom of the layers panel.
With the layer mask thumbnail selected, take a large soft black brush and paint over the lower part of the models face to mask it out, revealing the skull layer below.
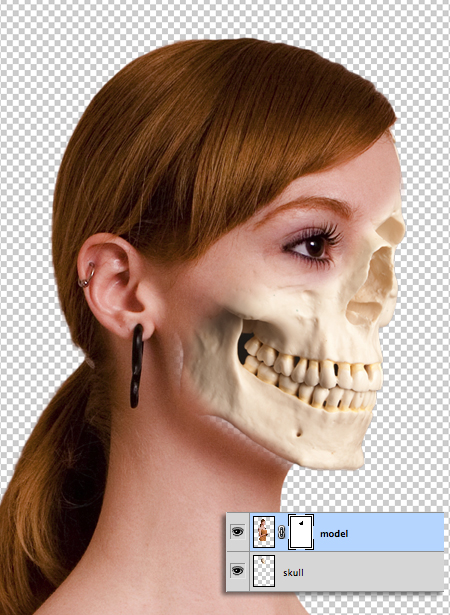
Use a hard white brush to carefully paint back in the skin on the neck up to the base of the skull's jawline.
Use a larger soft white brush set to 40 % opacity to blend the skin with the skull over the rest of the face.
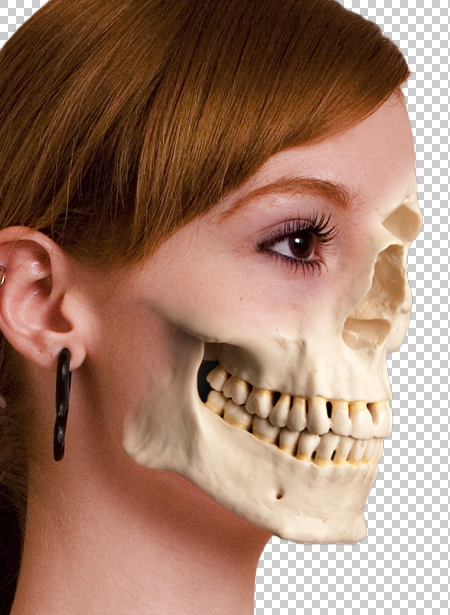
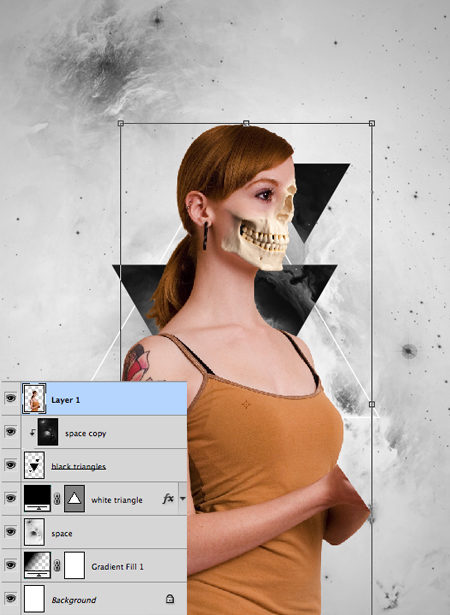
When you're finished go to Select > Select All, then Edit > Copy Merged, and paste it into your original file.
Resize the model, and position her as I have in the image below.
Step 4: Create stereoscopic 3D effect in photoshop
In step 4, it is a stereoscopic 3D effect photoshop tutorial.
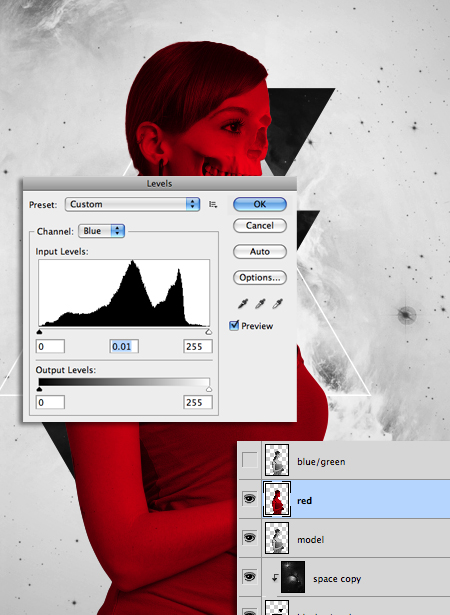
First, desaturate the model layer, and duplicate it twice. Call the top duplicate 'blue/green', and the other one 'red'.
With the 'red' layer selected, go to Image > Adjustments > Levels. Select Green from the Channel box, and move the middle slider all the way to the right. Then choose Blue, and move the slider to the right.
Click OK.
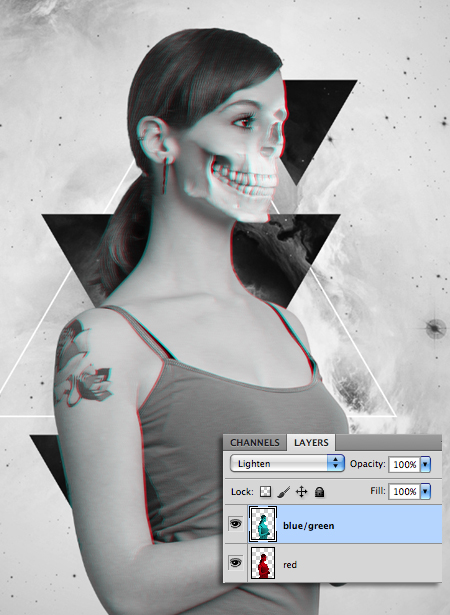
Next select the 'green/blue' layer, and bring up the Levels dialog box. Select Red, and move the slider all the way to the right.

Now change both of the layer's blending modes to Lighten.
Using the Move Tool, nudge the 'green/blue' layer a little to left, and the 'red' layer a little to the right. This is how you can create sterepscopic 3D effect in photoshop.
Step 5: How to layer mask in photoshop
Next we're going show how to use layer masks to remove the lower part of the model.
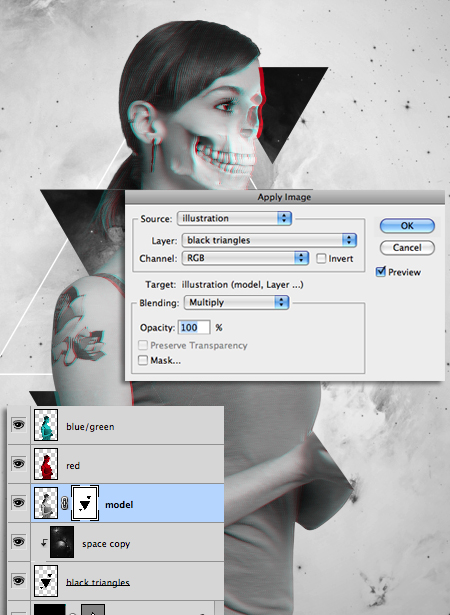
Click on the original model layer, and give it a layer mask. Click on the layer mask thumbnail then go to Image > Appy Image.
In the Layer field choose the 'black triangles' layer.
Click OK.
Go to Image > Adjustments > Invert.
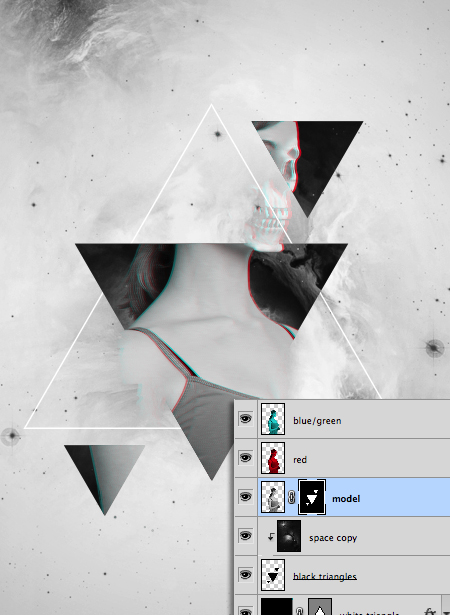
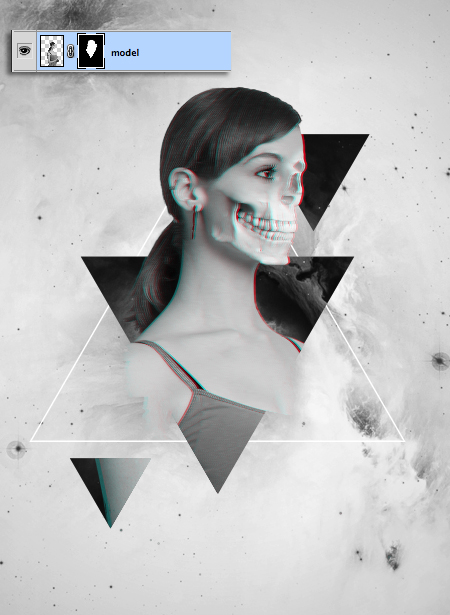
Now take a white brush and paint the top of the head back in.
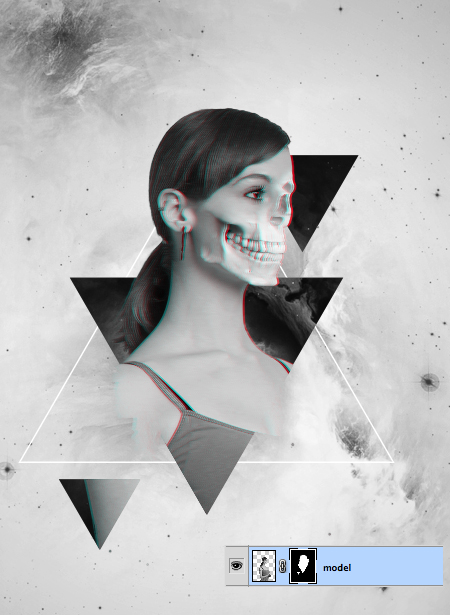
Take a black brush and paint over the lower left triangle.
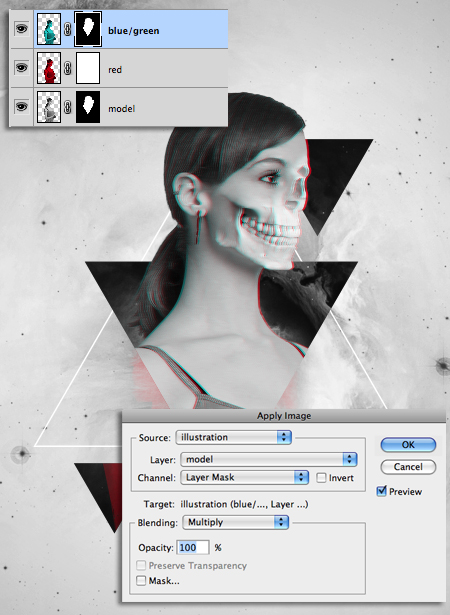
Now we'll use this layer mask and apply it to the other two model layers.
Give both the 'red' and 'blue/green' layers layer masks, and for each one use the Apply Image dialog box and apply the model layer with the Channel set to Layer Mask.
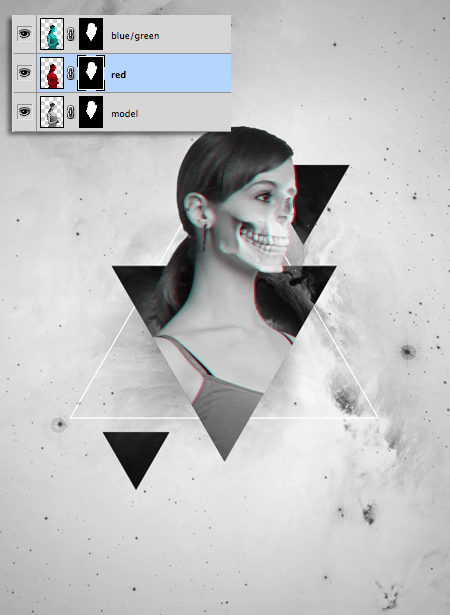
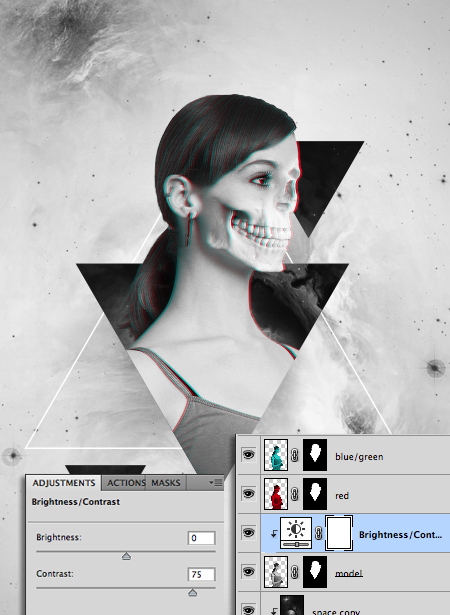
Next add a Brightness/Contrast adjustment layer above the model layer, and give it a clipping mask.
Take the Contrast up to +75.
Step 6: Adding more elements
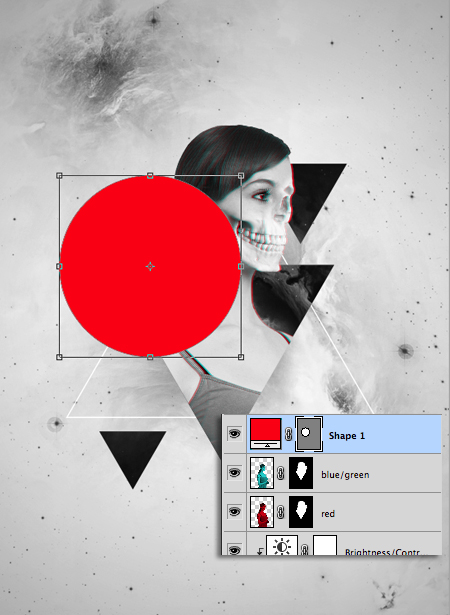
Take the Ellipse tool, and holding down the Shift key, drag out a circle over the model's left shoulder.
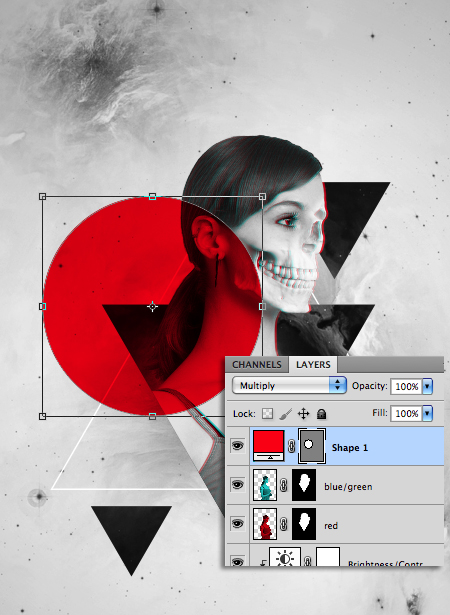
Set the layer's blending mode to Multiply.
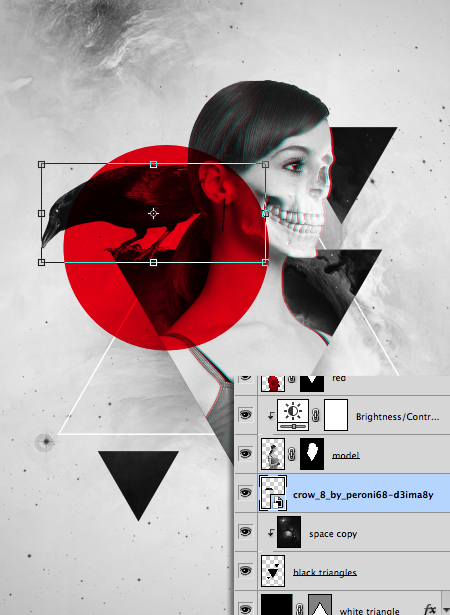
The pre-cut crow stock can be downloaded here: http://peroni68.deviantart.com/gallery/26997909
You can drag the crow directly into the project and resize and position it. Take the layer below the model layer.
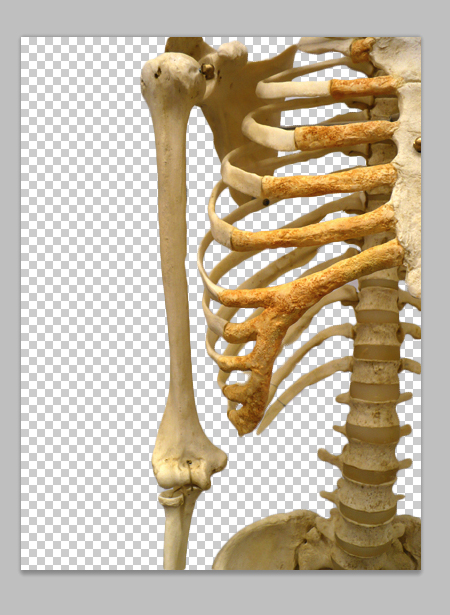
Step 7: The skeleton
The skeleton stock can be downloaded here: http://mishkuu.deviantart.com/art/rib-cage-109065836
Once you've downloaded the stock, open it in Photoshop, and use the Quick Selection Tool and Refine Edge sliders to make a selection of the skeleton, and delete the background.
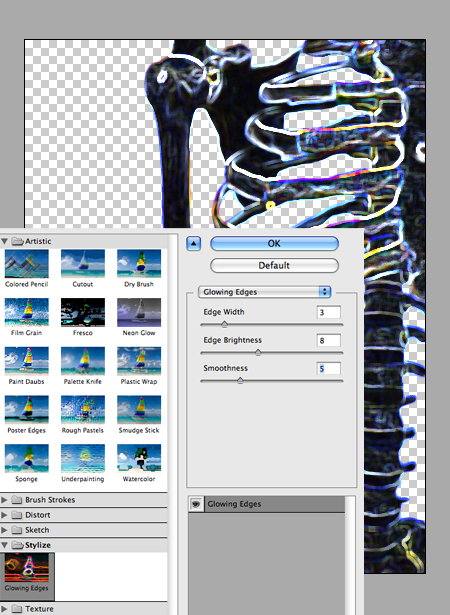
Go to Filter > Filter Gallery, and choose the Glowing Edges filter. Use the settings shown in the image below.
Click OK.
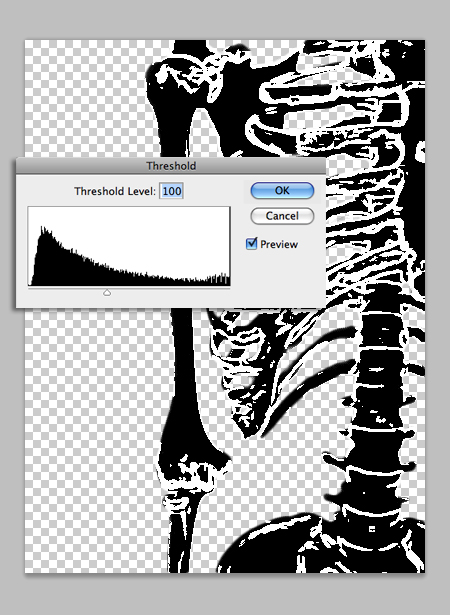
Now go to Image > Adjustments > Threshold, and move the slider a little to the left so there is a good amount of white detail.
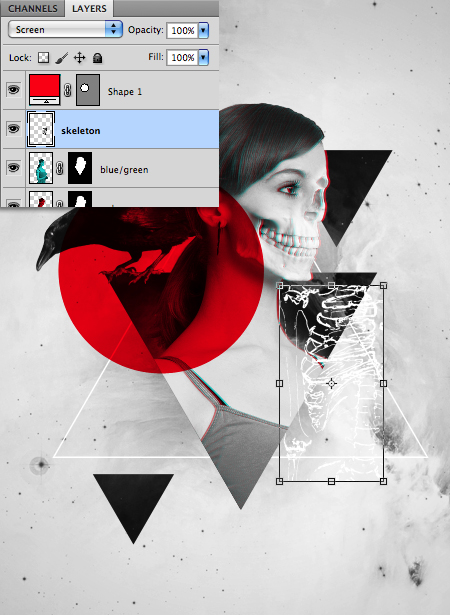
Select the whole canvas, copy it, and paste it into your project below the red circle layer.
Position it by the models right shoulder, and set the layer's blending mode to Screen.
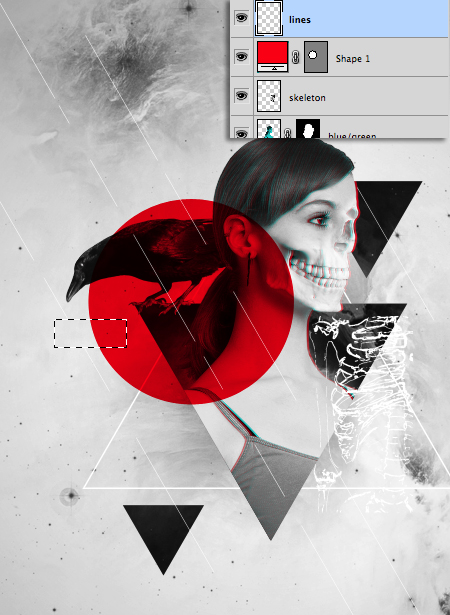
Finally we'll add some diagonal streaks across the image.
Take the Line tool with the Weight set to 1px. Hold down the Shift key and and drag the line diagonally all the way across the image. Duplicate it a few times and position the lines as I have below.
Select all the line layers and merge them into one.
Take the Rectangular selection tool and select random parts of each line and delete the sections.
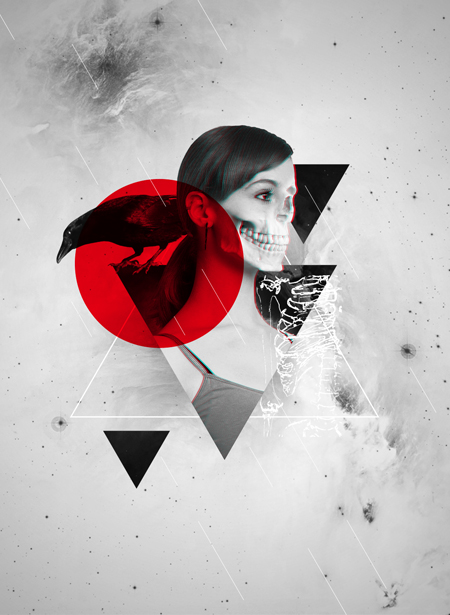
The Final Outcome
Hope you can learn something new from this tutorial.
I feel really glad if you give me feedback through comment below. Soon i am going to show more interesting & innovative tutorials so please keep visit our blog. That’s for now.
Have fun!
Feel free to contact with Clipping Design for clipping path service, image editing service, image masking service or any kind of design support.
Thank you…
Credit:webdesign.org
No comments:
Post a Comment